
Widgets
There are several directories in the downloaded template bundle. Let's now examine what's inside each folder.
Screenshots - displays template screenshots. Do not use these for creating templates
Theme - carries Files for a WordPress theme
"church-community-pro" -This Theme folder has The important files for theme regarding the theme.
The file "license.txt" consists of important information regarding the license
The installation process can be executed in two methods.
Logging into your dashboard is the first step in installing a new theme on a WordPress website.
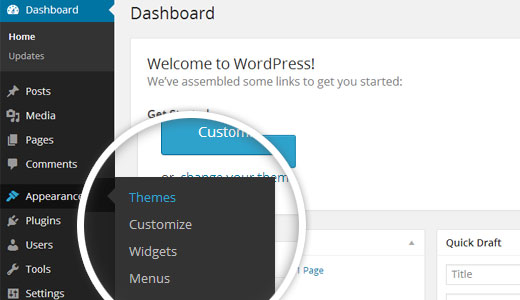
1. Select The Appearance → Then Themes
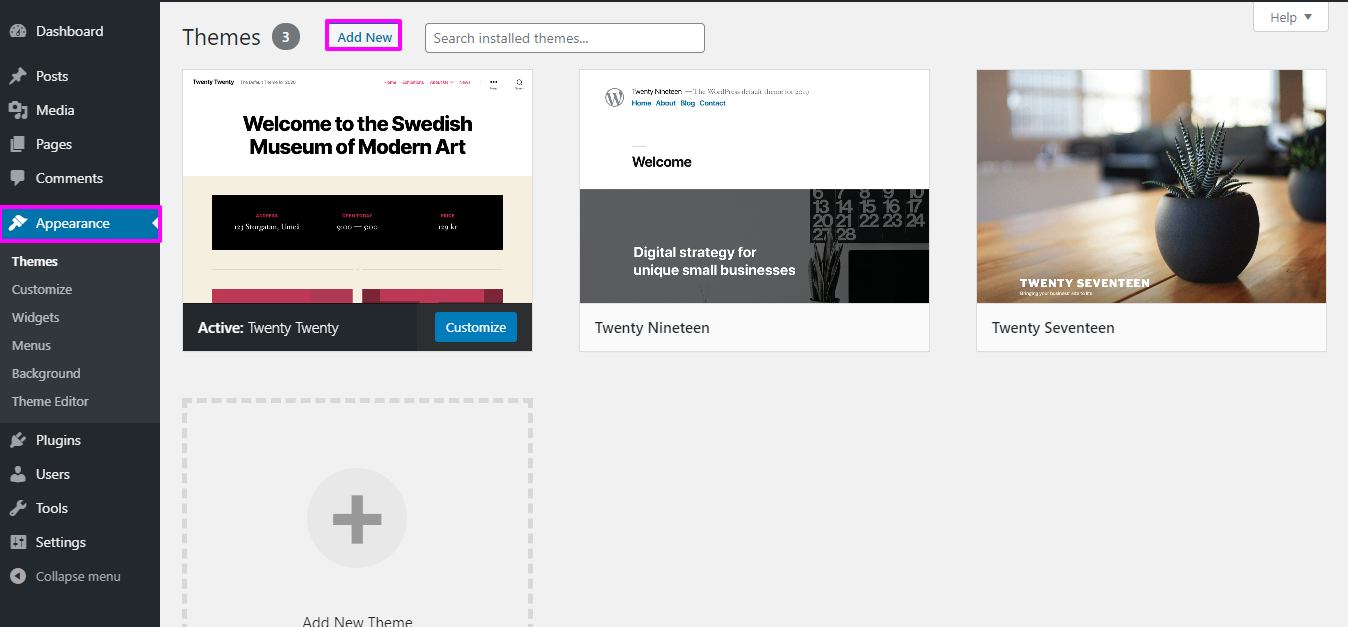
2. Tap Tap "Add new."
3. By clicking a "Upload Theme" option.
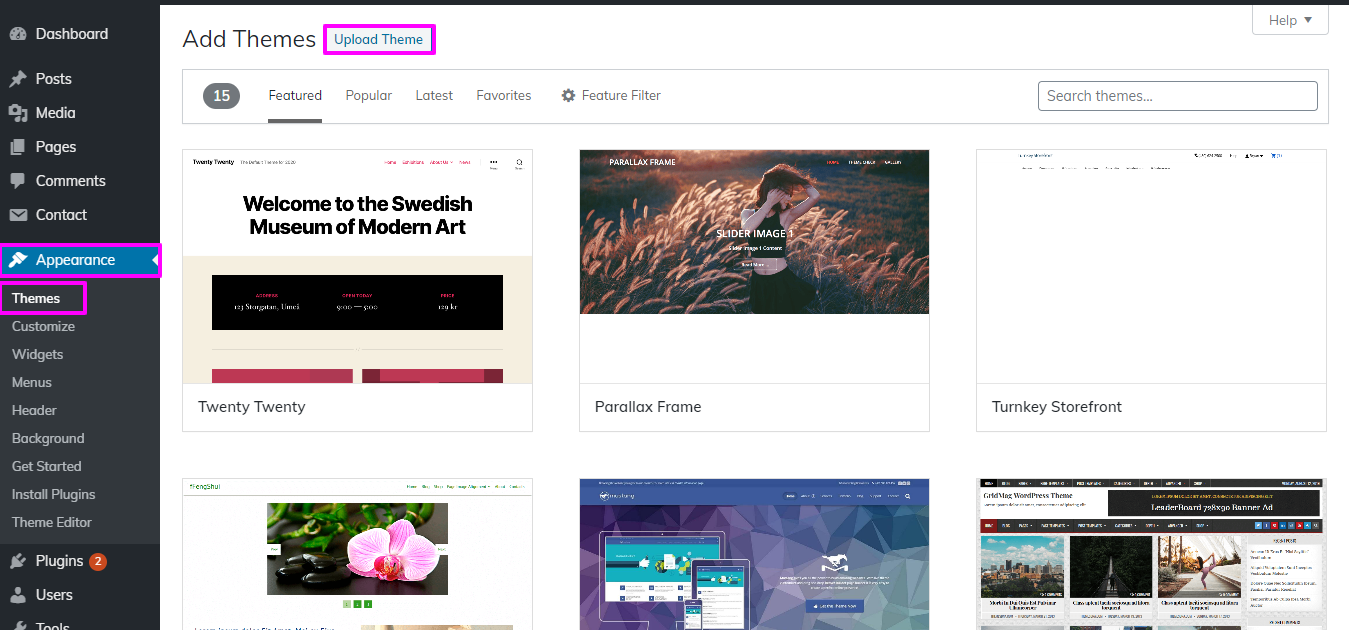
4. Select "Browse" to install the theme file and select it from your device the church-community-pro theme theme on your WordPress website. Click "Install Now" To begin the installation procedure after you've chosen the file.
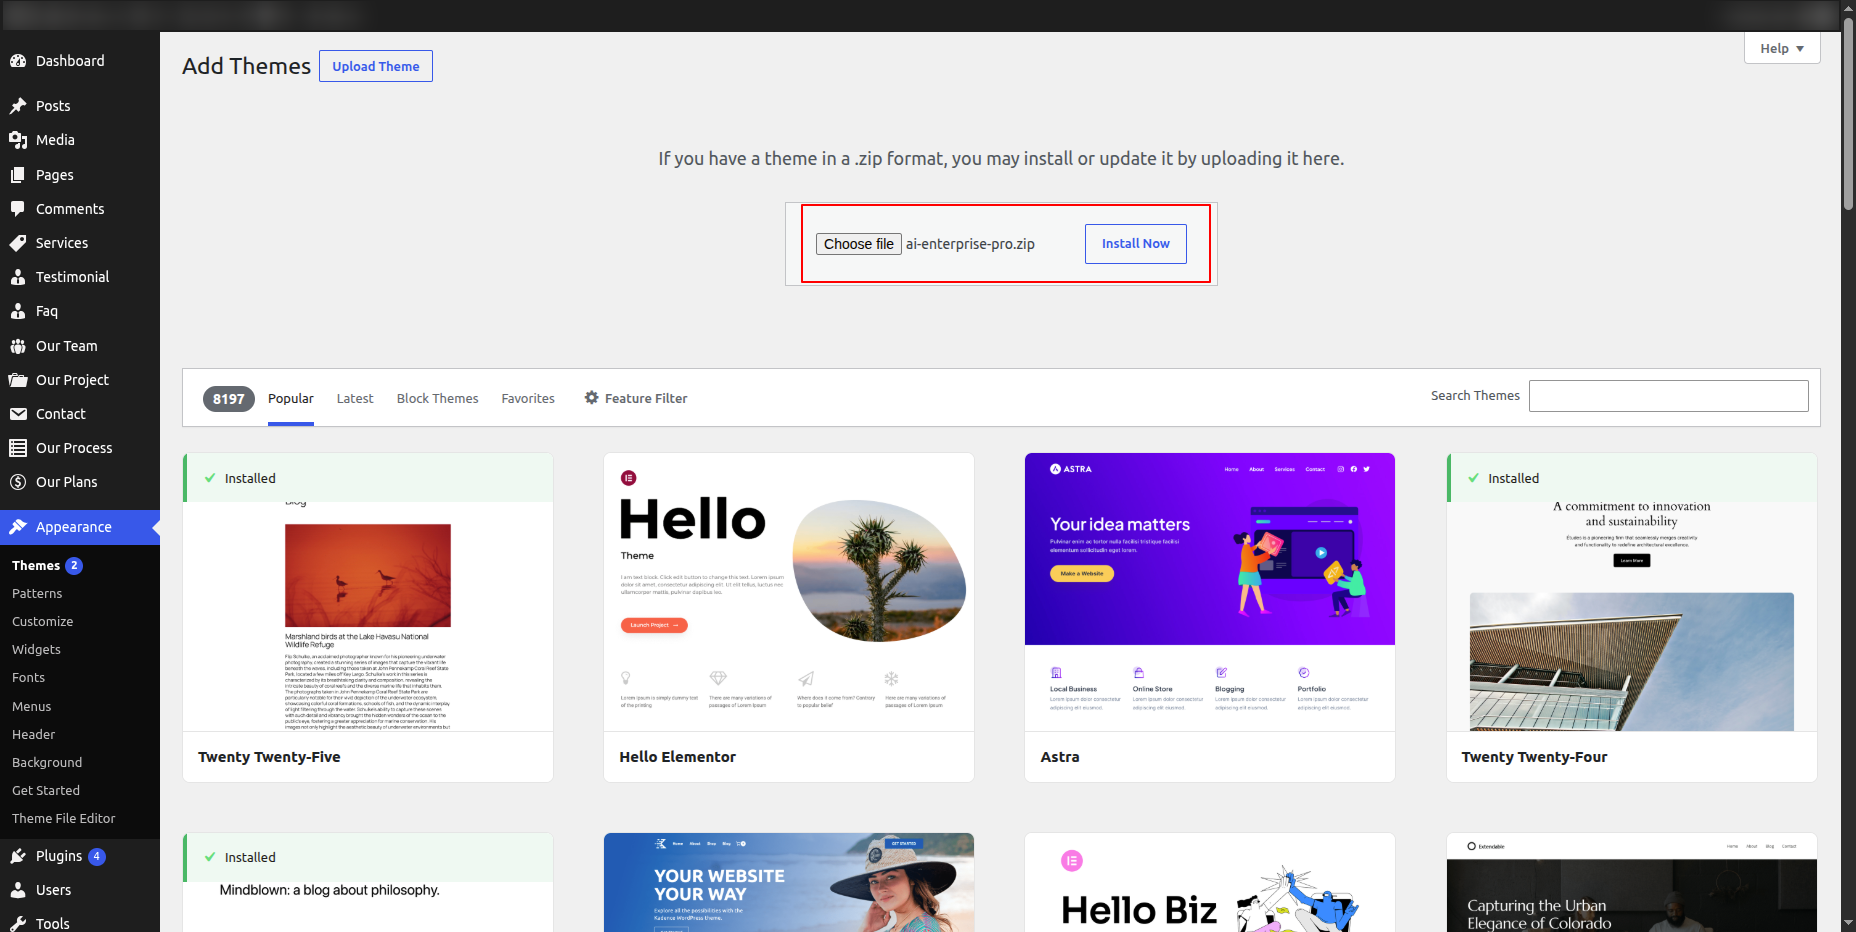
Congratulations on completing the WordPress theme installation!
Another option for installing a theme is to upload it via FTP (File Transfer Protocol).you first need to log in your website via FTP and Select to the themes folder inside wp-content folder. From there, you can upload the theme you downloaded by unzipping it and uploading it to server.
Afterward, log in your WordPress site and Select to Appearance -- Select Themes And activate .
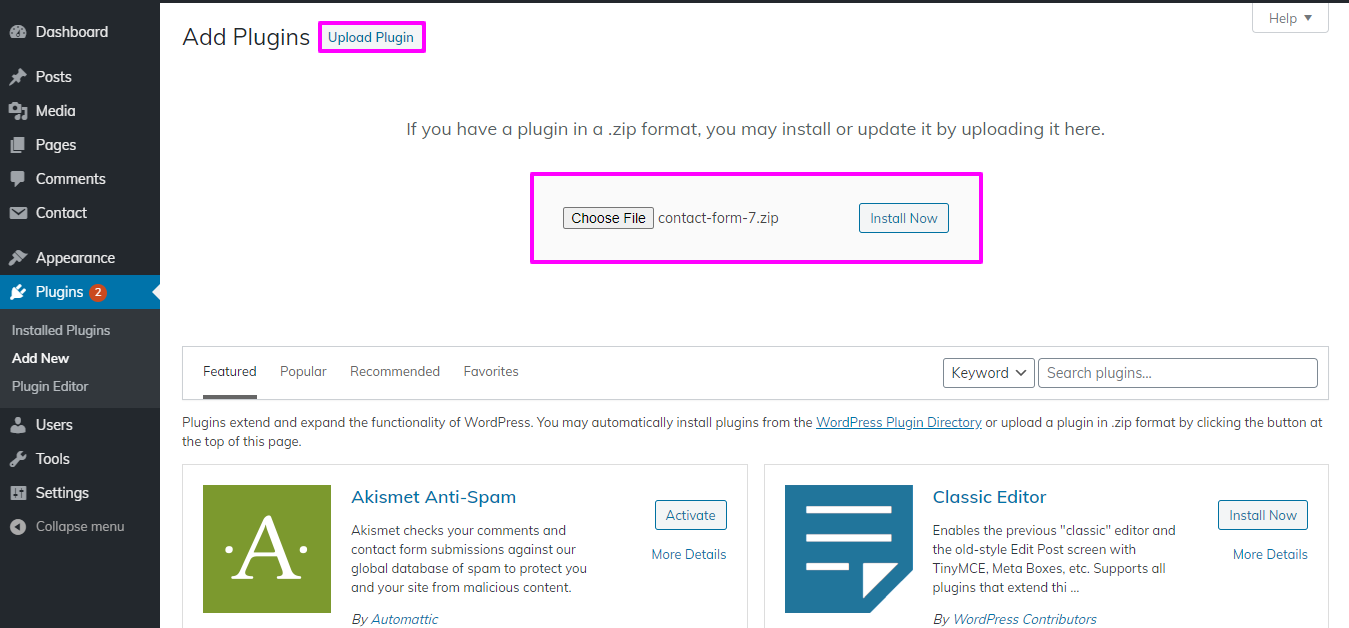
To manually add a WordPress plugin applying a zip file archive, adhere to the procedures listed below.
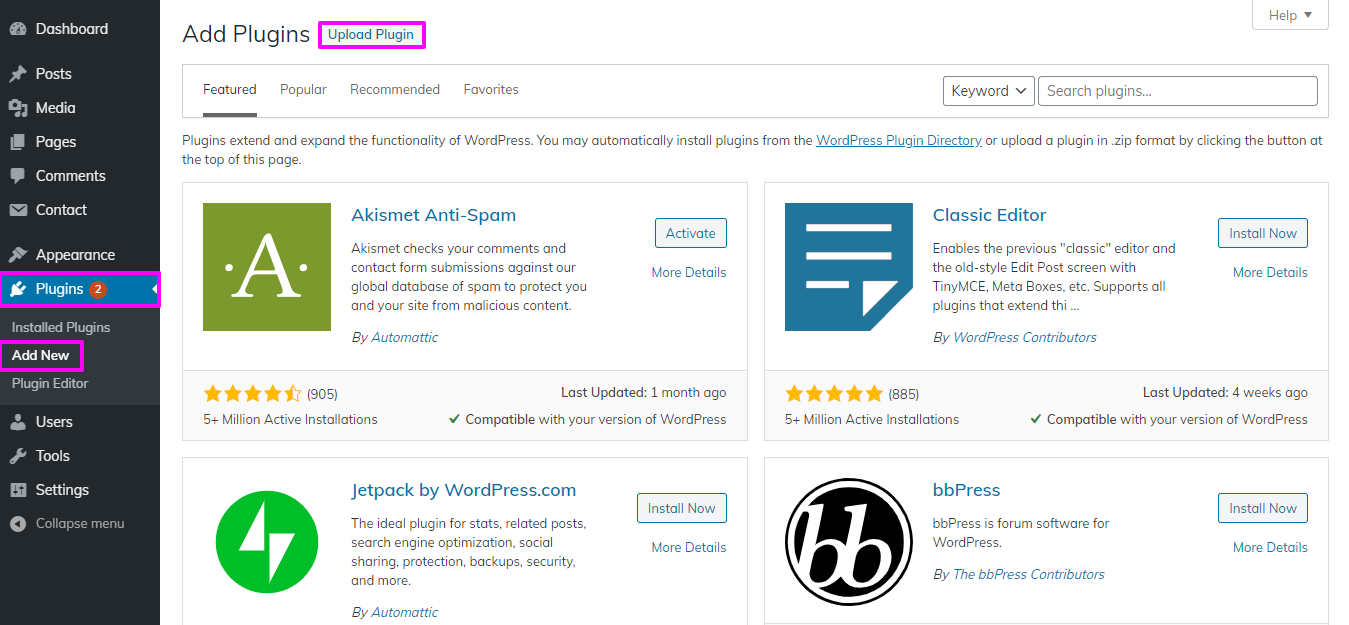
click install now button and activate
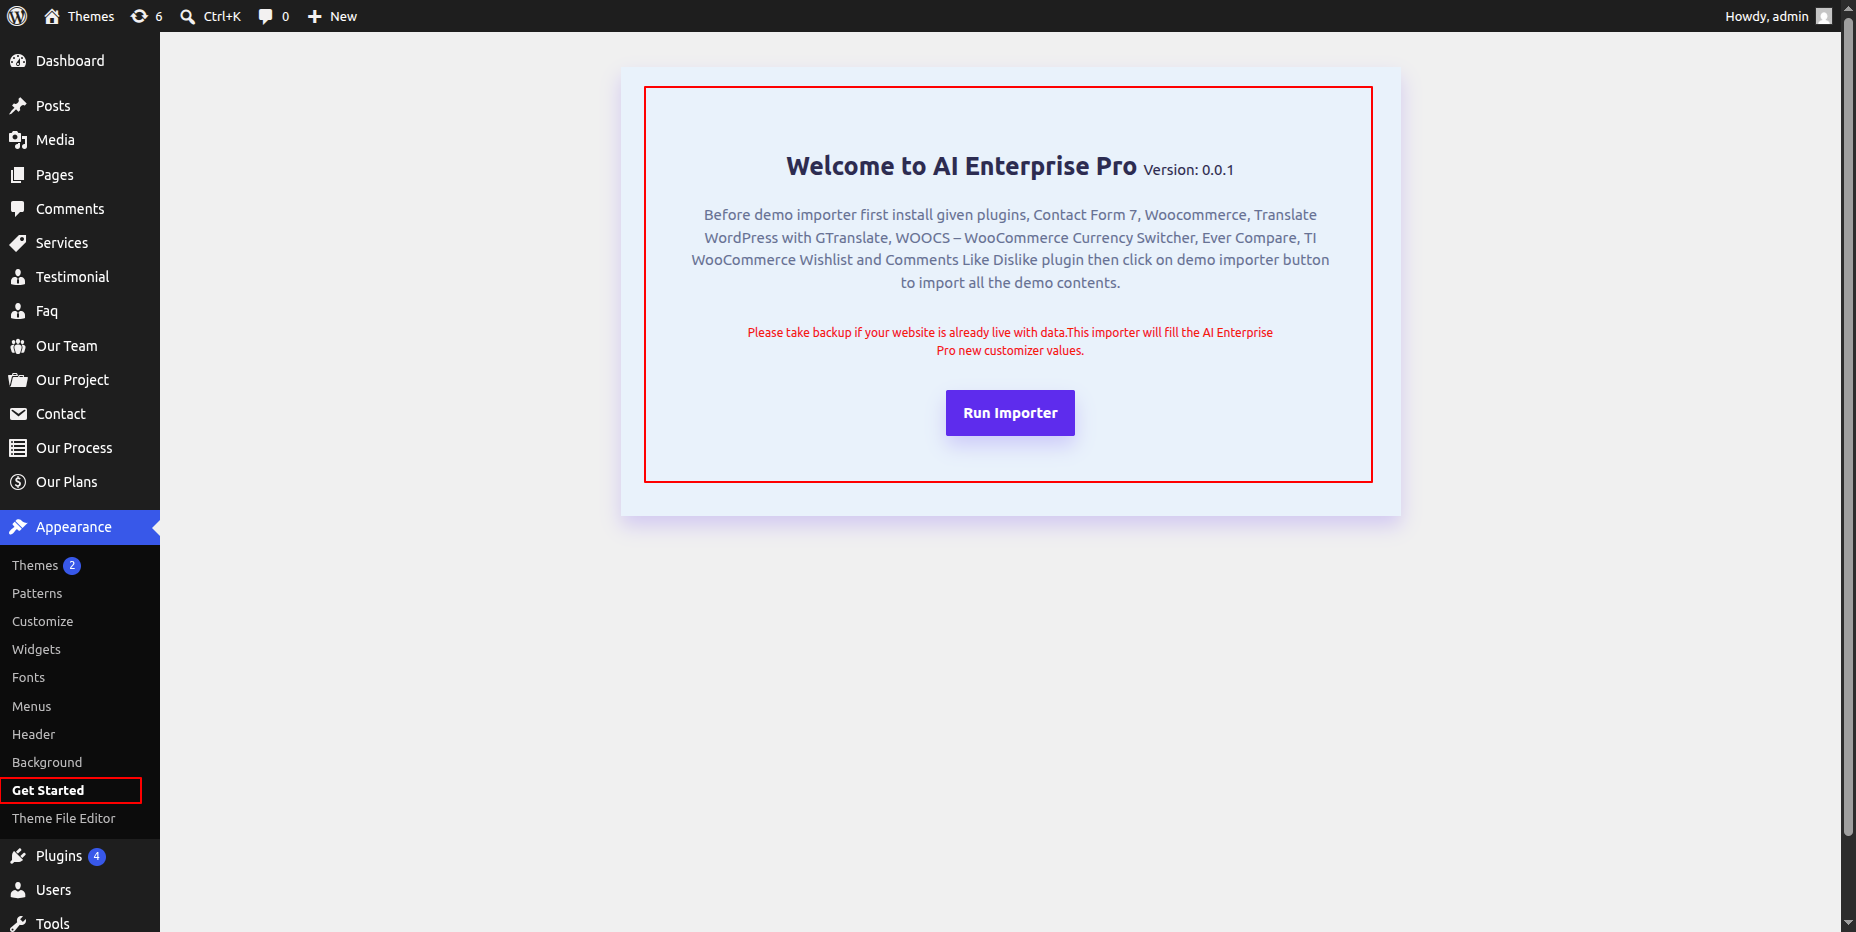
Import demonstration content with one click to get your theme Set-up. This content will lead you through creating your website.
SelectDashboard in the next section. → Go To The Appearance → Tap Get started
Tap"Run Importer".
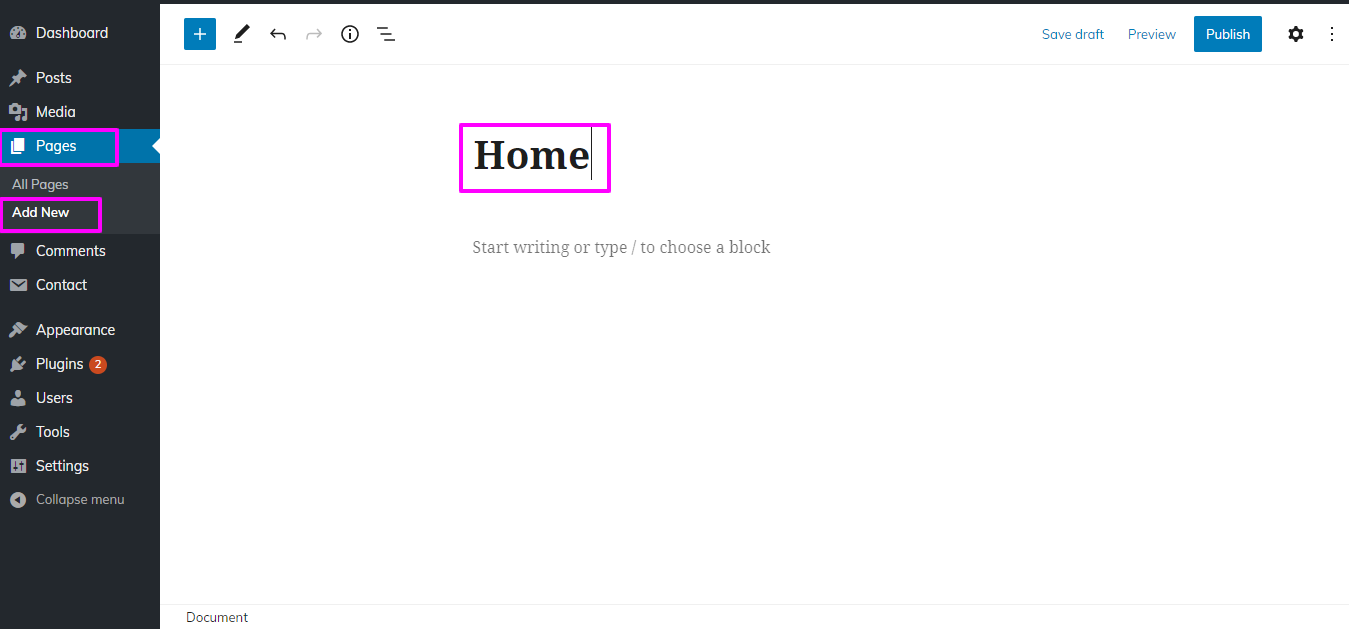
1) Now To set up home Page First Create a Page From Admin Area
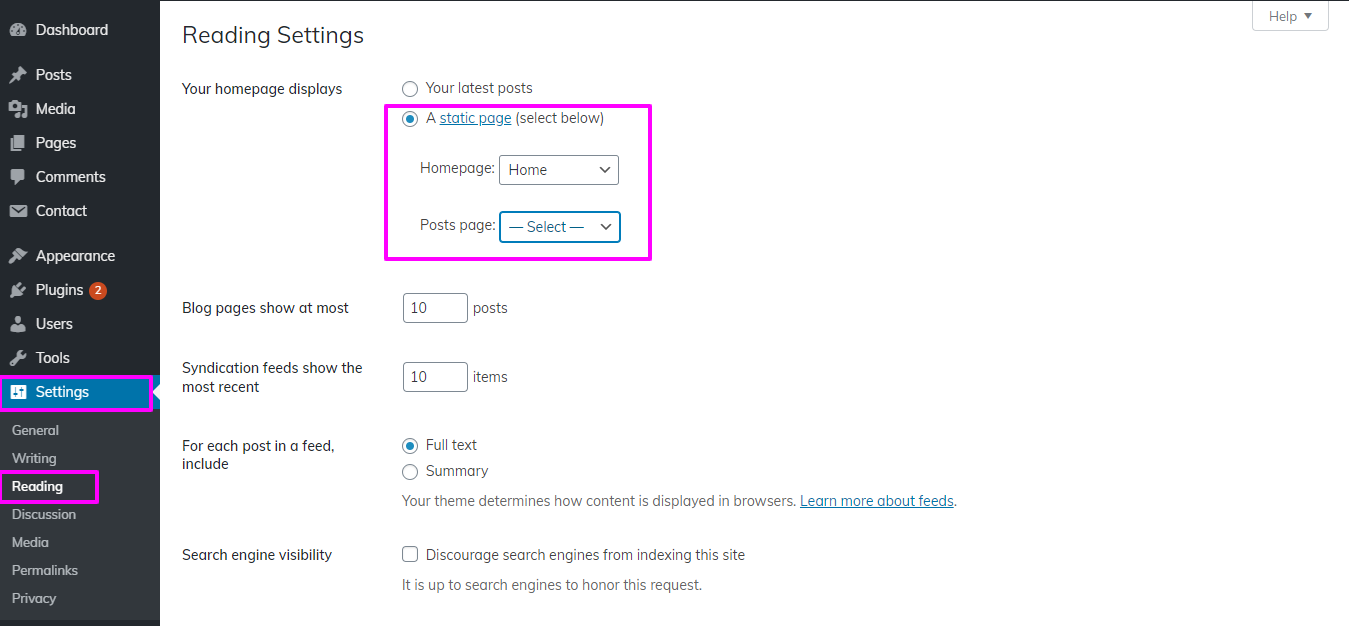
You have the option of calling your page the parent site name or the main page. By choosing Settings and then Reading, you can switch the template from static to the Home page..
2) Set the page: Select Setting → Reading → Set the post page display static page to the Home page.
You will notice the Home Page looks same as scrrenshot
How to Reorder and Organize Section
Section reordering means to arranage the section as per our requirement. first you need to choose section and drag section on top or bottom where you need it. when you will drap any section your front view will change according to your choice.
To ensure that begin with Section Ordering.
Select The Appearance → Select Move to Theme Settings → Tap Section Ordering
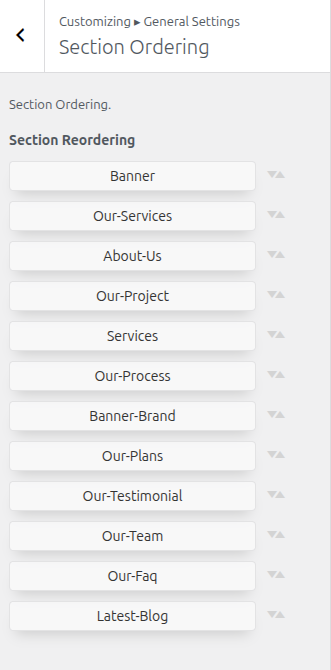
To be able to begin with Site Identity,
SelectThe Appearance → Select The Customize → Site Identity
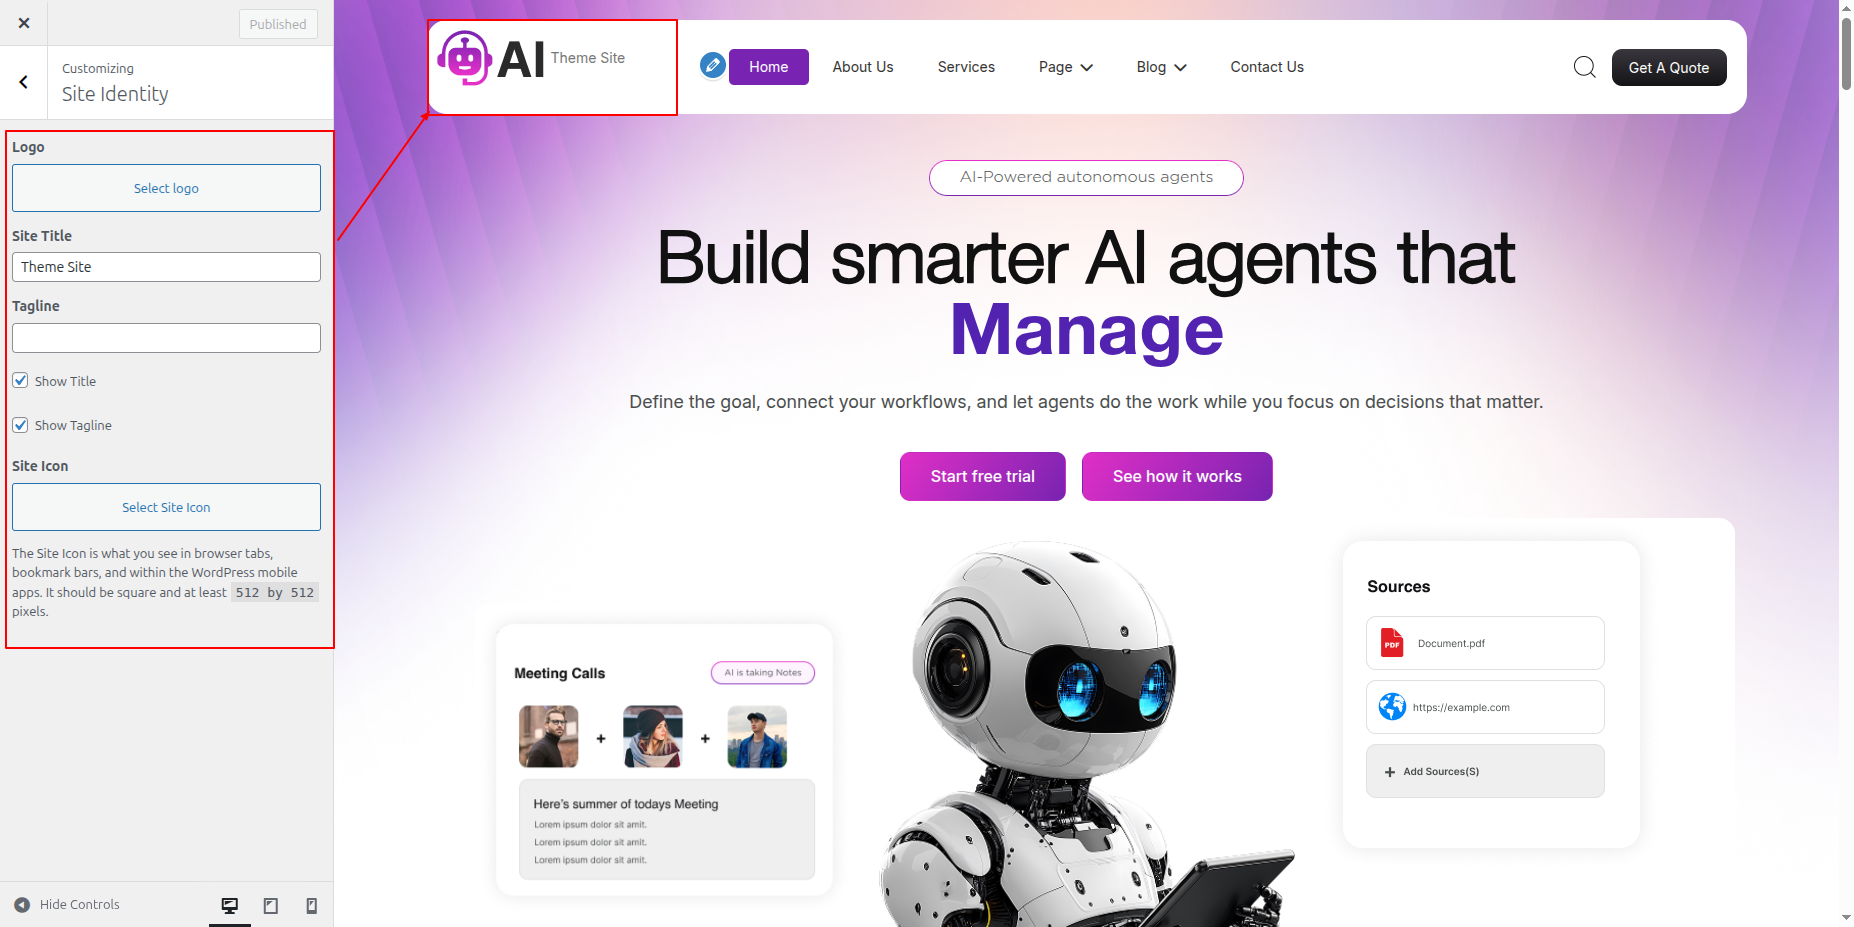
To be able to begin with header,
Select Pages → Tap "Add new."
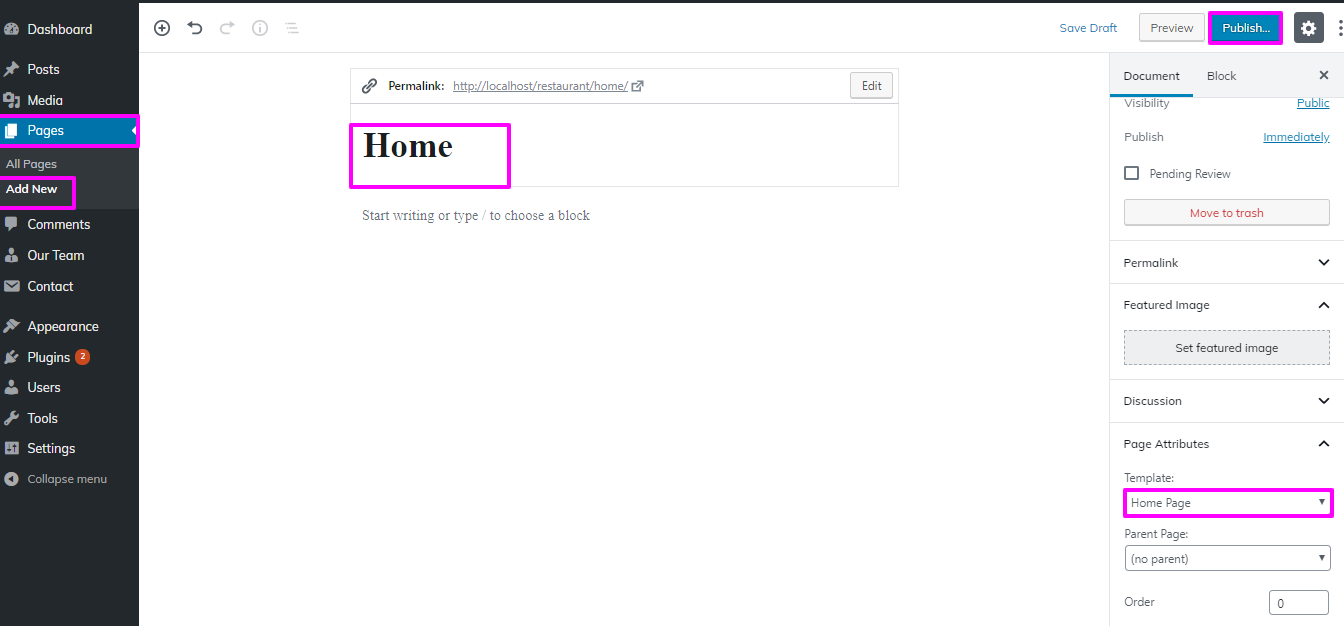
The menu will require more pages.
Select The Appearance → menu → Tap "Add new."
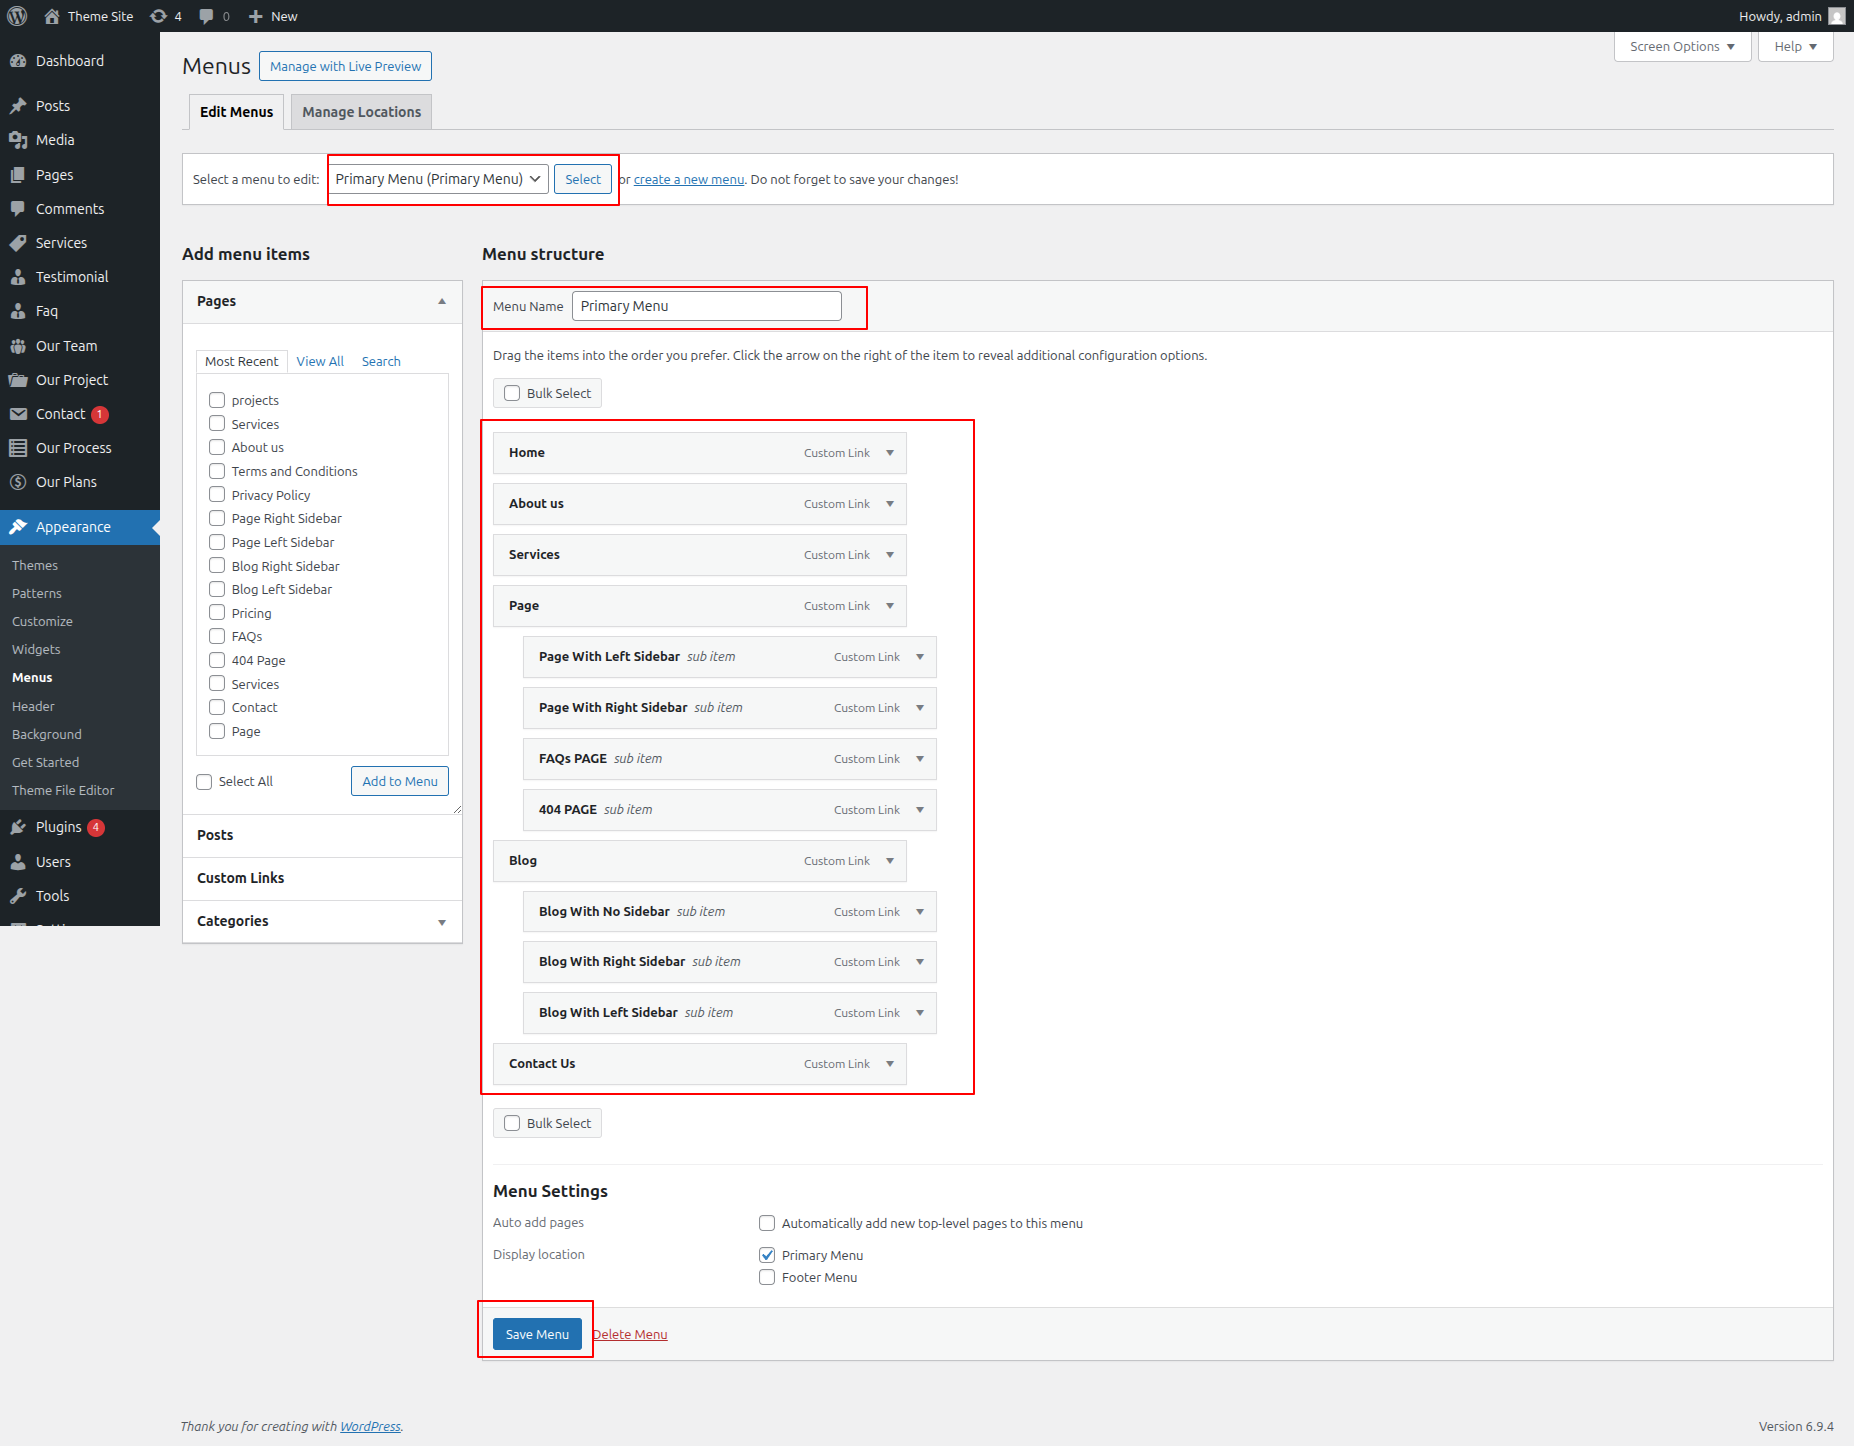
If you wish to add more pages, follow the same procedures again.
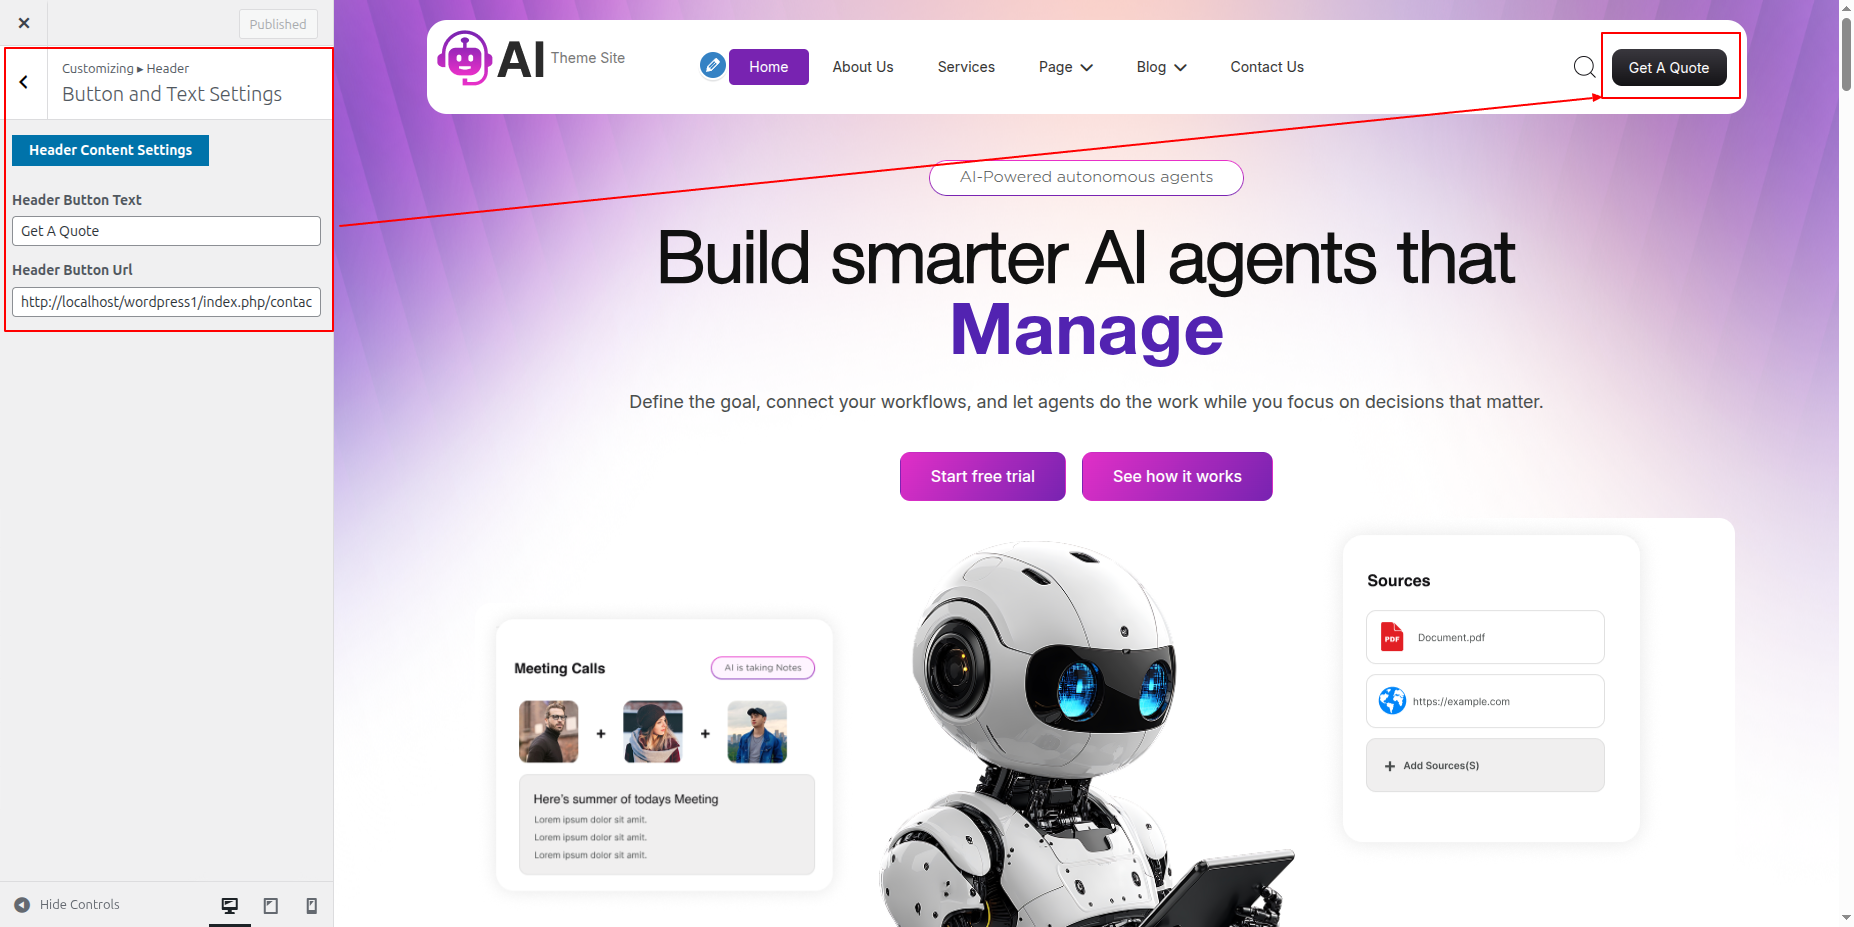
SelectThe Appearance → Select The Customize → Move to Theme Settings → Header → Button and Text Settings
SelectThe Appearance → Select The Customize → Move to Theme Settings → Header → Style Settings
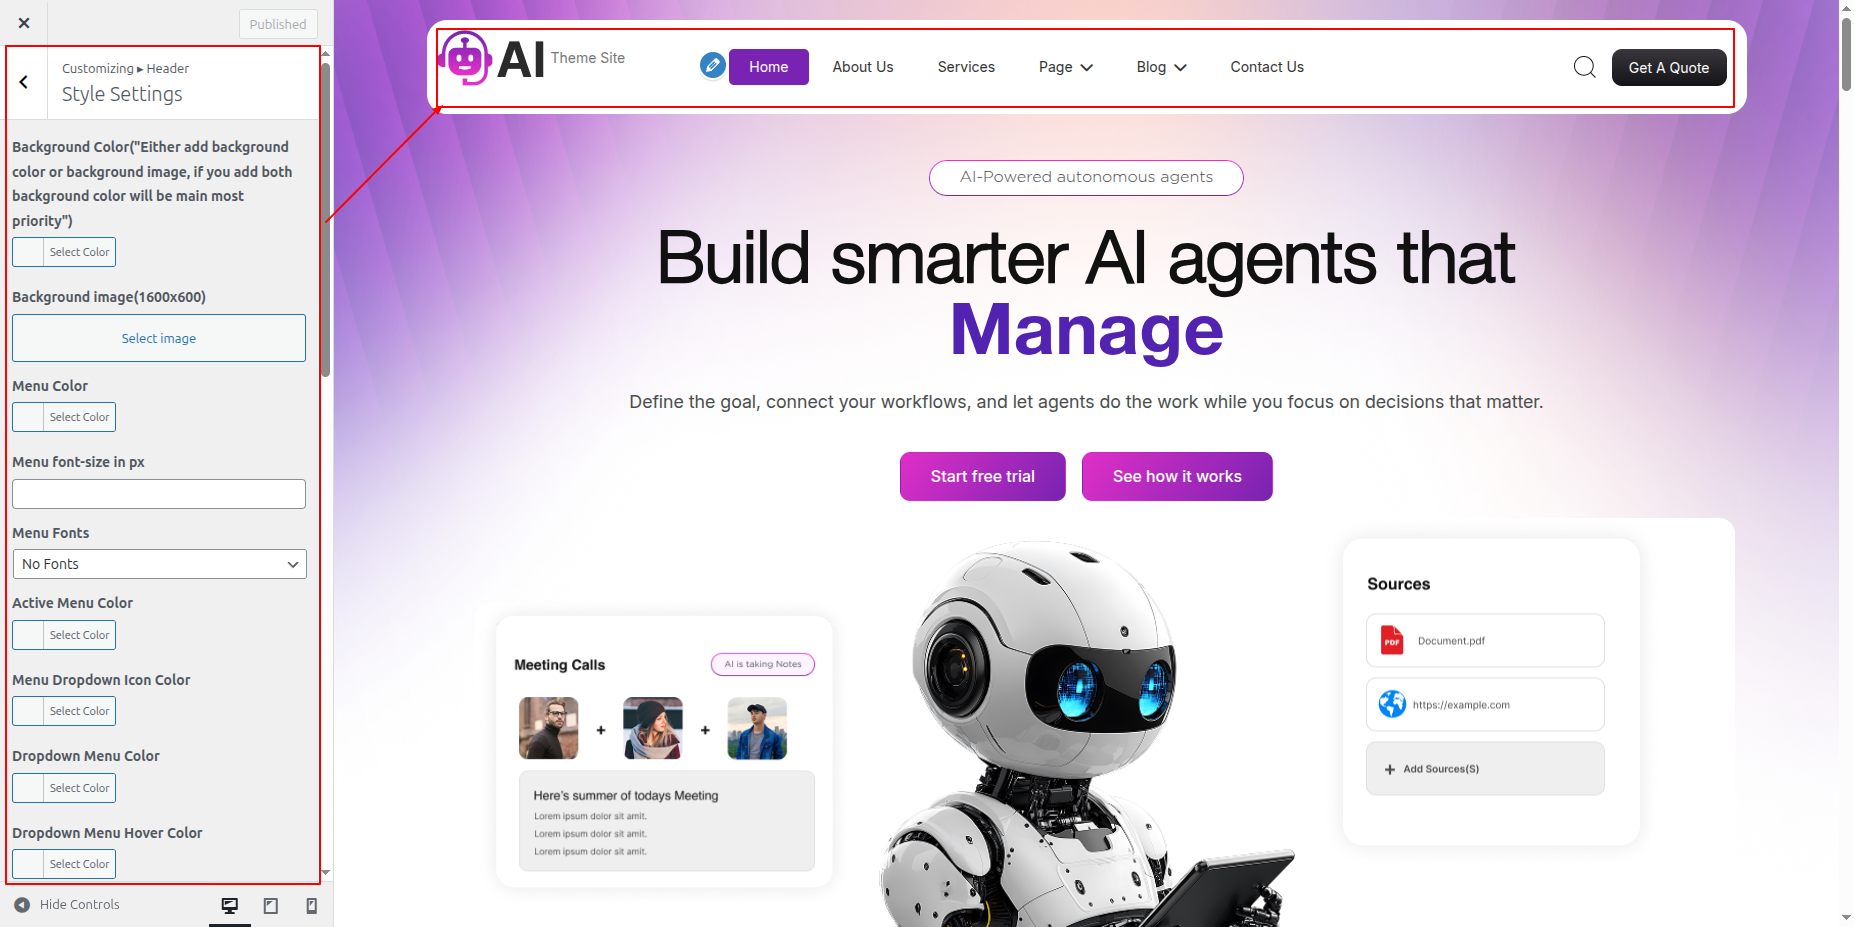
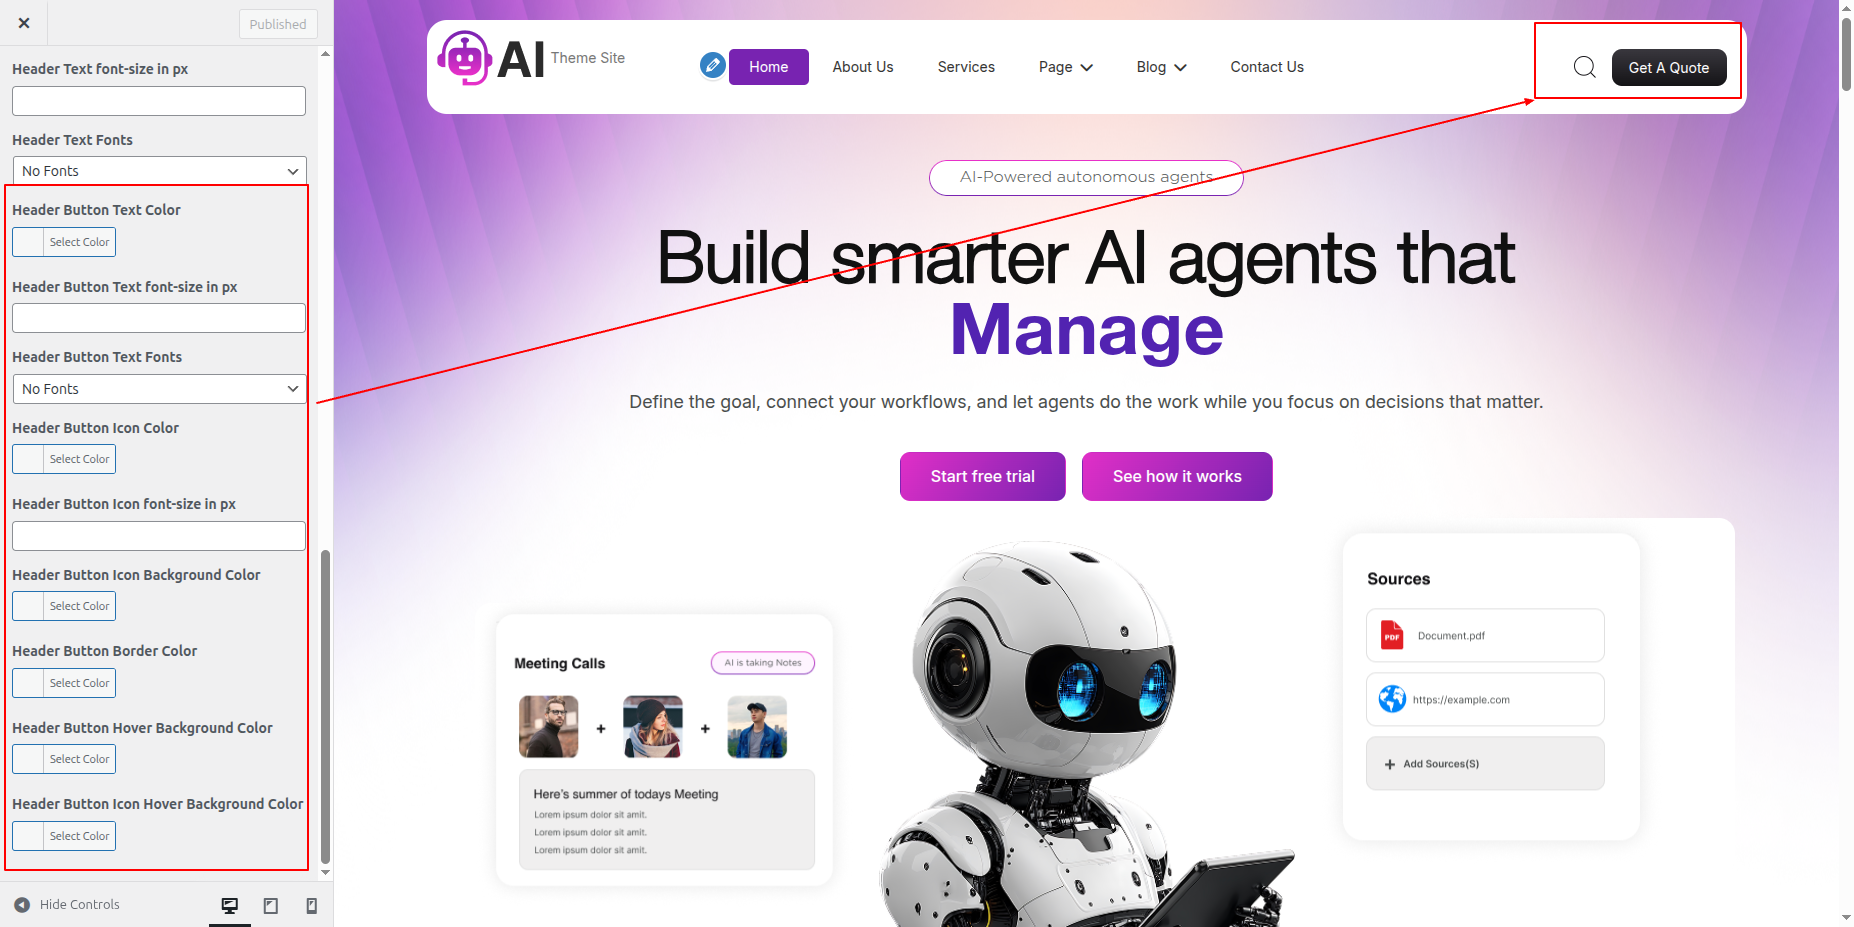
You can include the menu section in this manner.

To be able to begin with Slider
Select The Appearance → Select The Customize → Move to Theme Settings → Banner → Banner Settings
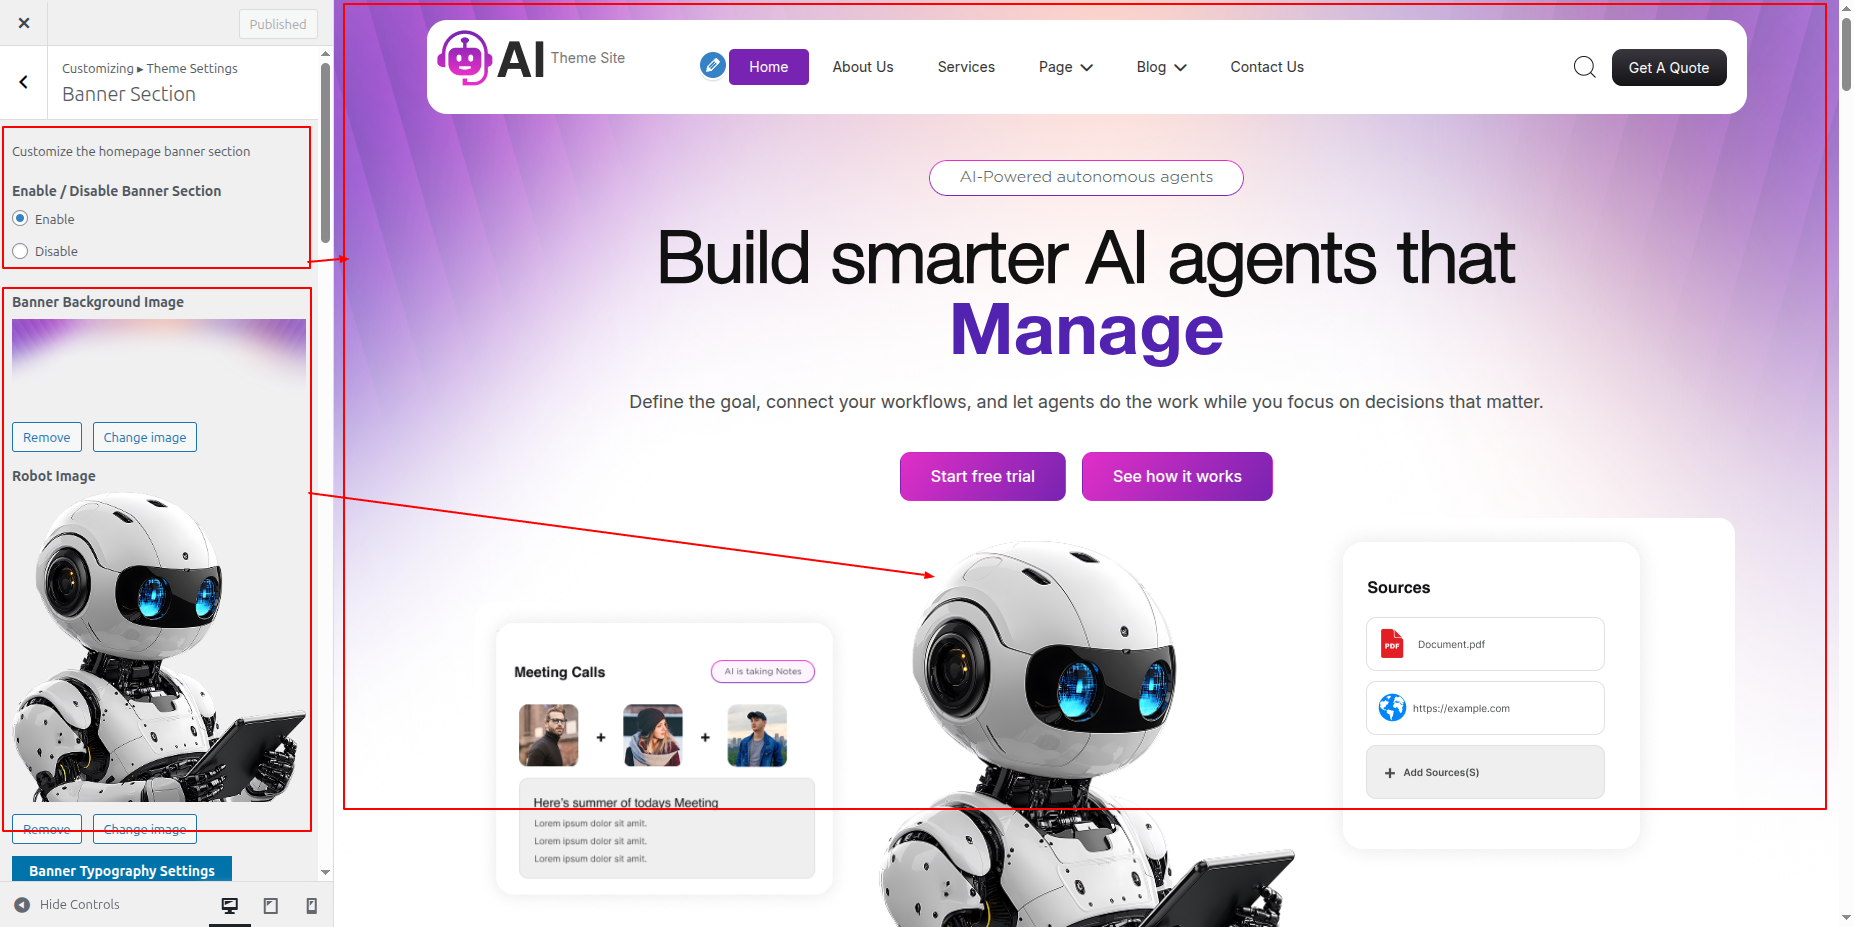

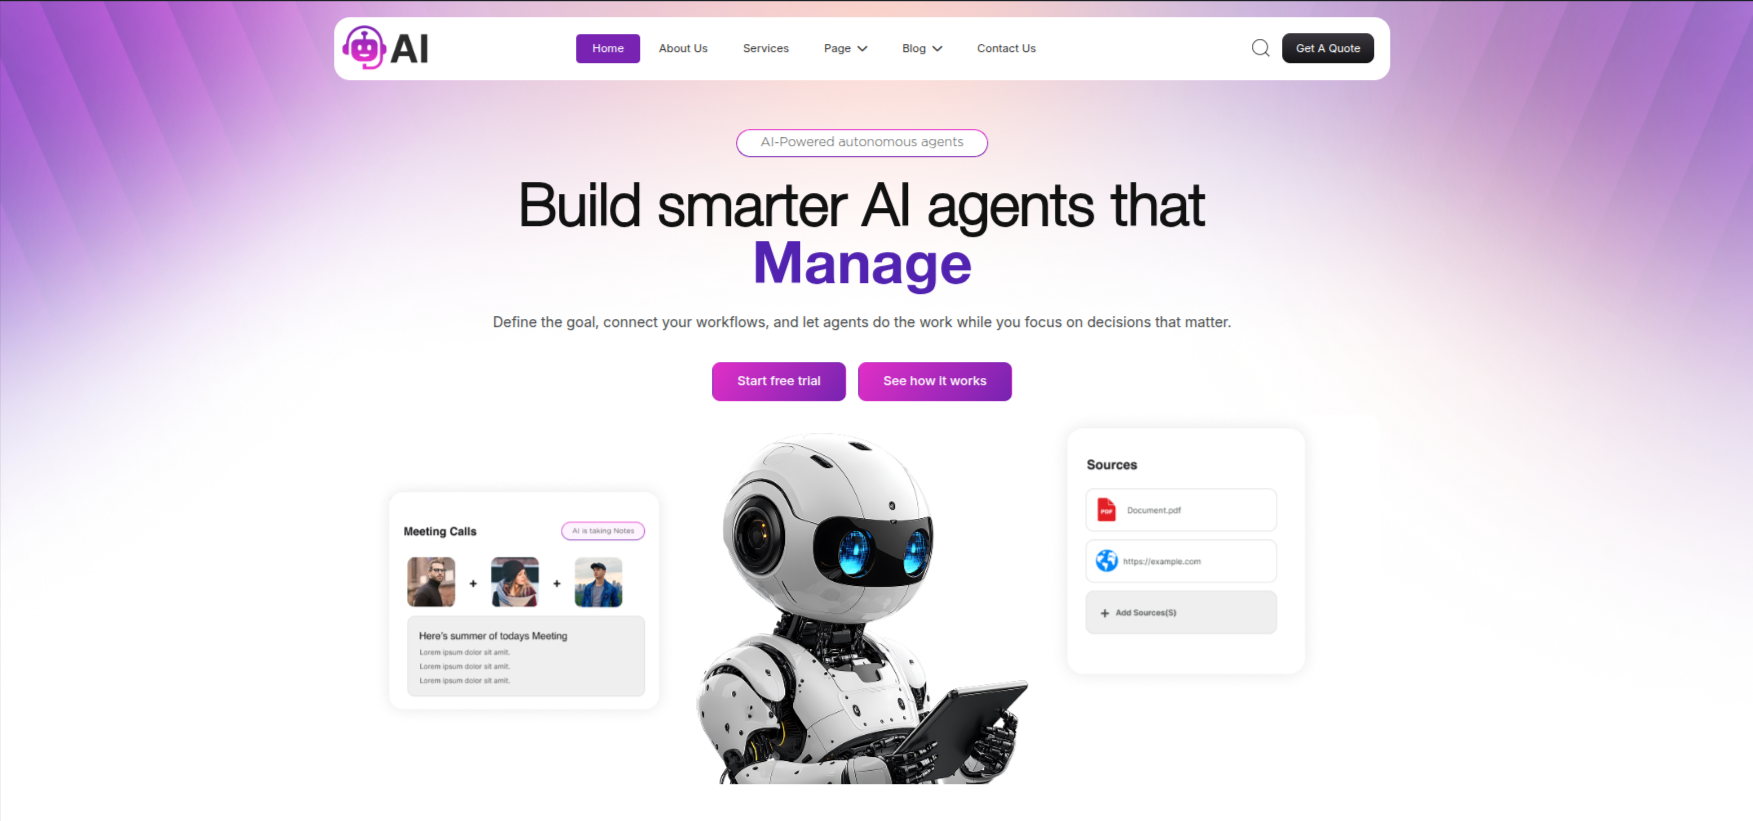
On the front end, it will appear as shown.
To ensure that start the Our Services Section.
The Our Services must be established on your WordPress website first.
Installation and activation of the Artifical Intelligence Pro Posttype Plugin are required for the Our Services section. The dashboard's Our Services section will show up after activation.
To ensure that Configuring Move to the Dashboard >> Our Services >>Tap "Add new."
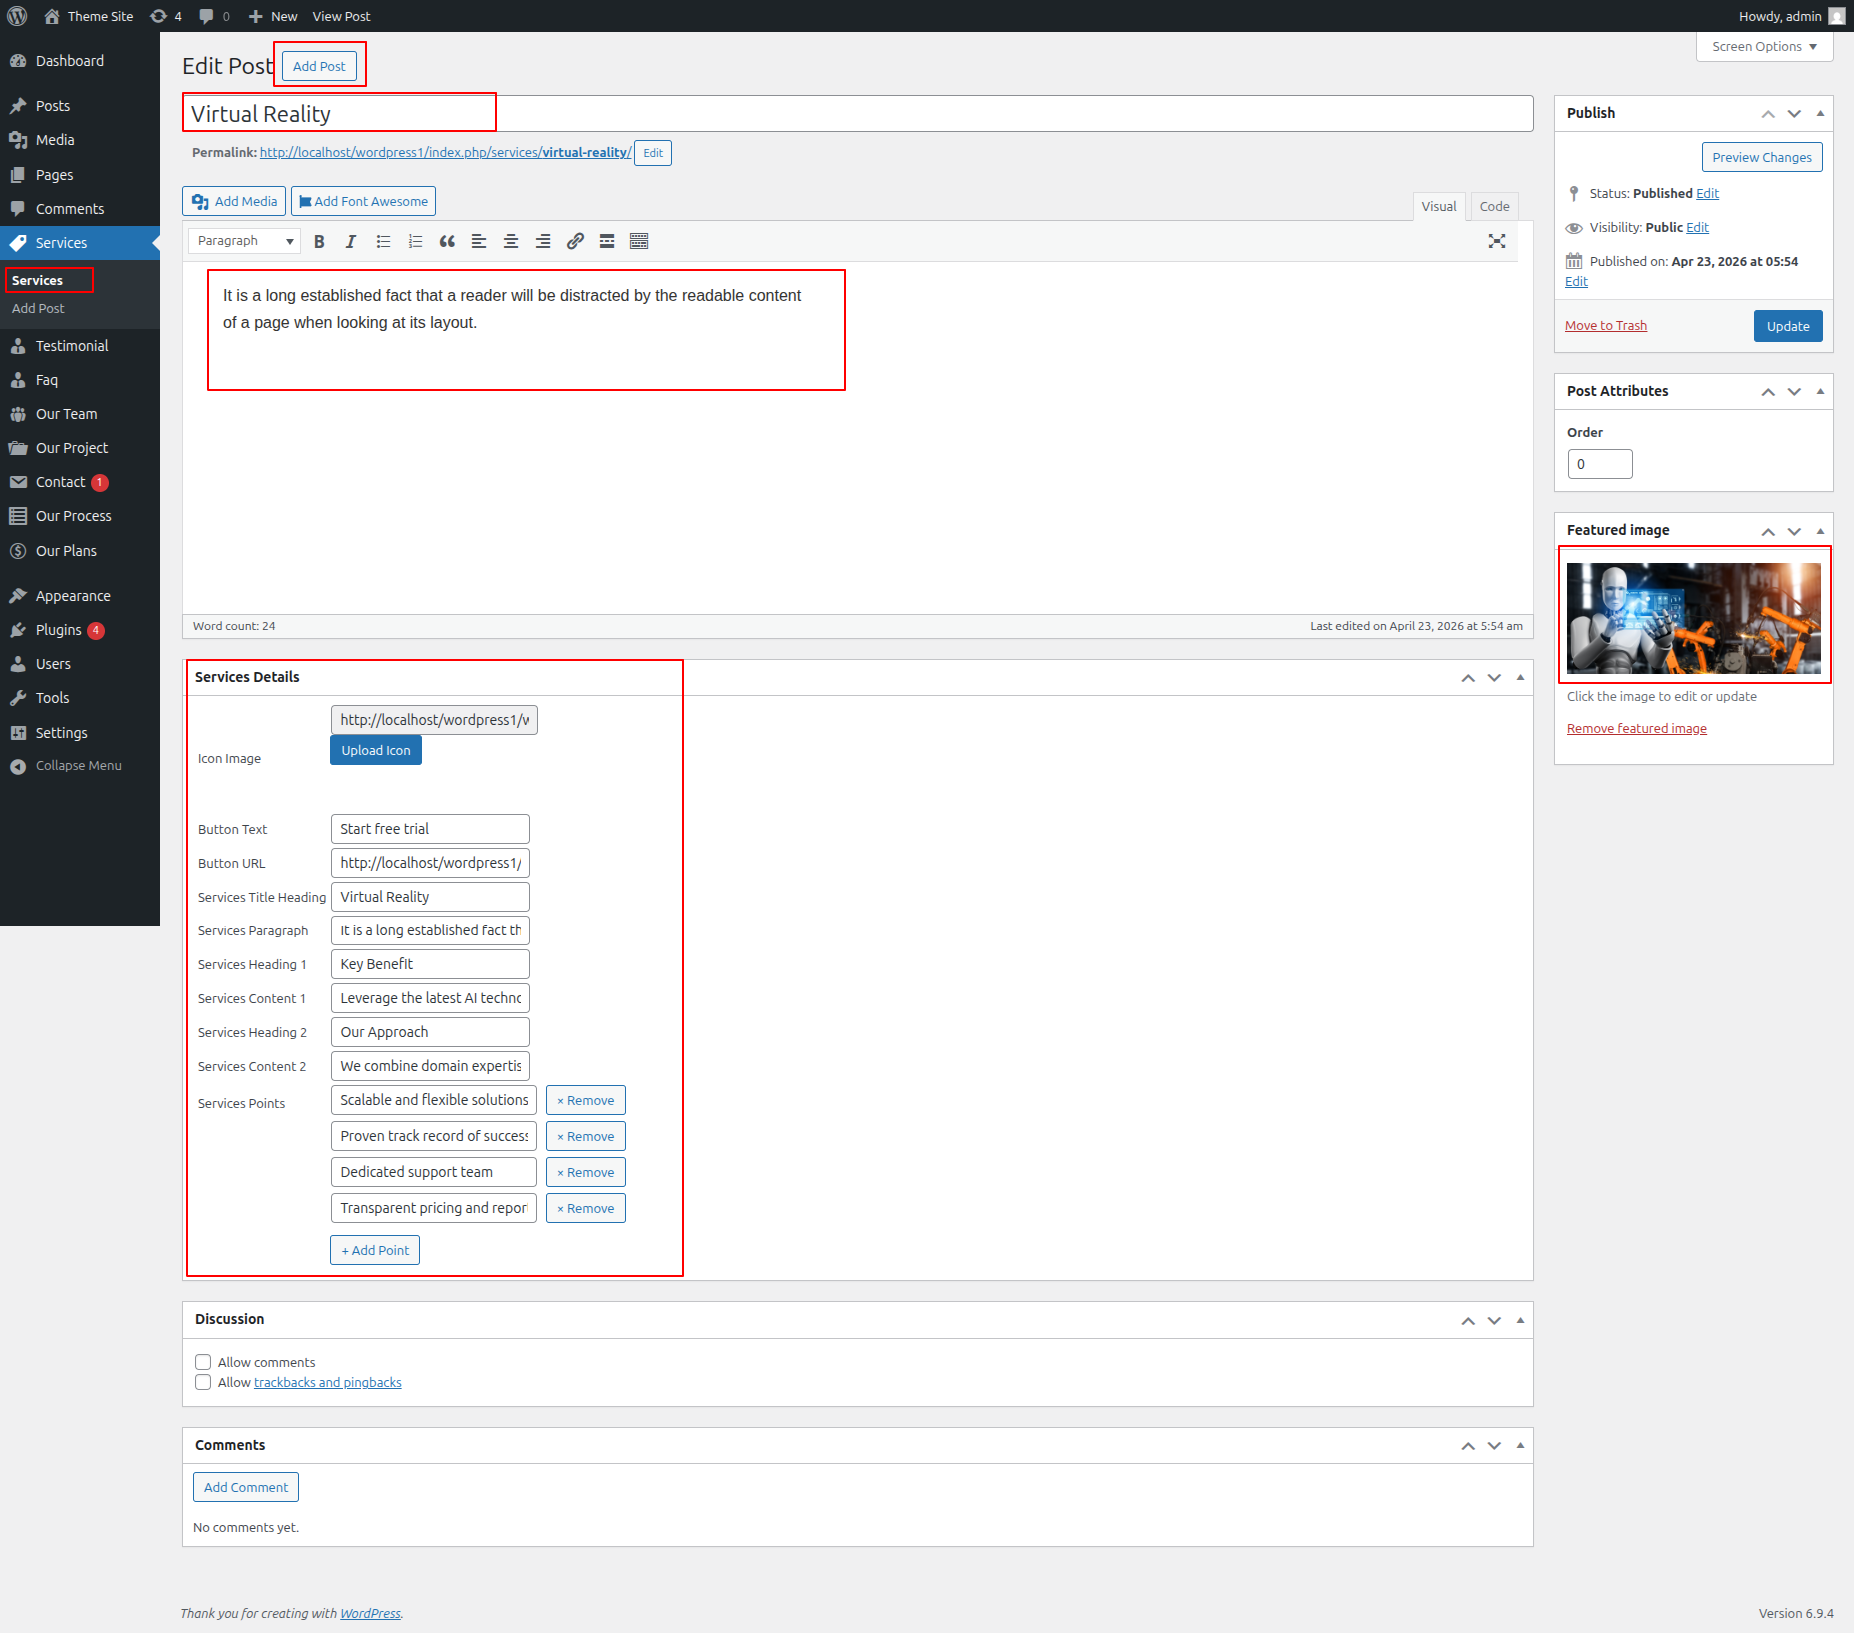
Select The Appearance → Select The Customize → Move to Theme Settings → Our Services Section
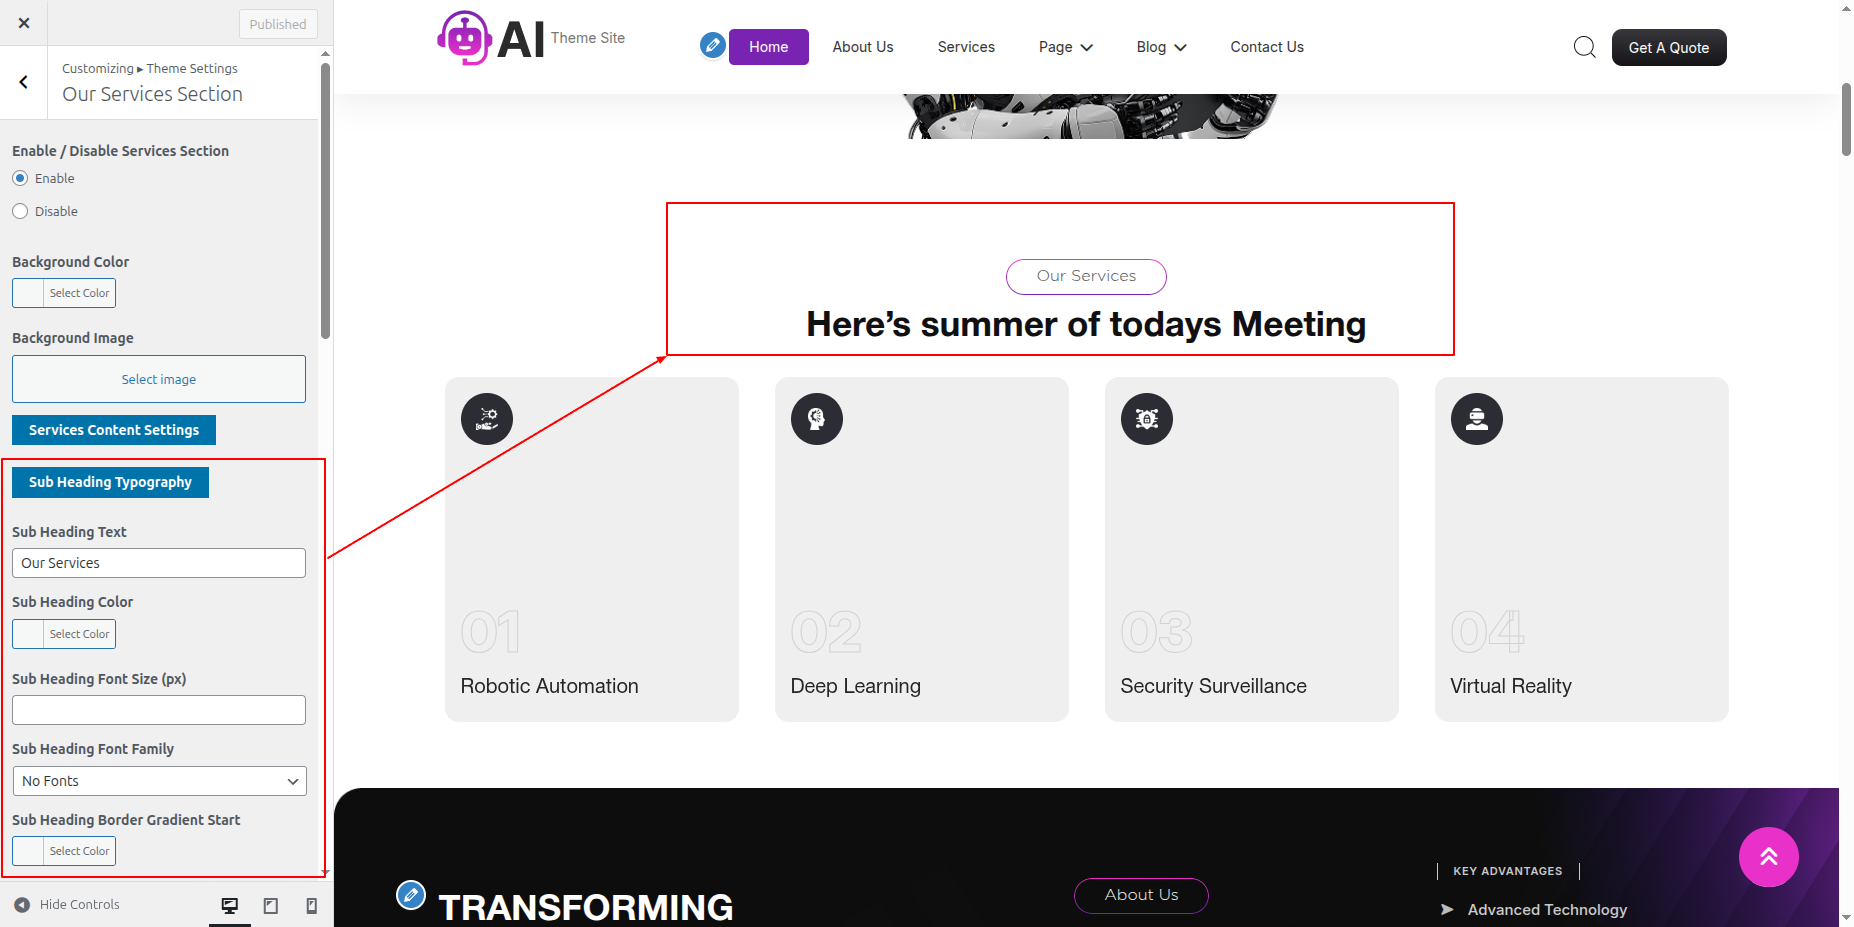
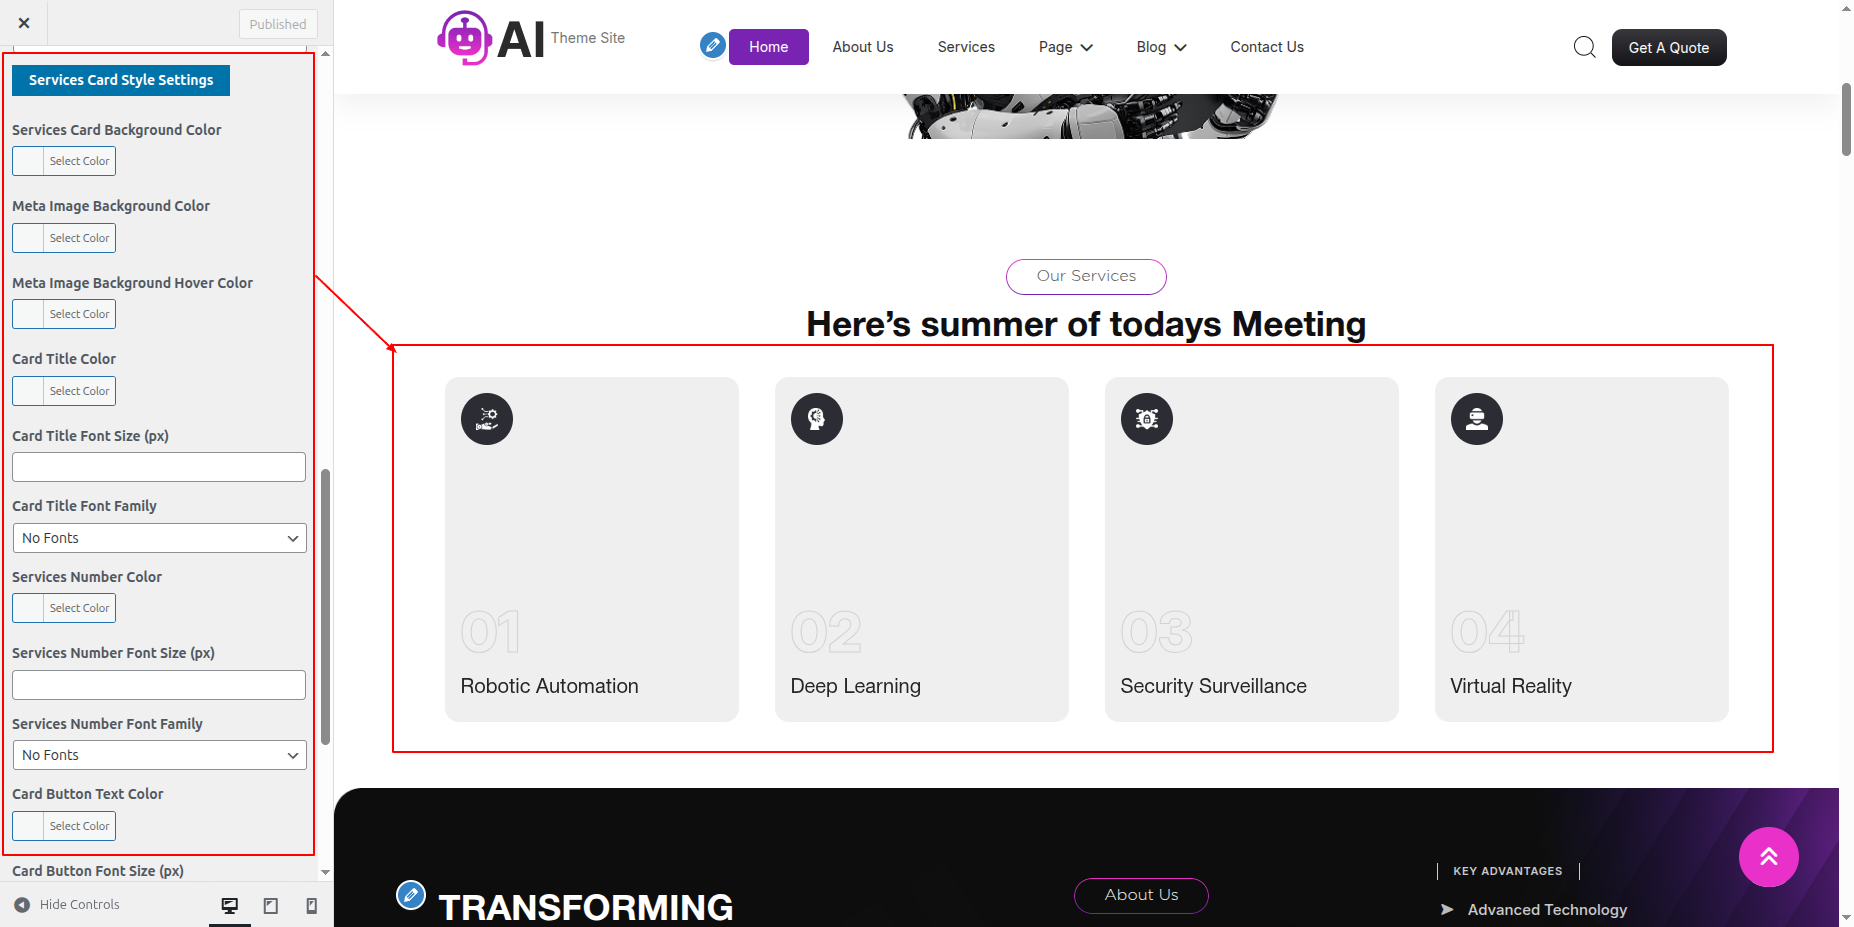
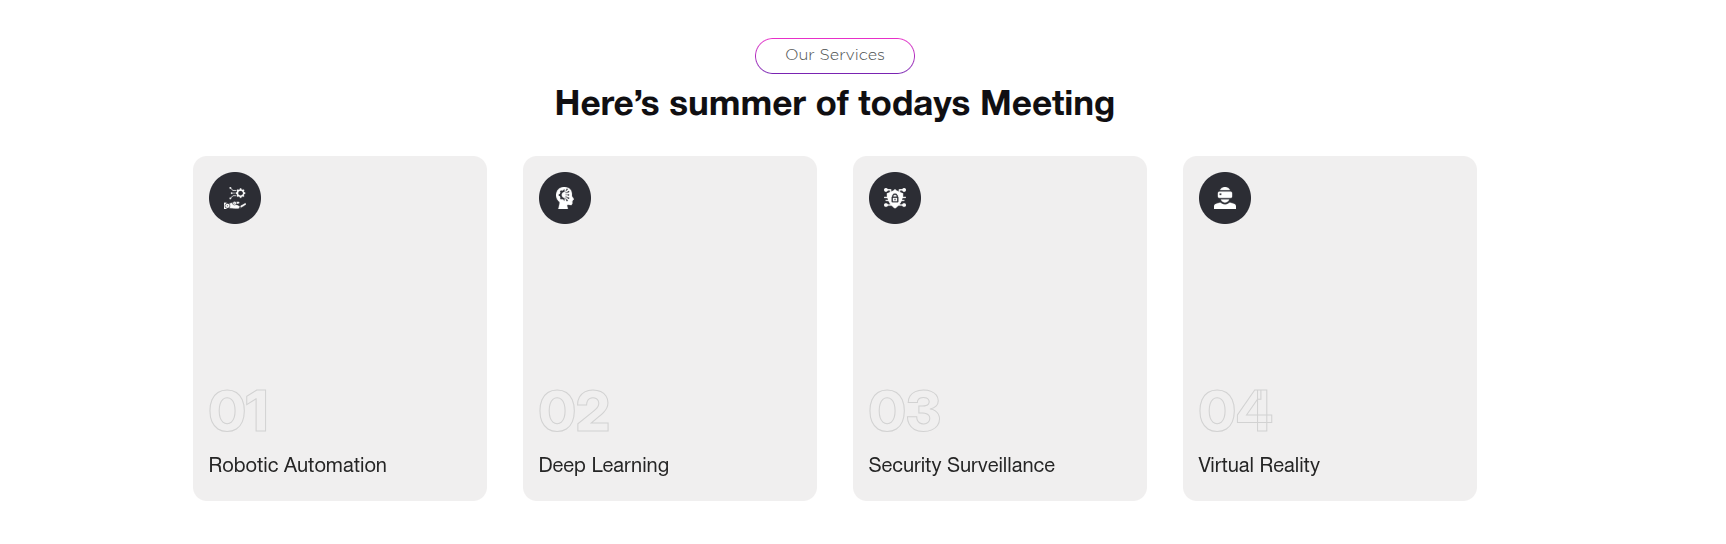
On the front end, it will appear as shown.
To be able to begin with About Us Section.
Select The Appearance → Select The Customize → Move to Theme Settings → About Us Section
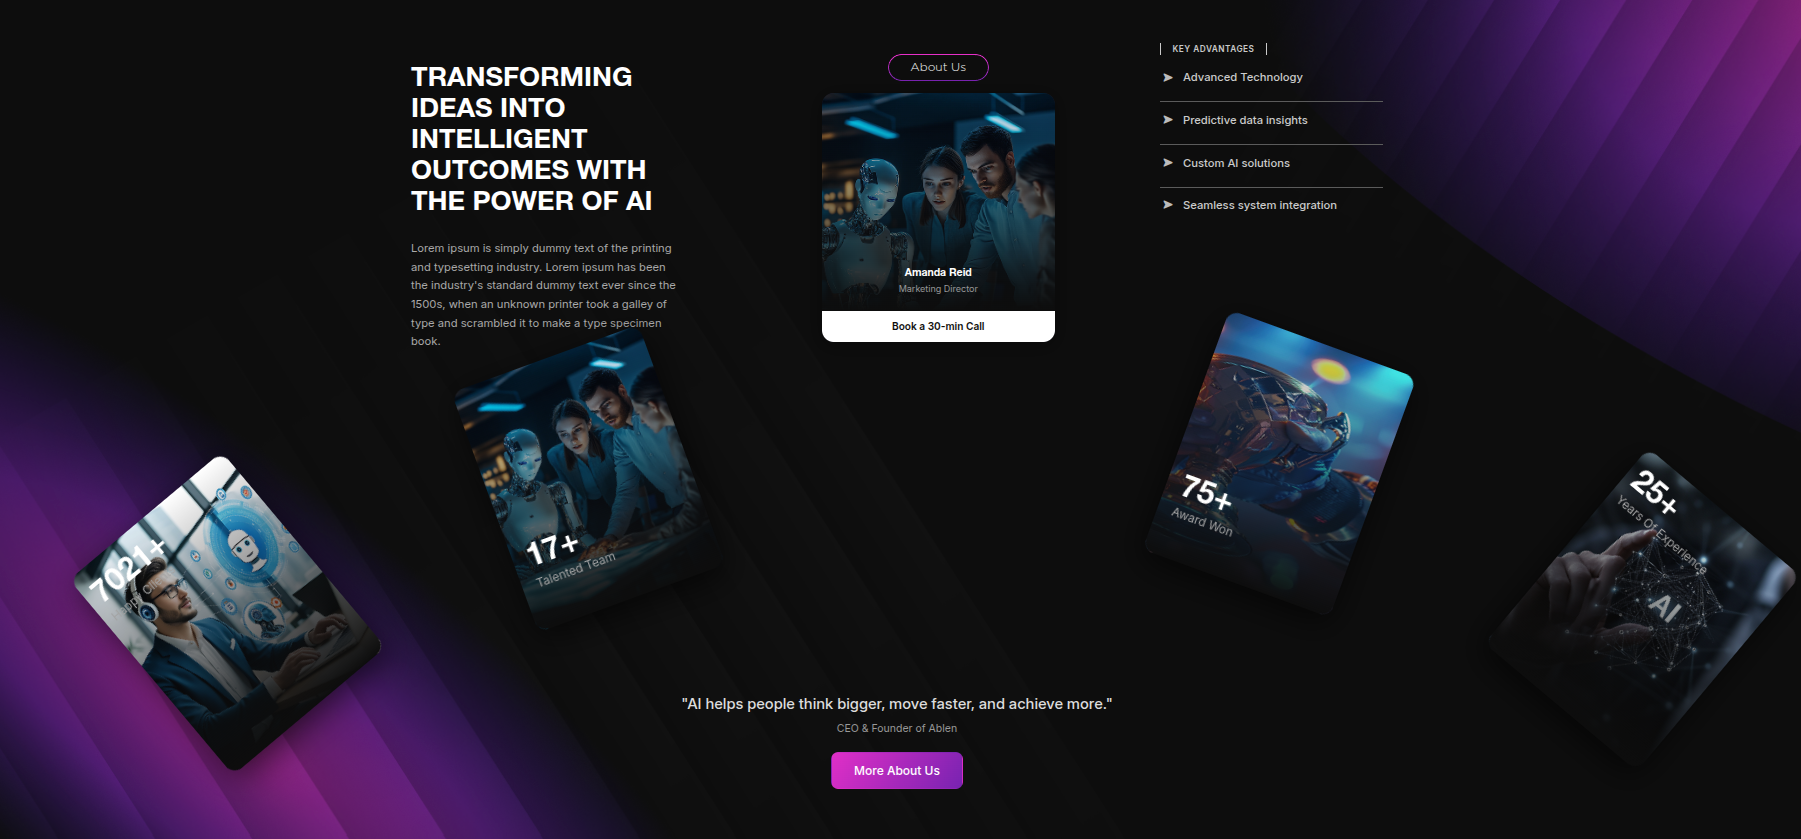
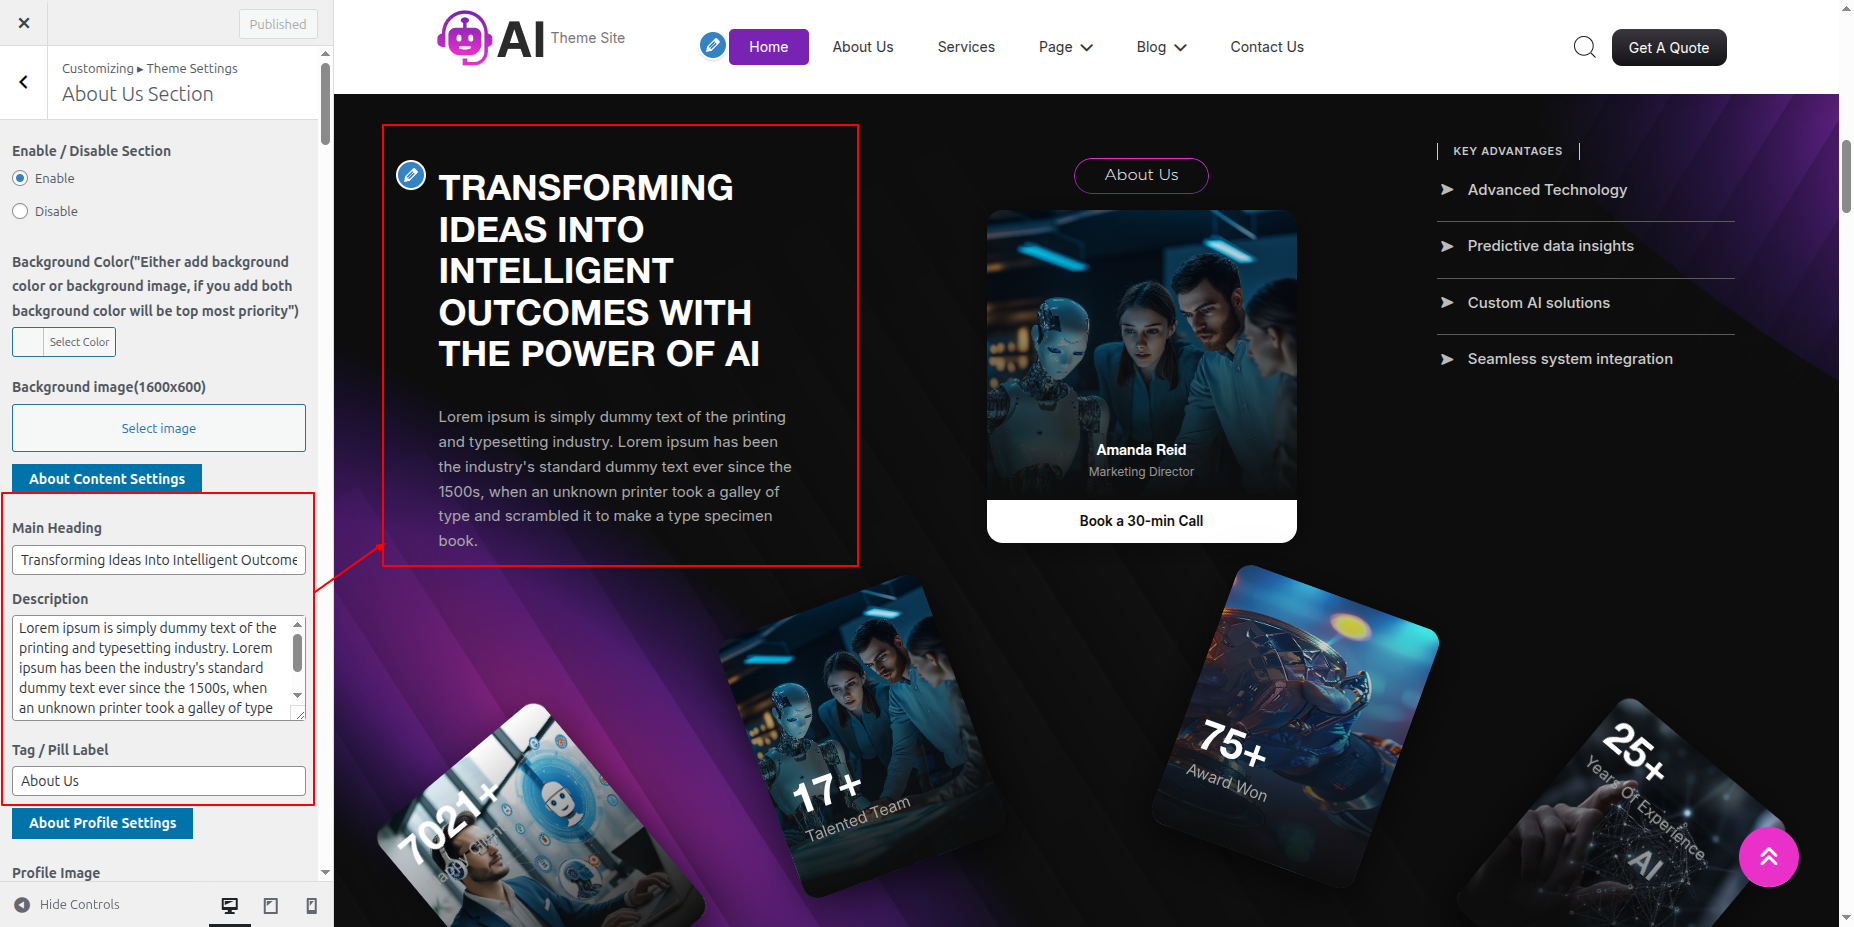
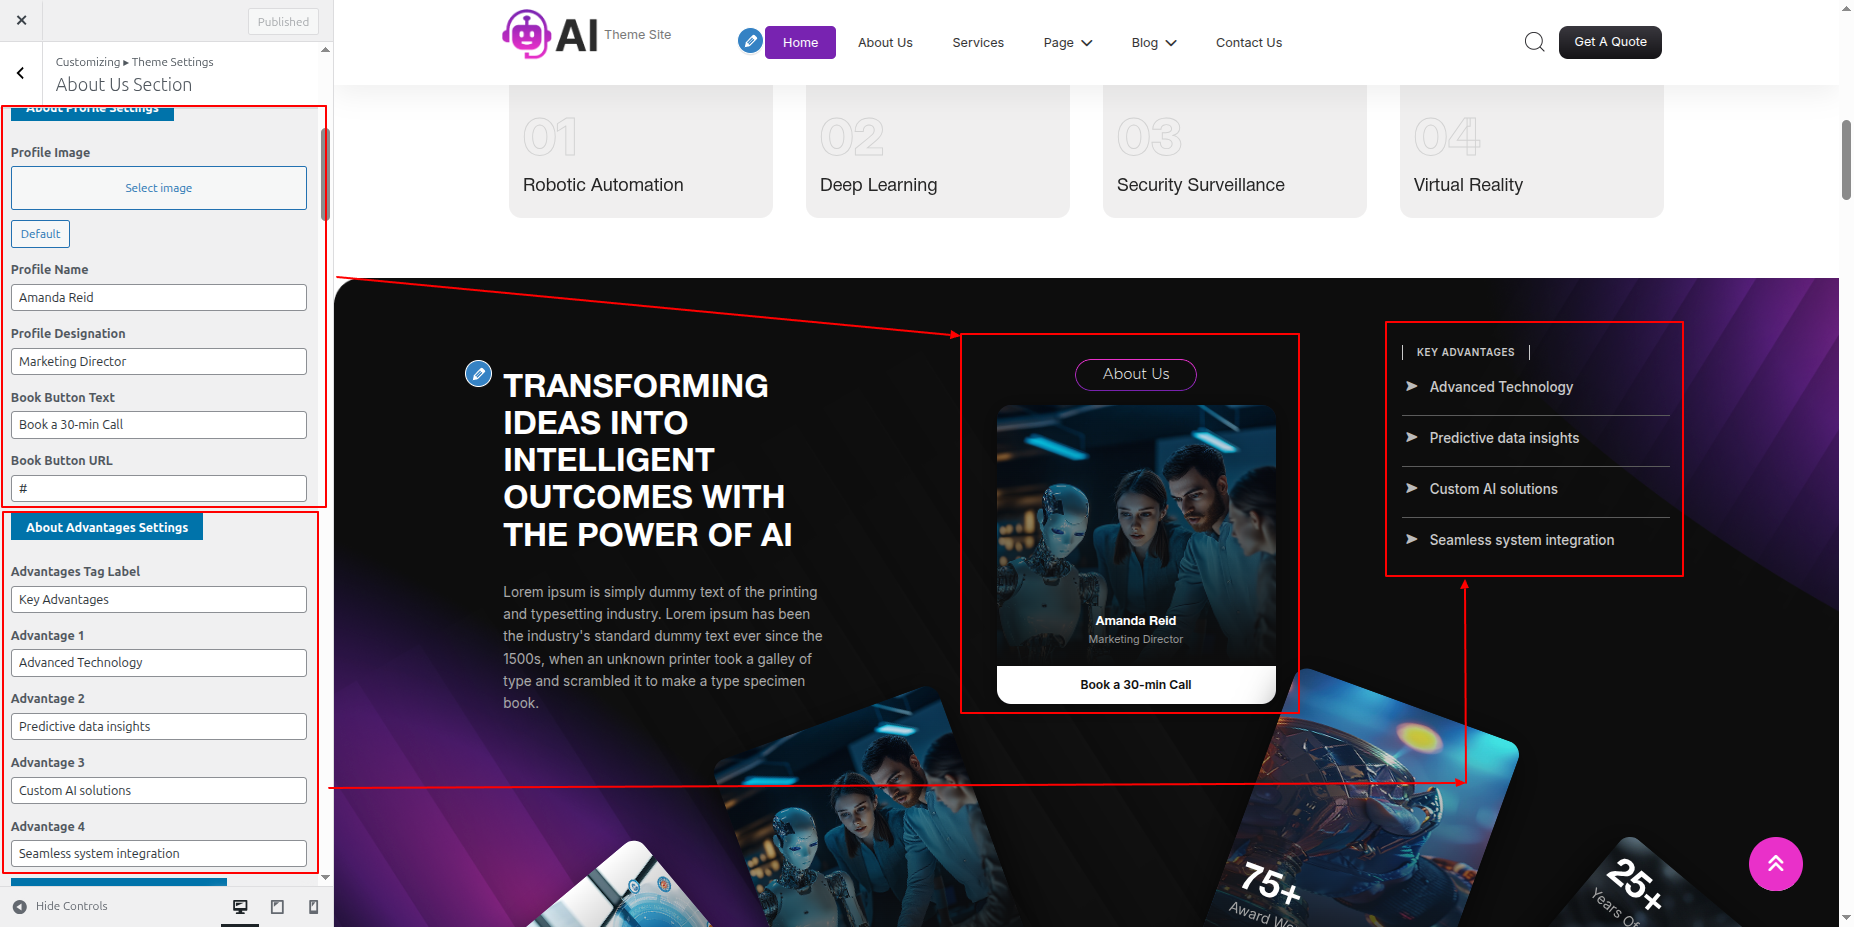
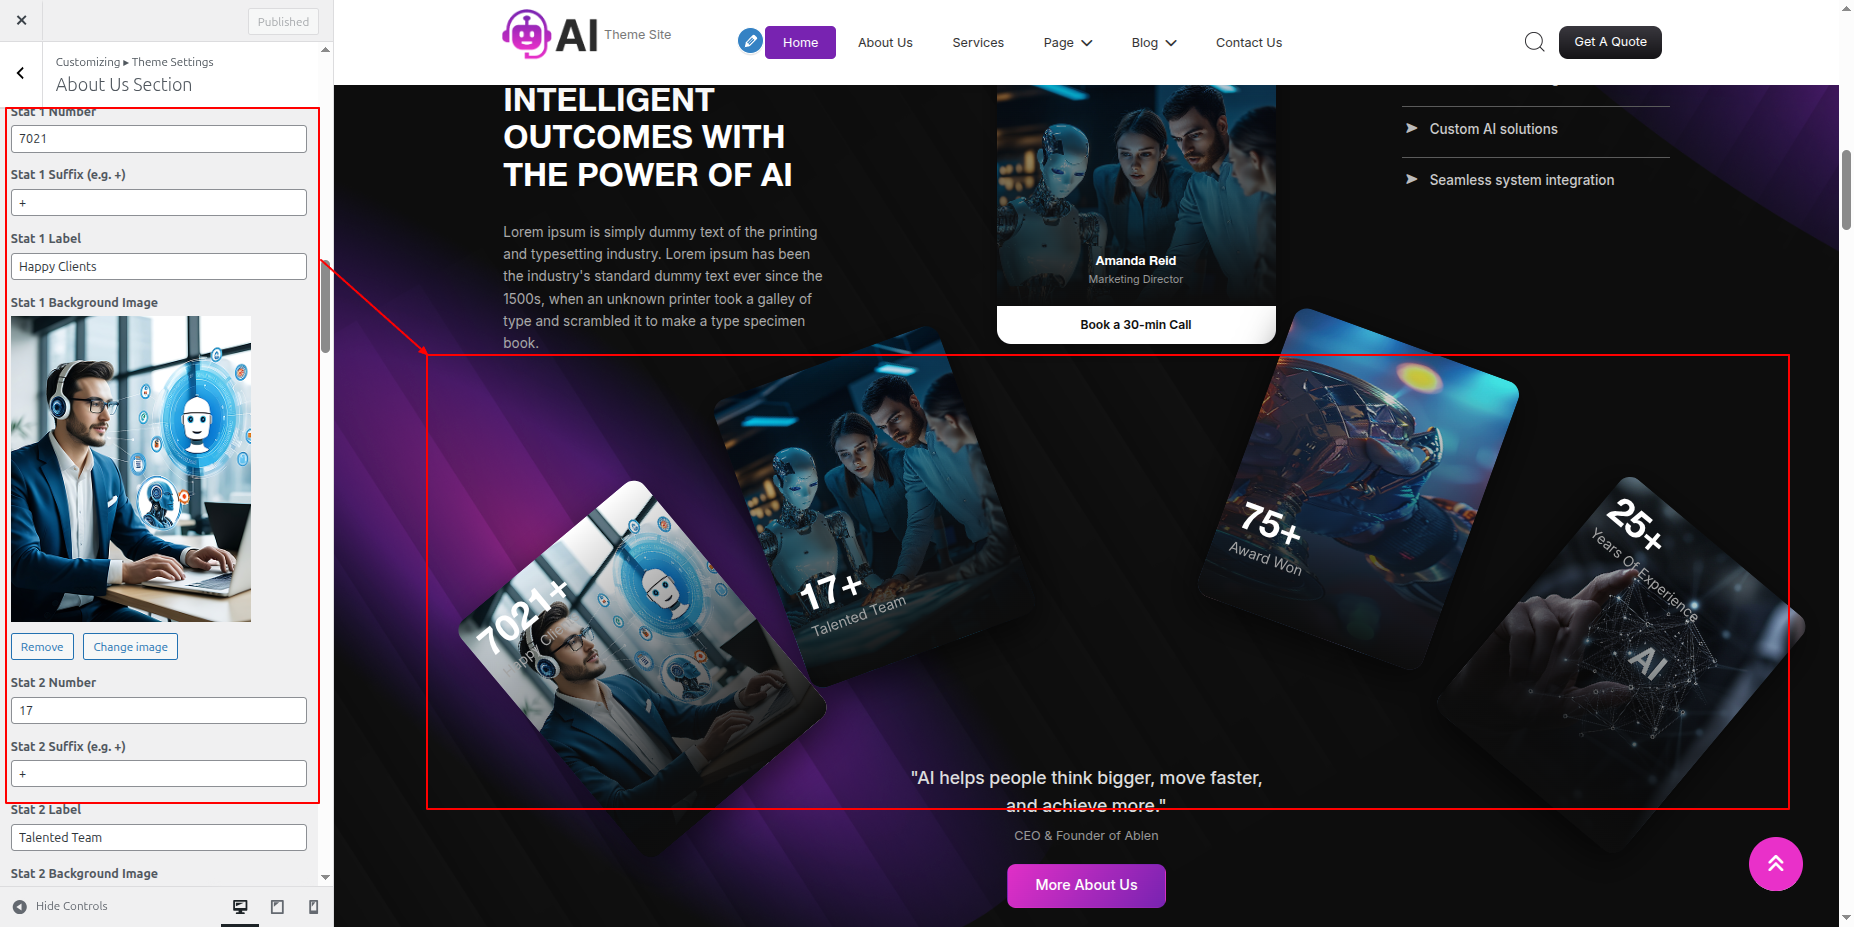
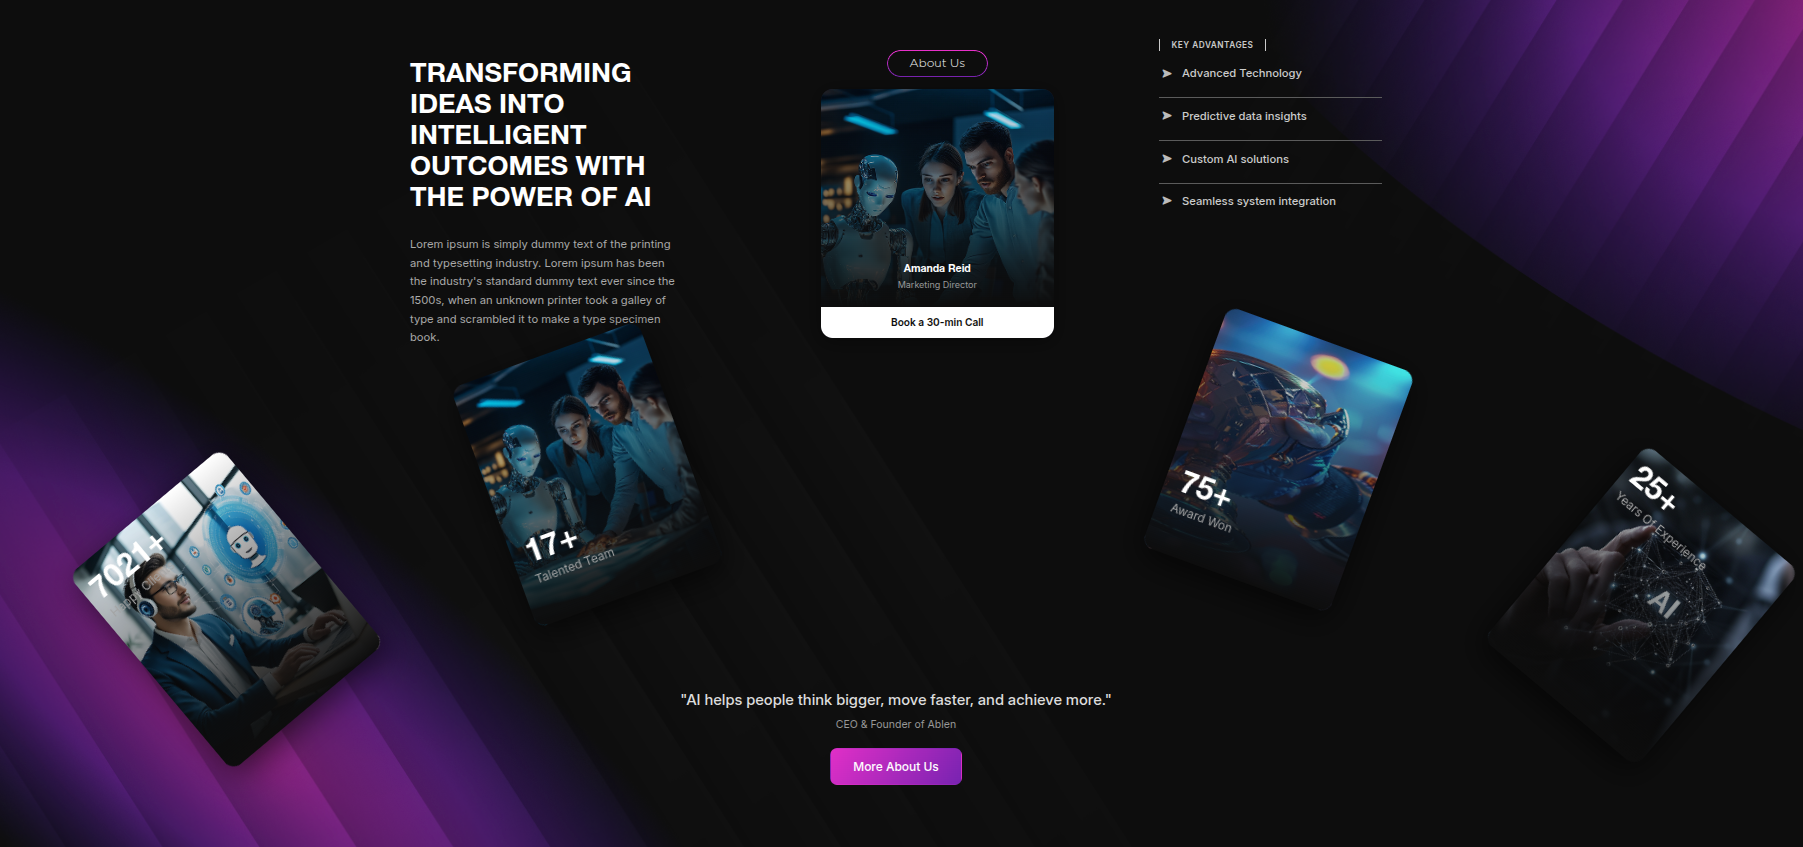
On the front end, it will appear as shown.
To ensure that start the Project Section.
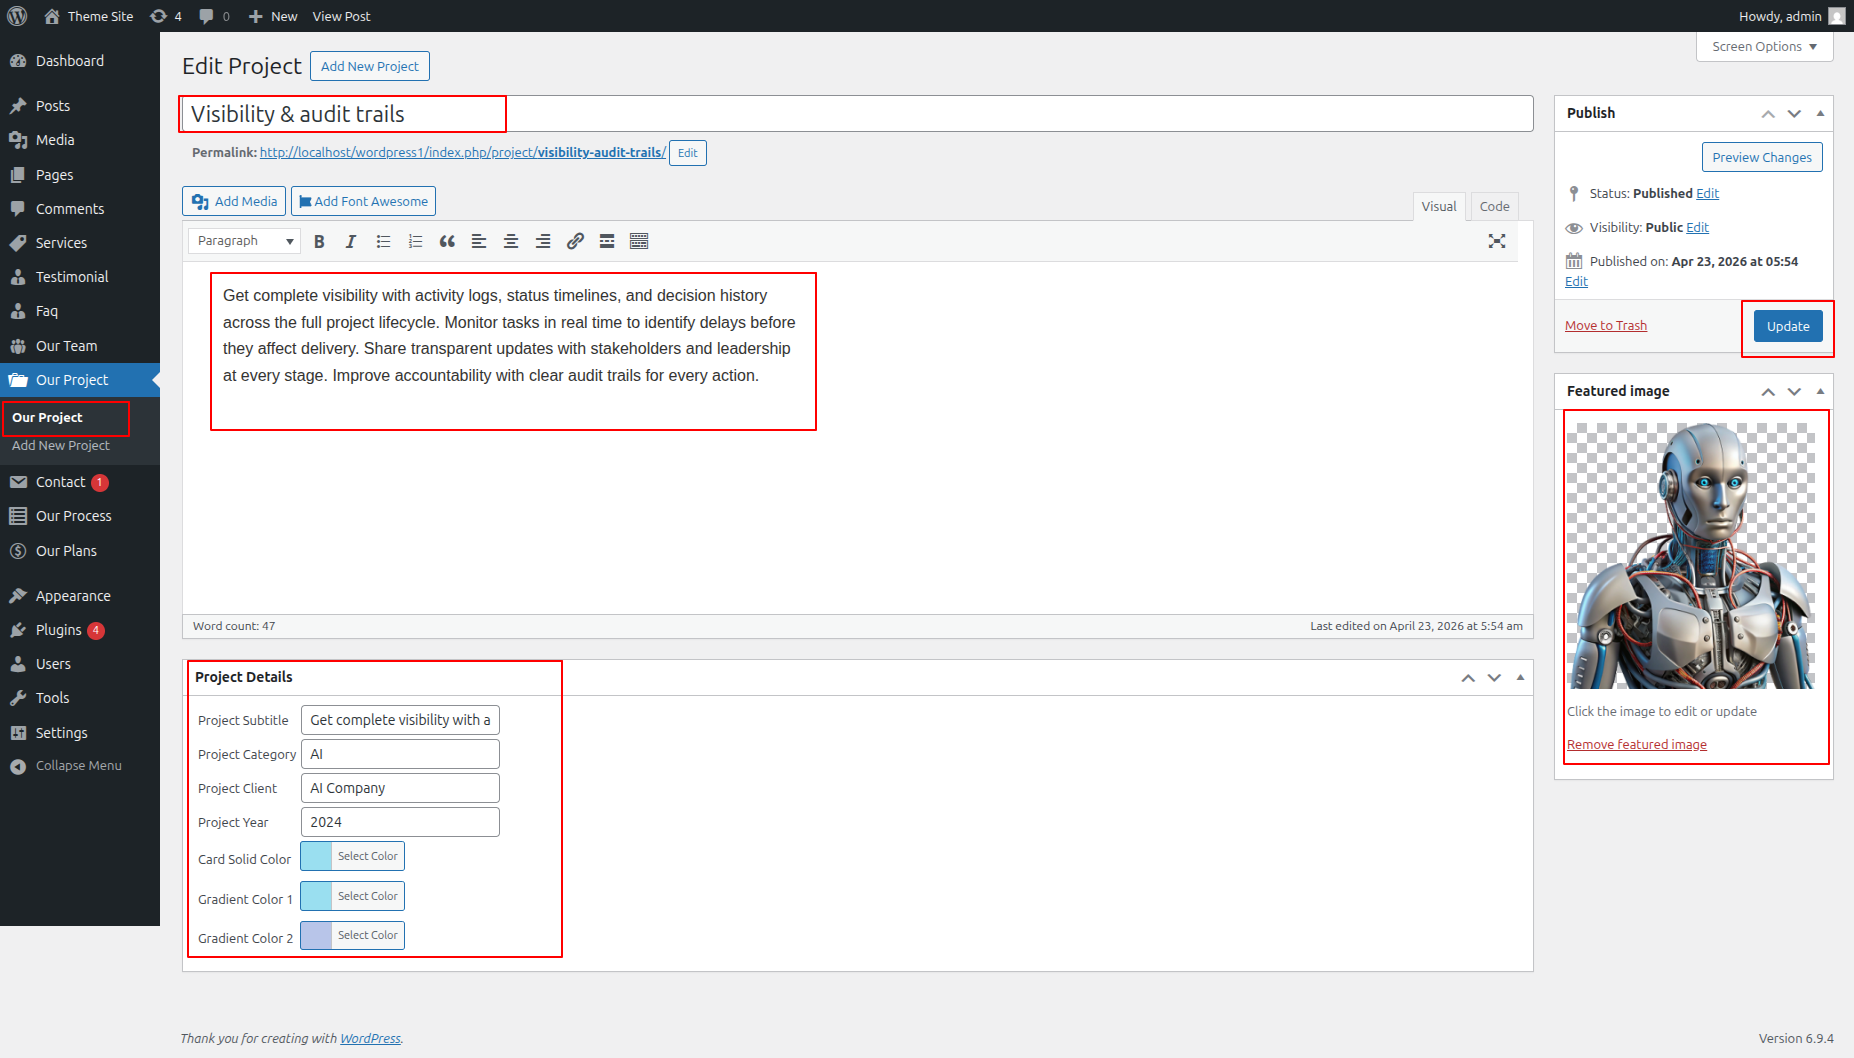
The Project must be established on your WordPress website first.
Installation and activation of the Project Lists Plugin are required for the Project section. The dashboard's Project section will show up after activation.
To ensure that Configuring Move to the Dashboard >> Project >>Tap "Add new."
Select The Appearance → Select The Customize → Move to Theme Settings → Our Project Section
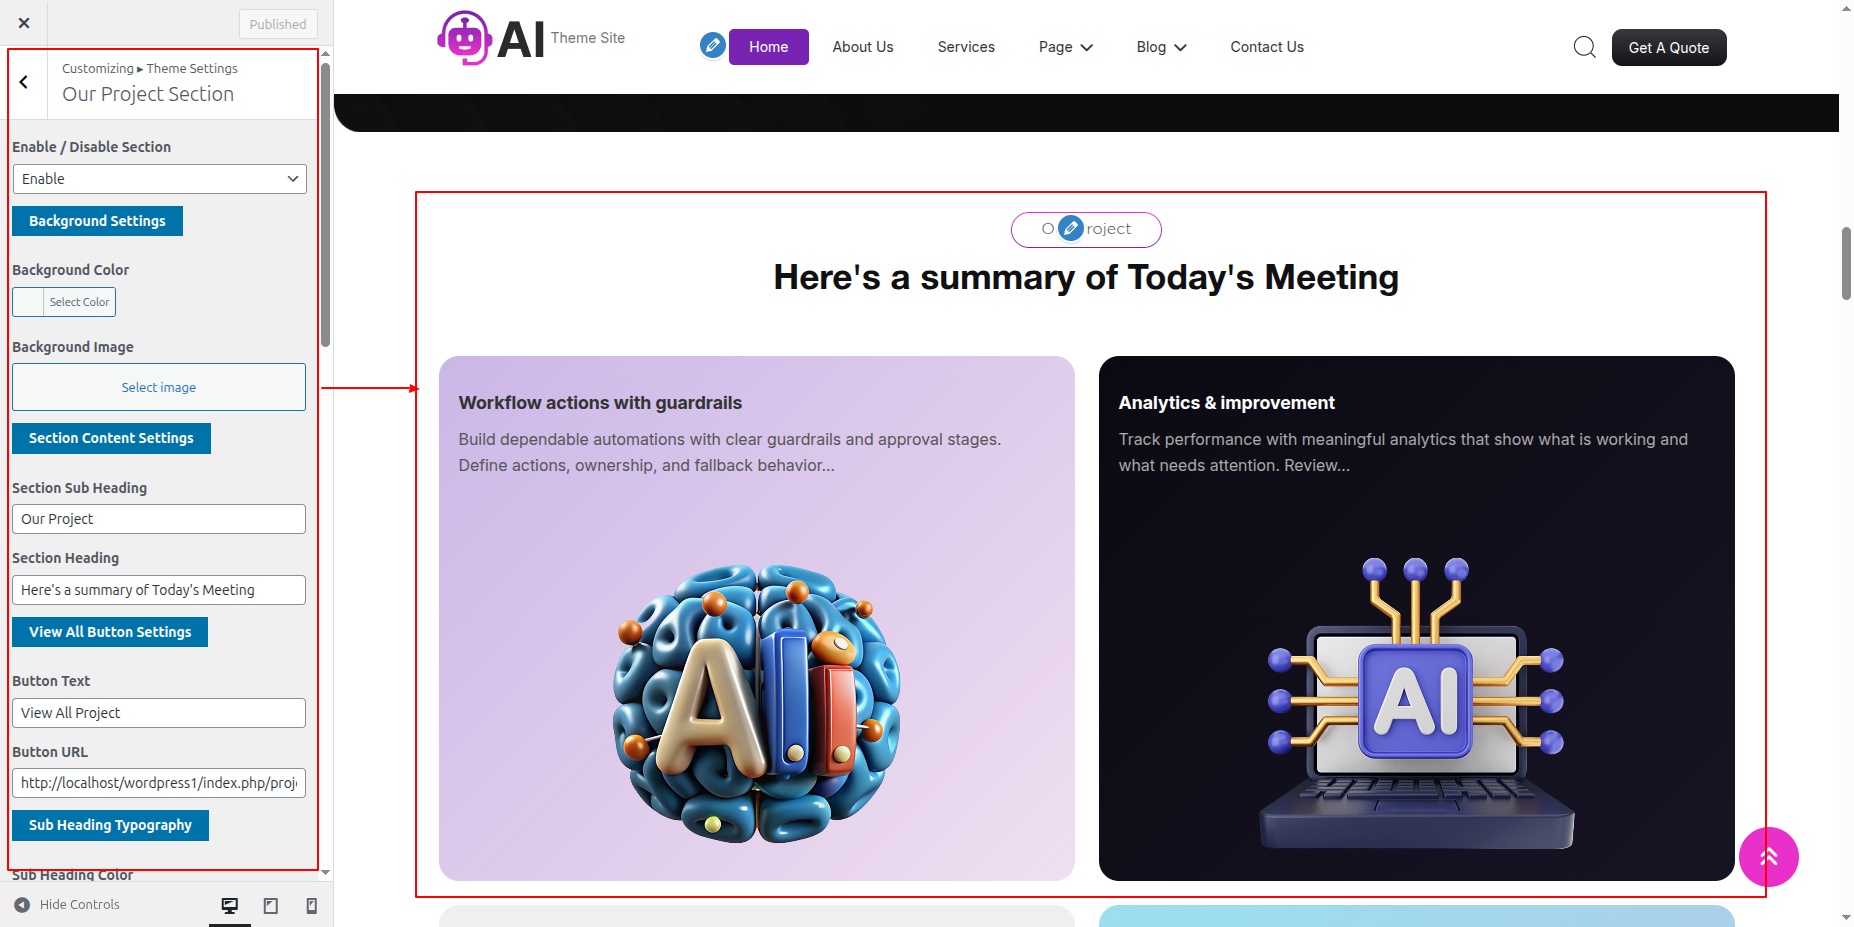
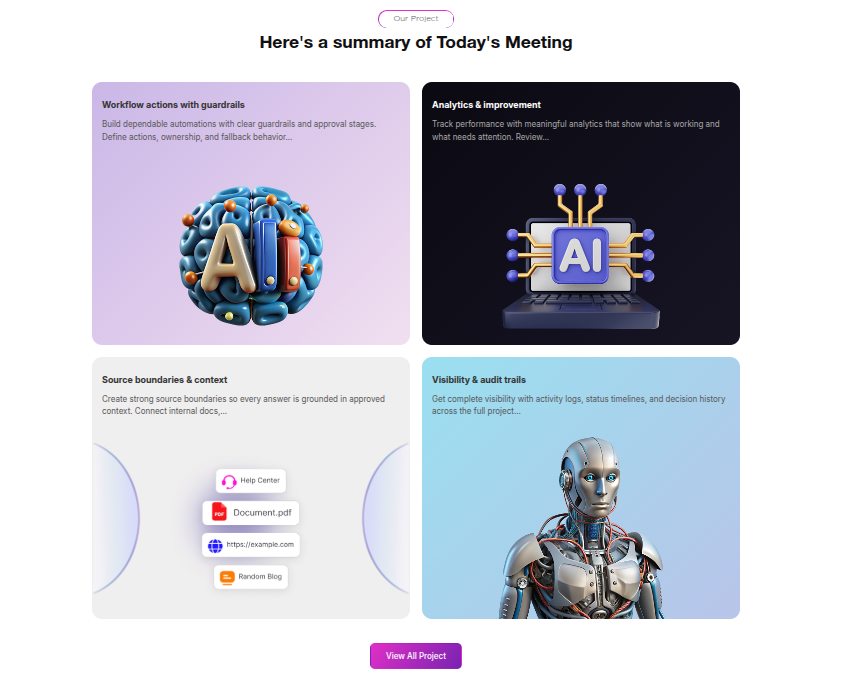
On the front end, it will appear as shown.
To be able to begin with Our Process Section.
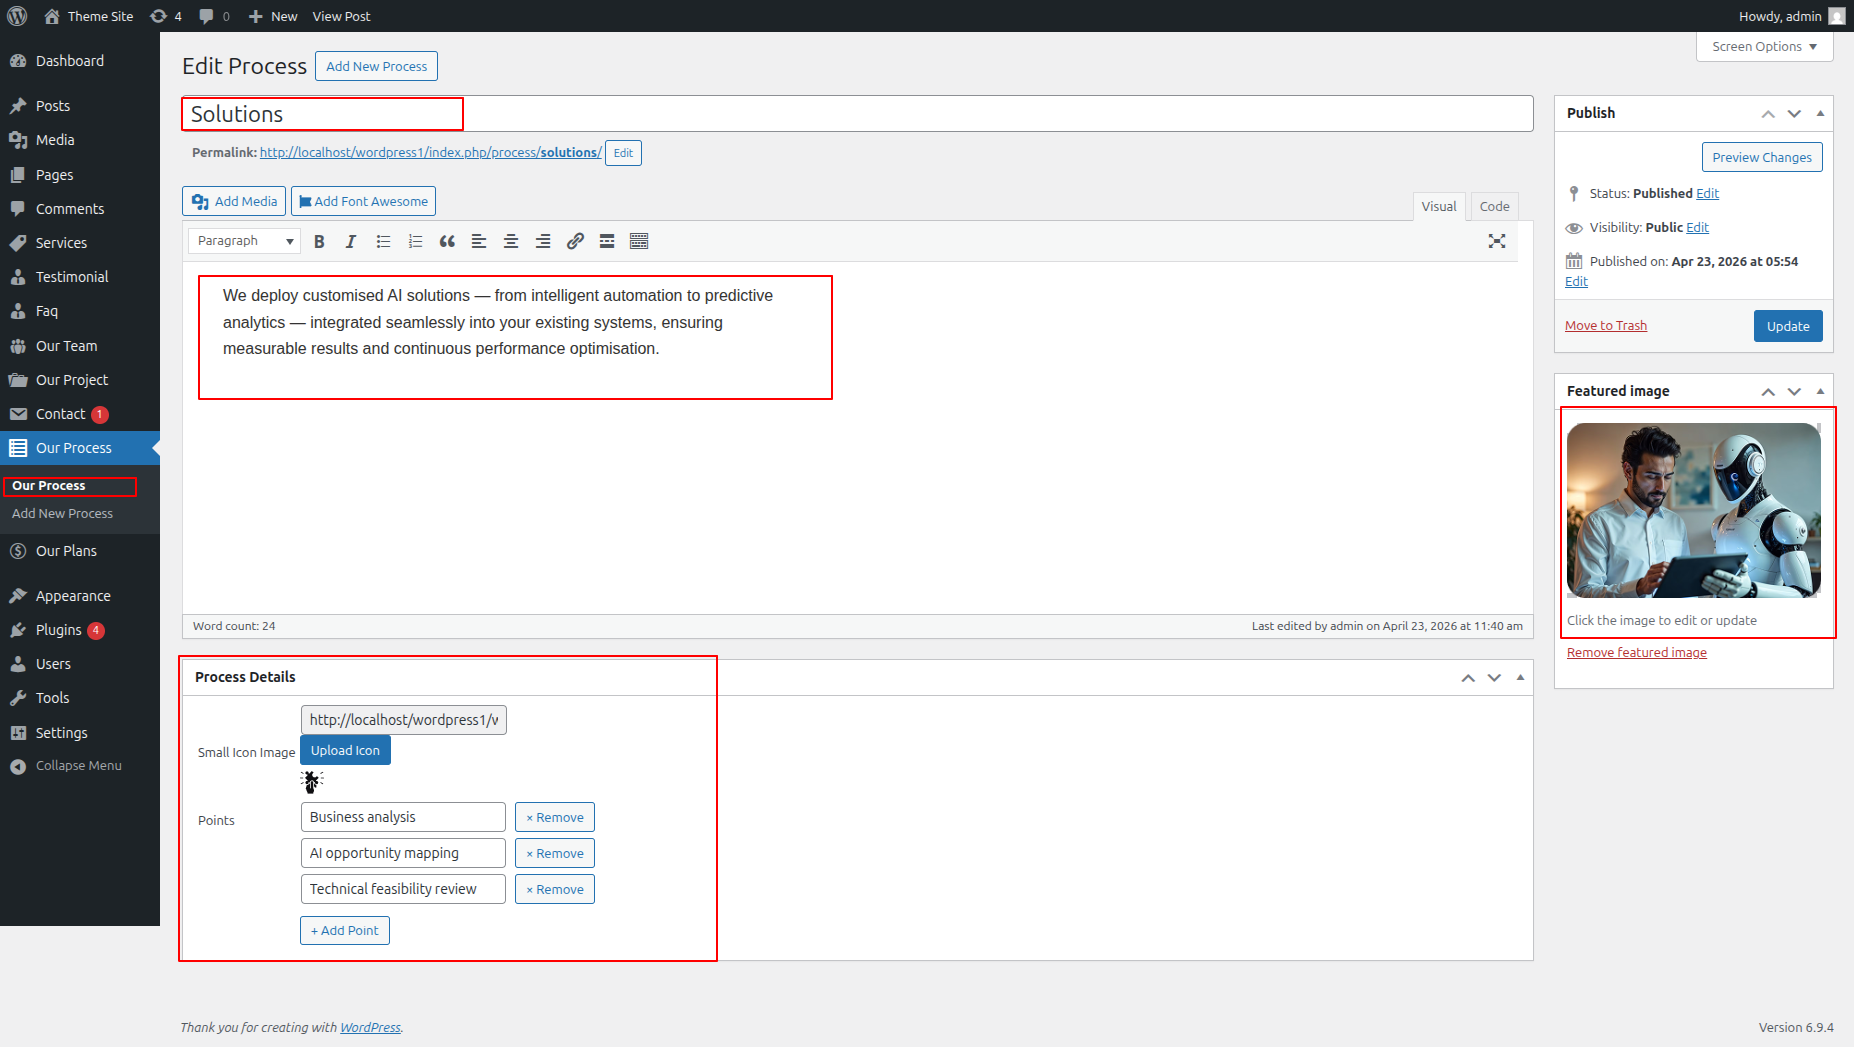
Installation and activation of the Our Process Lists Plugin are required for the Our Process section. The dashboard's Project section will show up after activation.
To ensure that Configuring Move to the Dashboard >> Our Process >>Tap "Add new."
Select The Appearance → Select The Customize → Move to Theme Settings → Our Process Section


On the front end, it will appear as shown.

To ensure that start the Banner Brand Section.
The Banner Brand must be established on your WordPress website first.
Select The Appearance → Select The Customize → Move to Theme Settings → Banner Brand Section
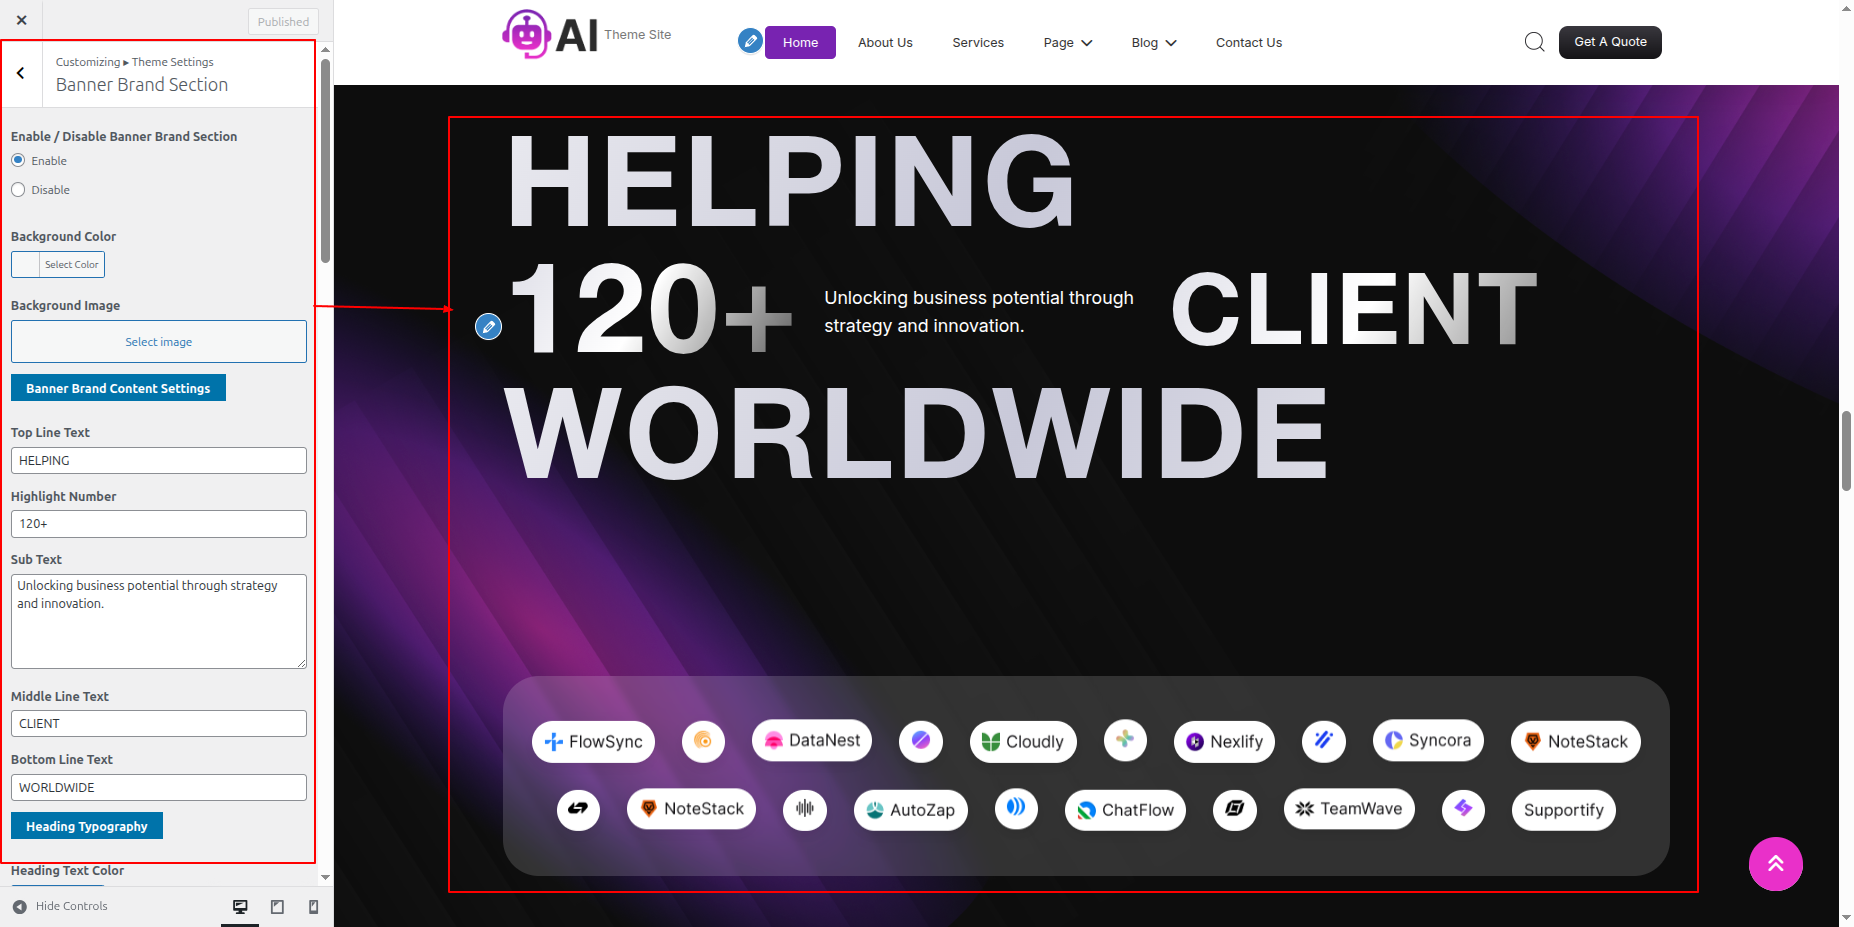
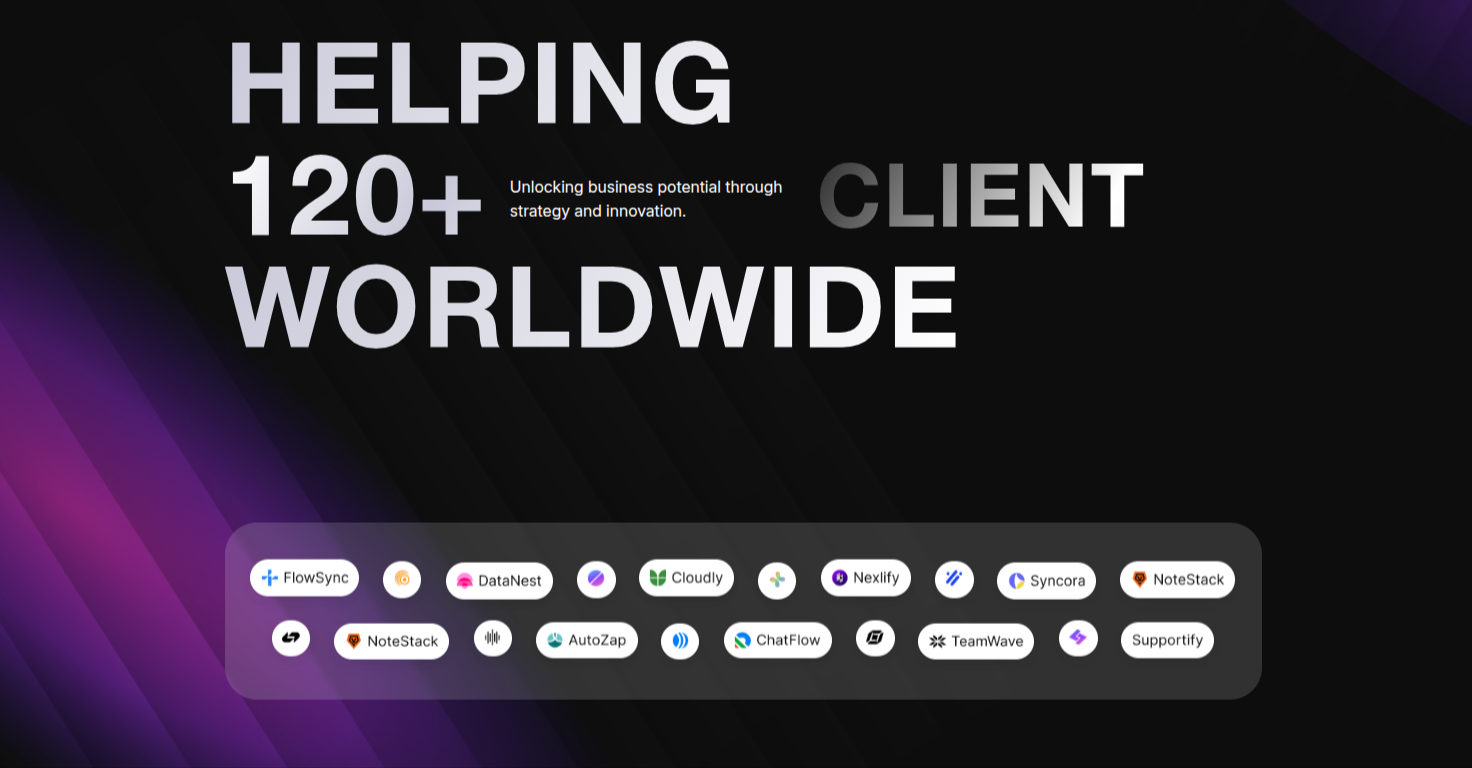
On the front end, it will appear as shown.
Installation and activation of the Our Plans Lists Plugin are required for the Our Plans section. The dashboard's Project section will show up after activation.
You can add Our Plans from here, and the Our Plans with the most sales will appear in the Section.
To Add Products You need to go to
Dashboard → Our Plans → Add New

Select The Appearance → Select The Customize → Move to Theme Settings → Our Plans Section
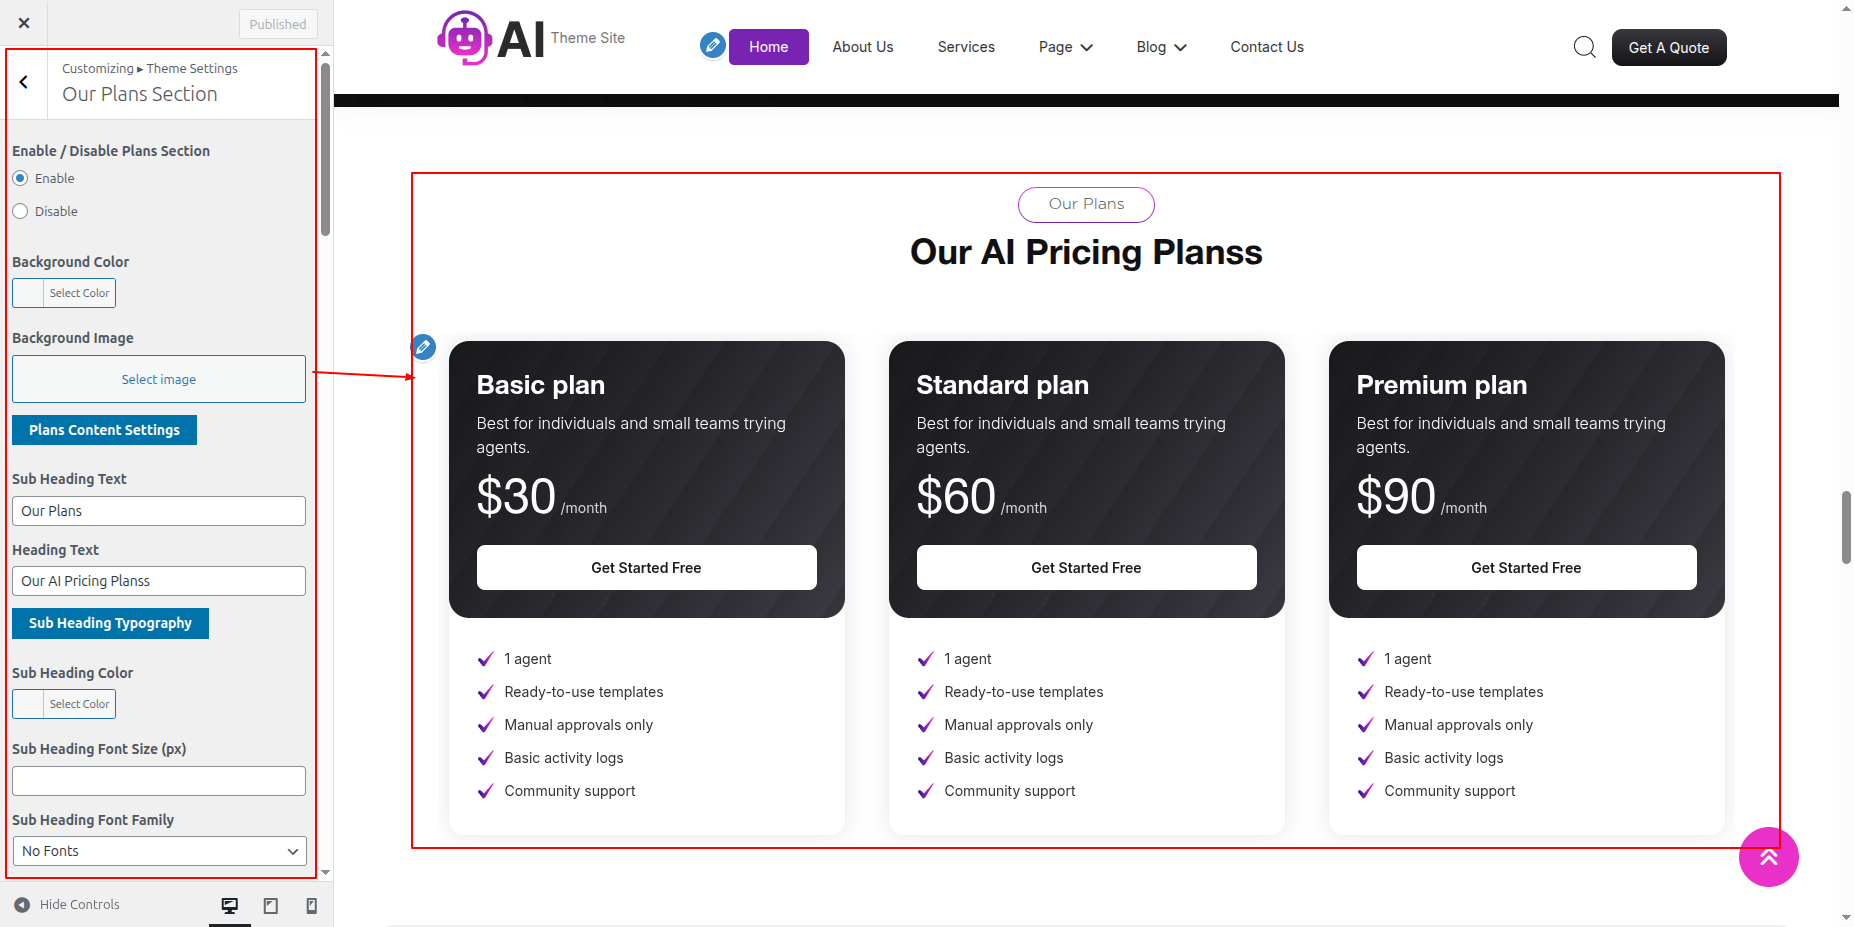
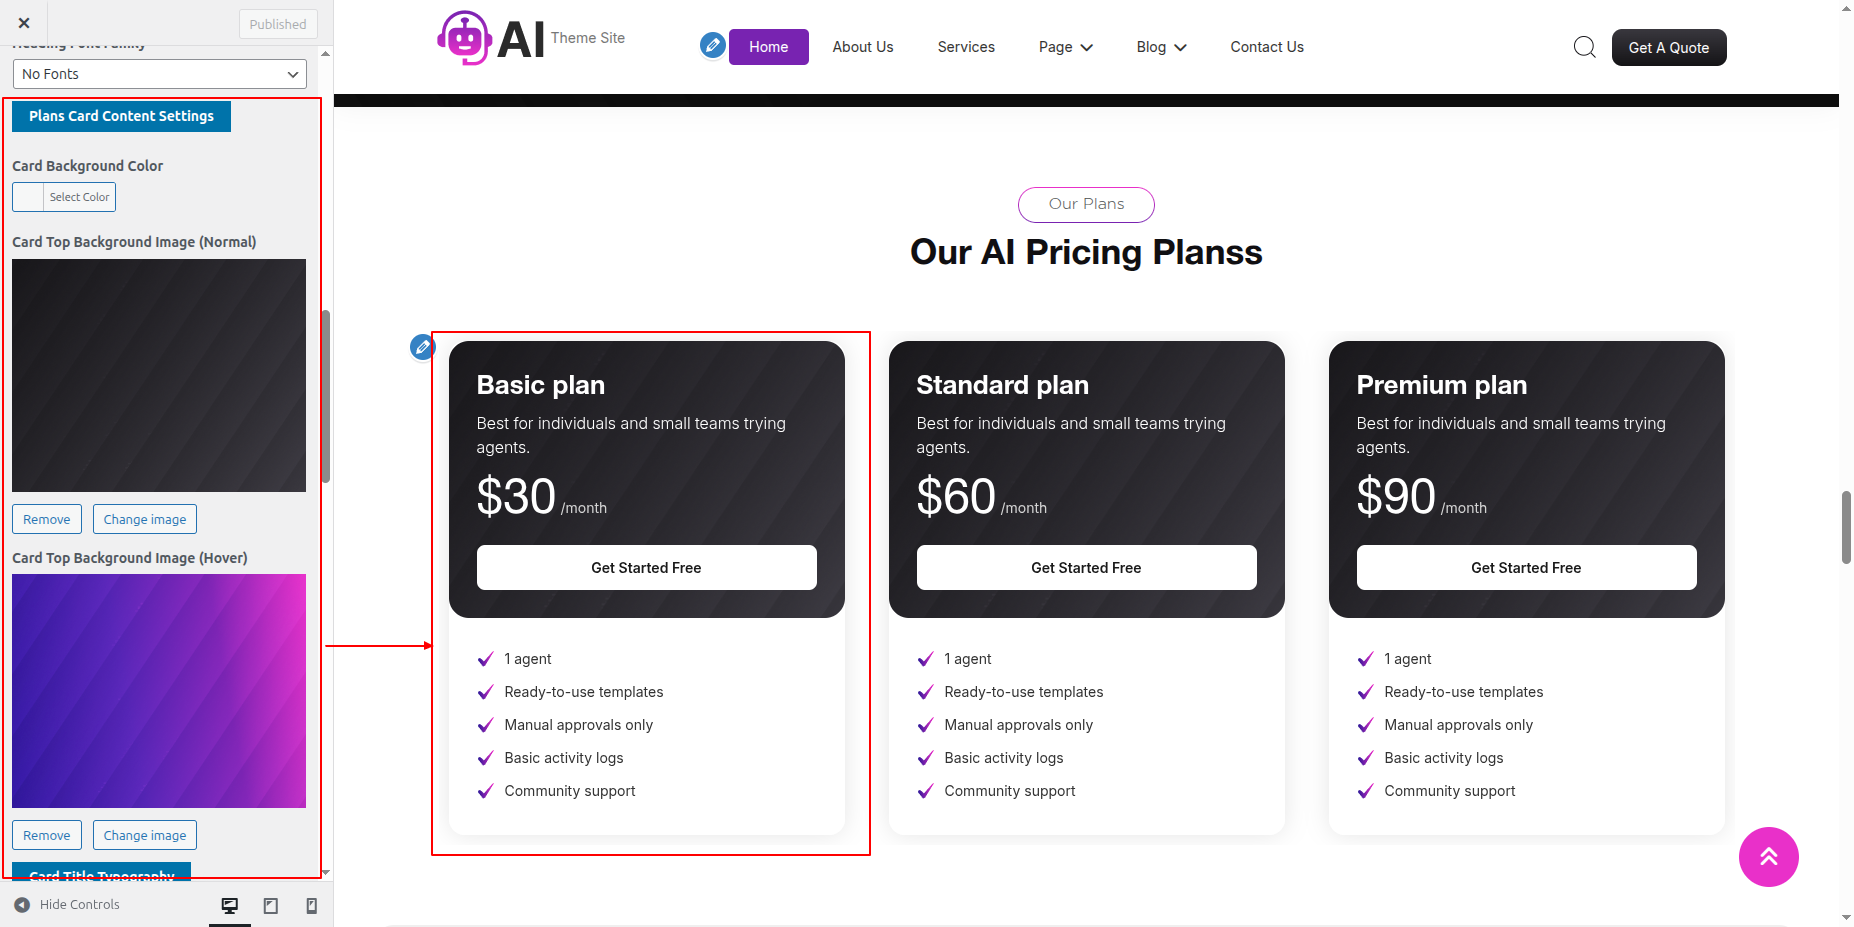
On the front end, it will appear as shown.

To ensure that start the Testimonial Section.
The testimonial must be established on your WordPress website first.
Installation and activation of the Artifical Intelligence Pro Posttype Plugin are required for the Testimonial section. The dashboard's Testimonial section will show up after activation.
To ensure that Configuring Move to the Dashboard in the next section. >> Testimonial >>Tap "Add new."
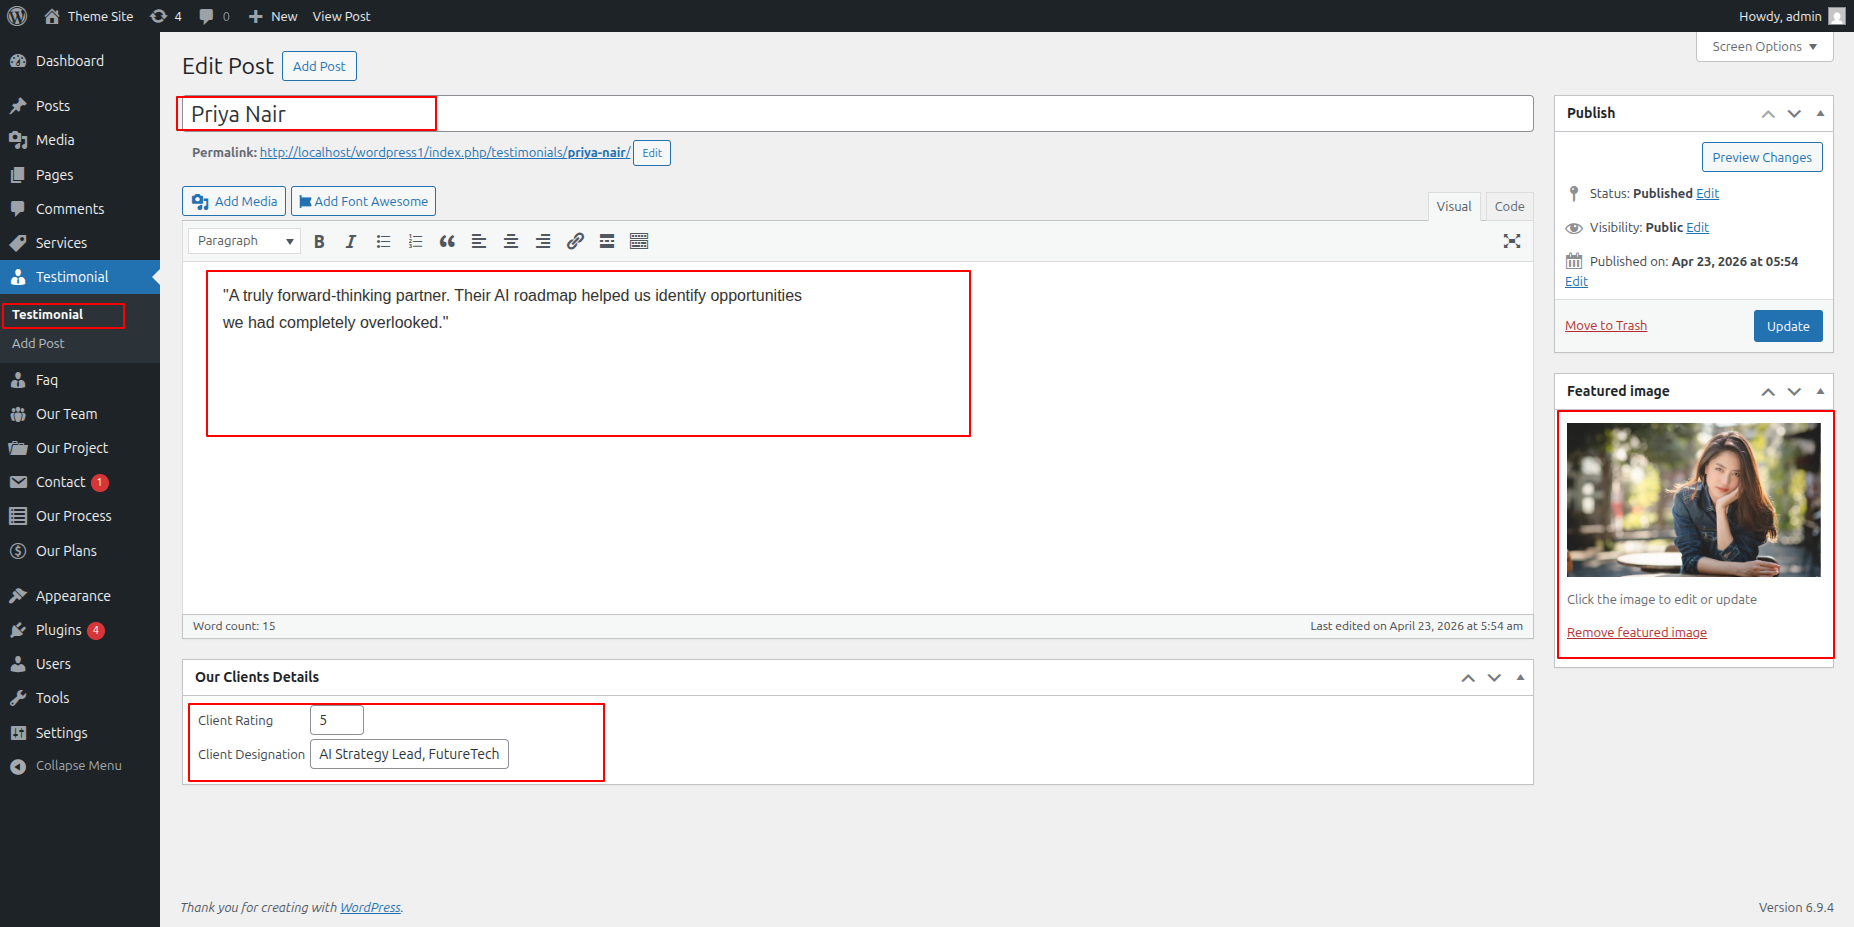
Select The Appearance → Select The Customize → Move to Theme Settings → Testimonial Section
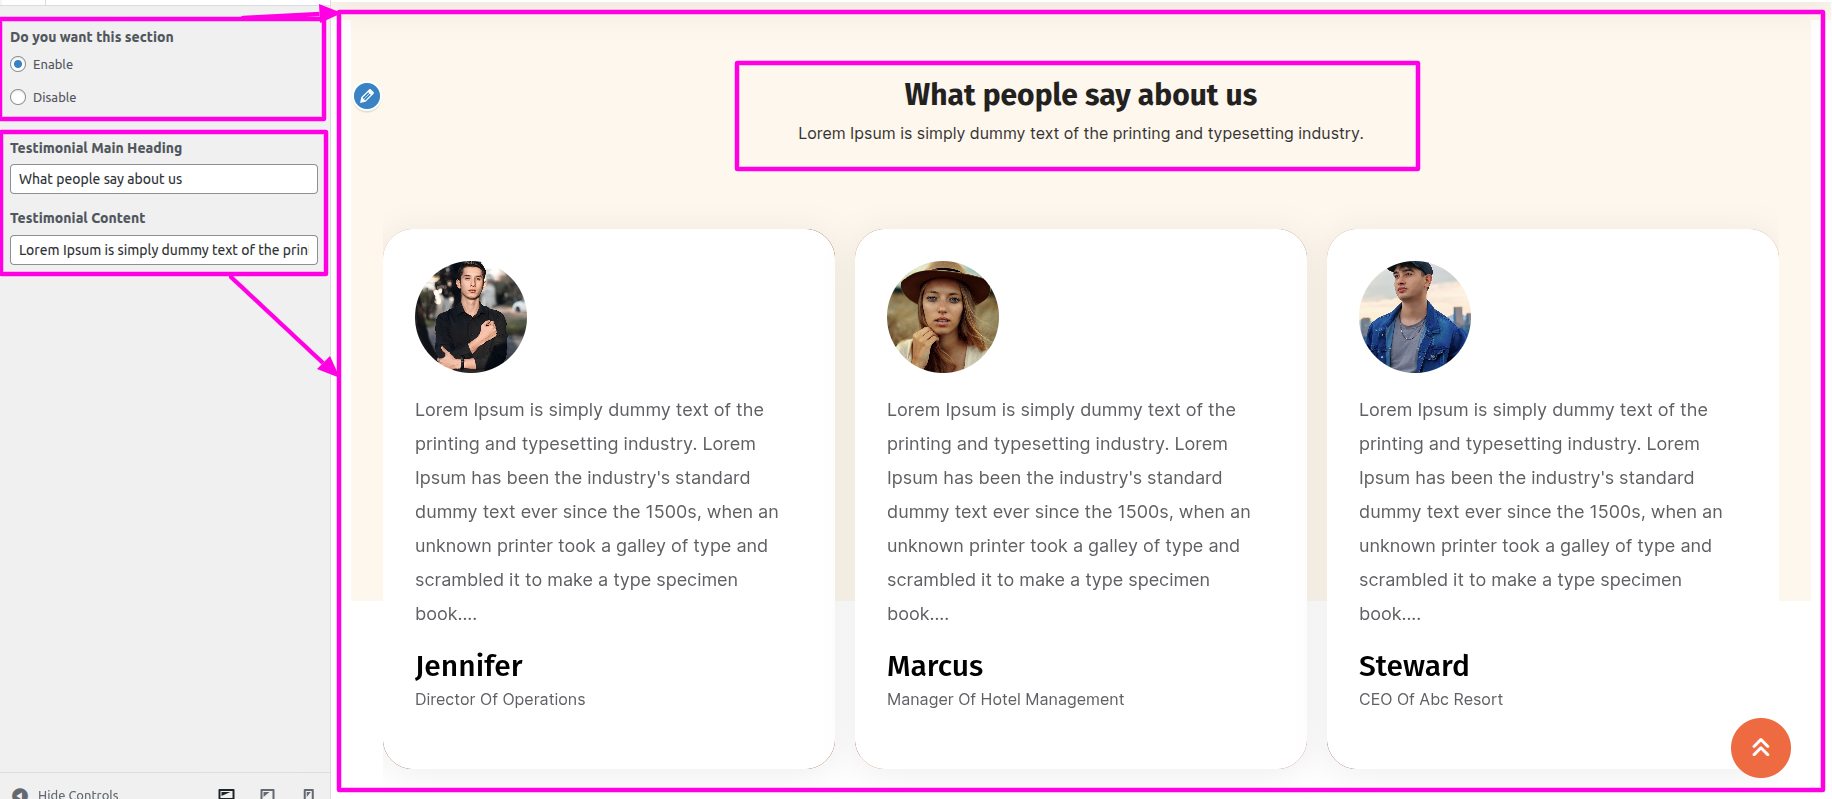
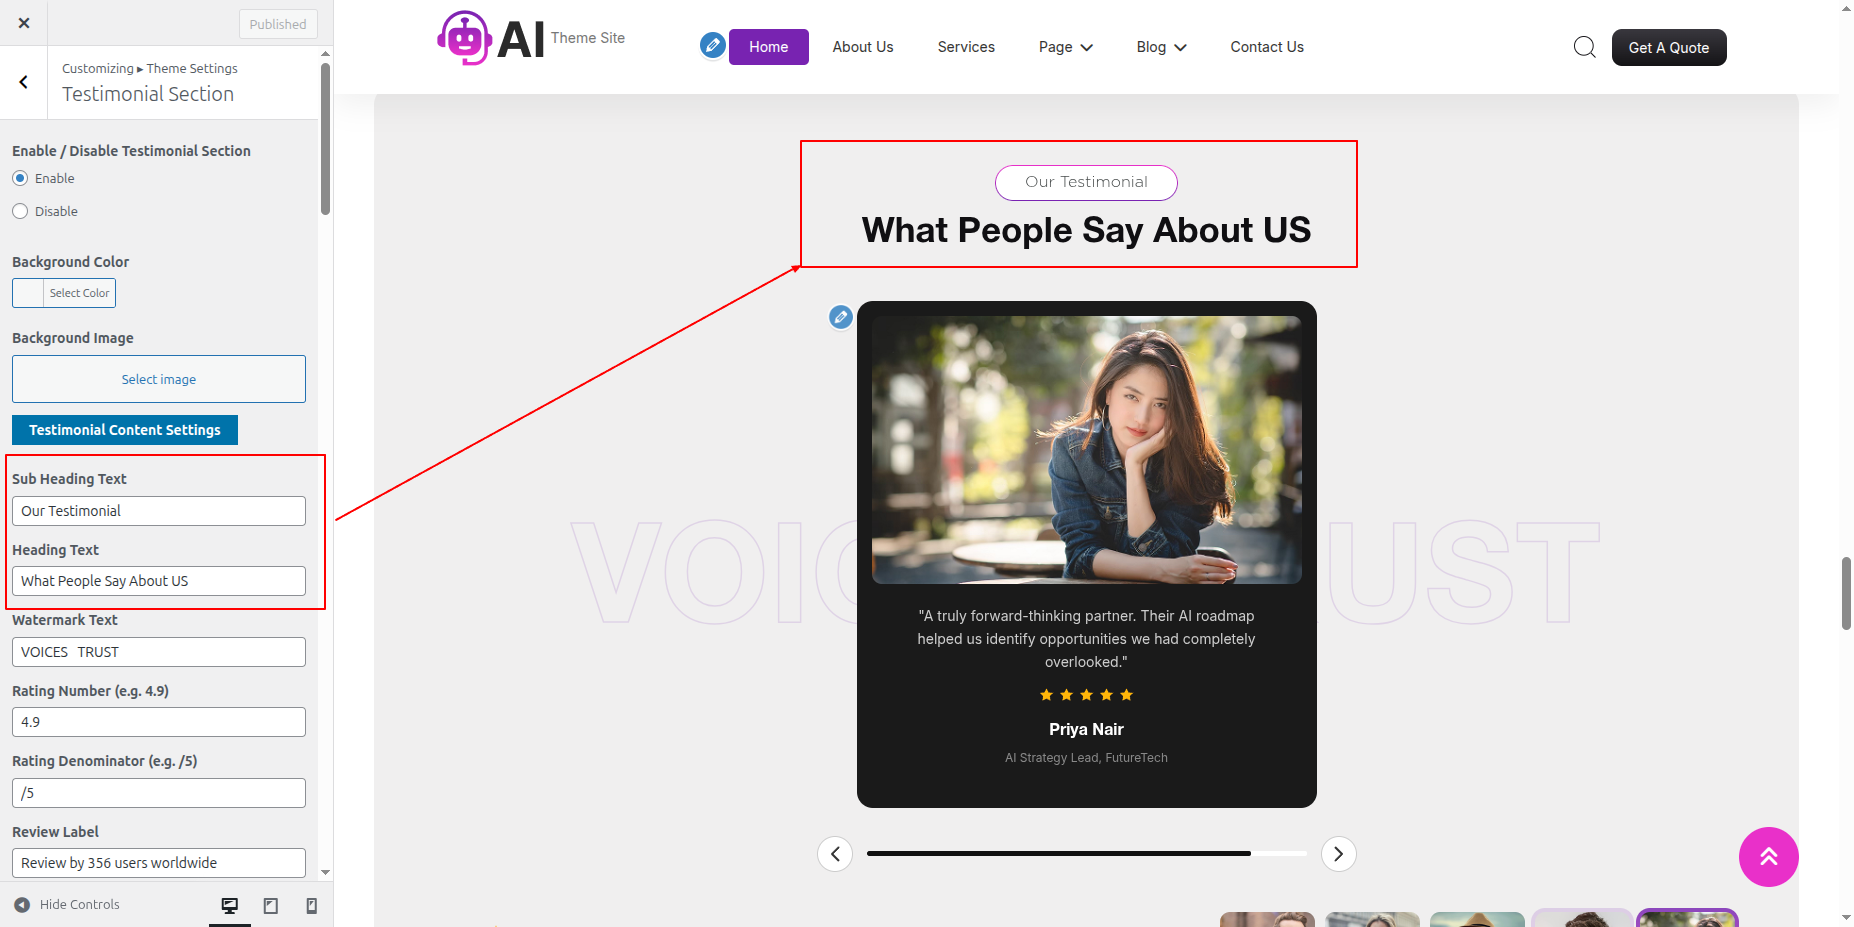
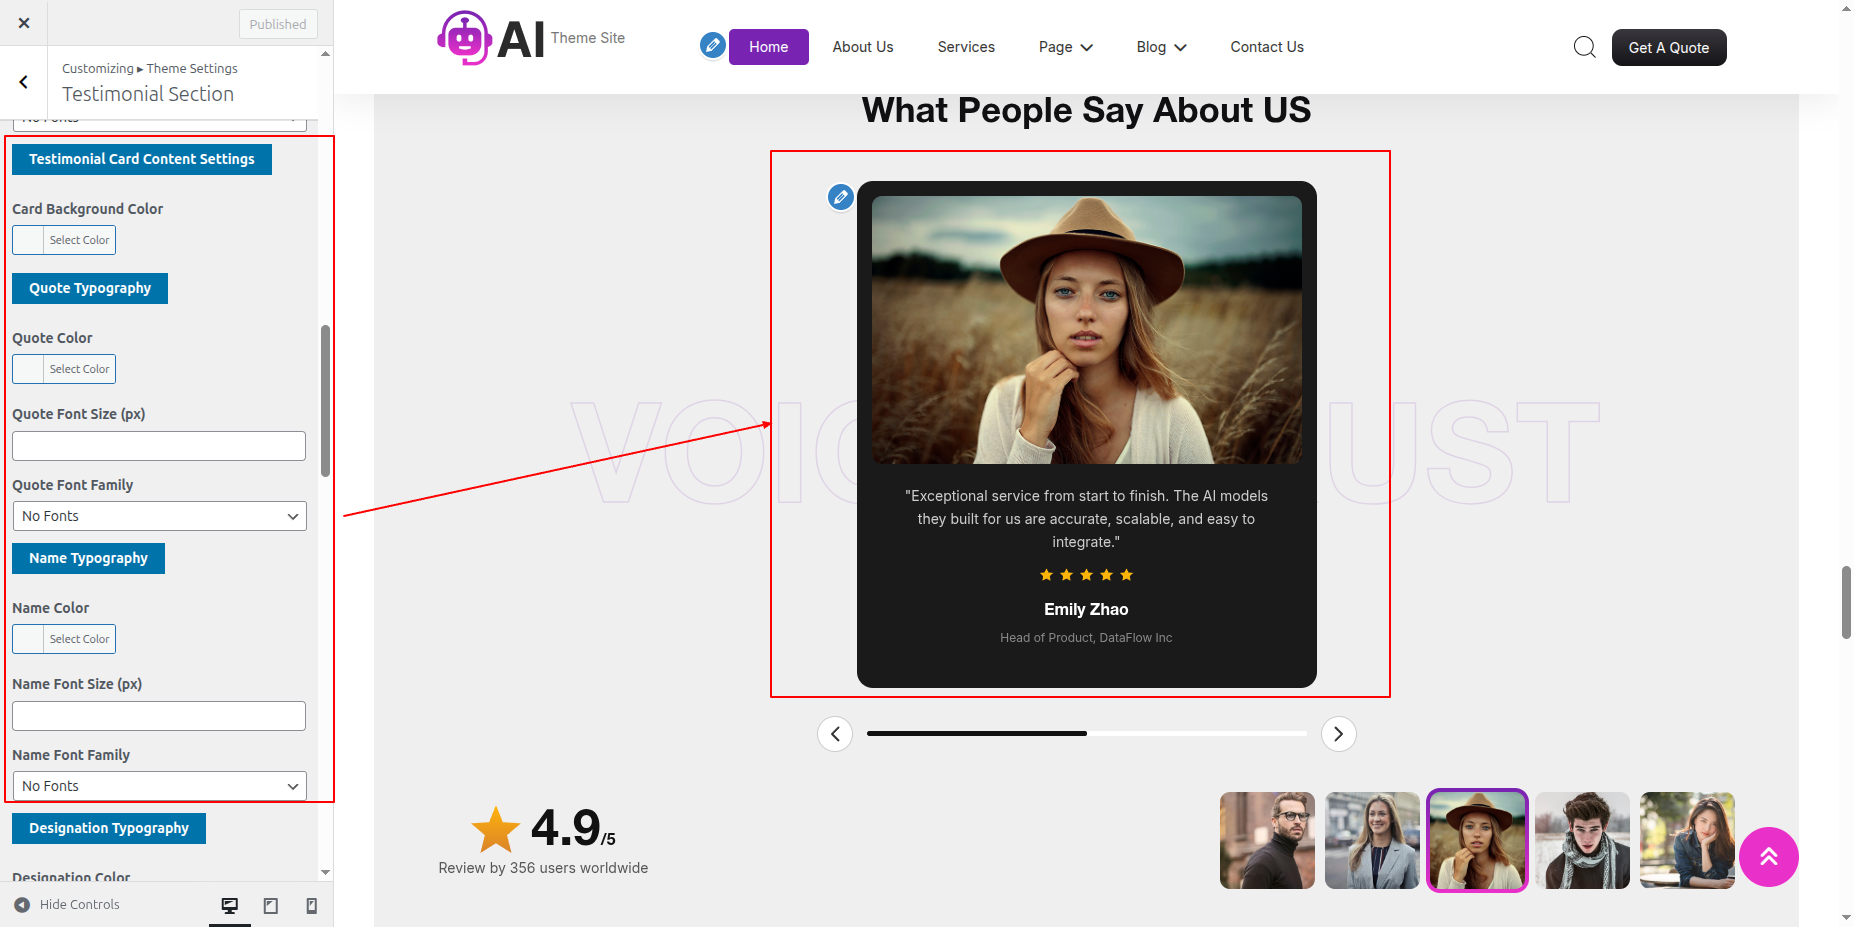
On the front end, it will appear as shown.
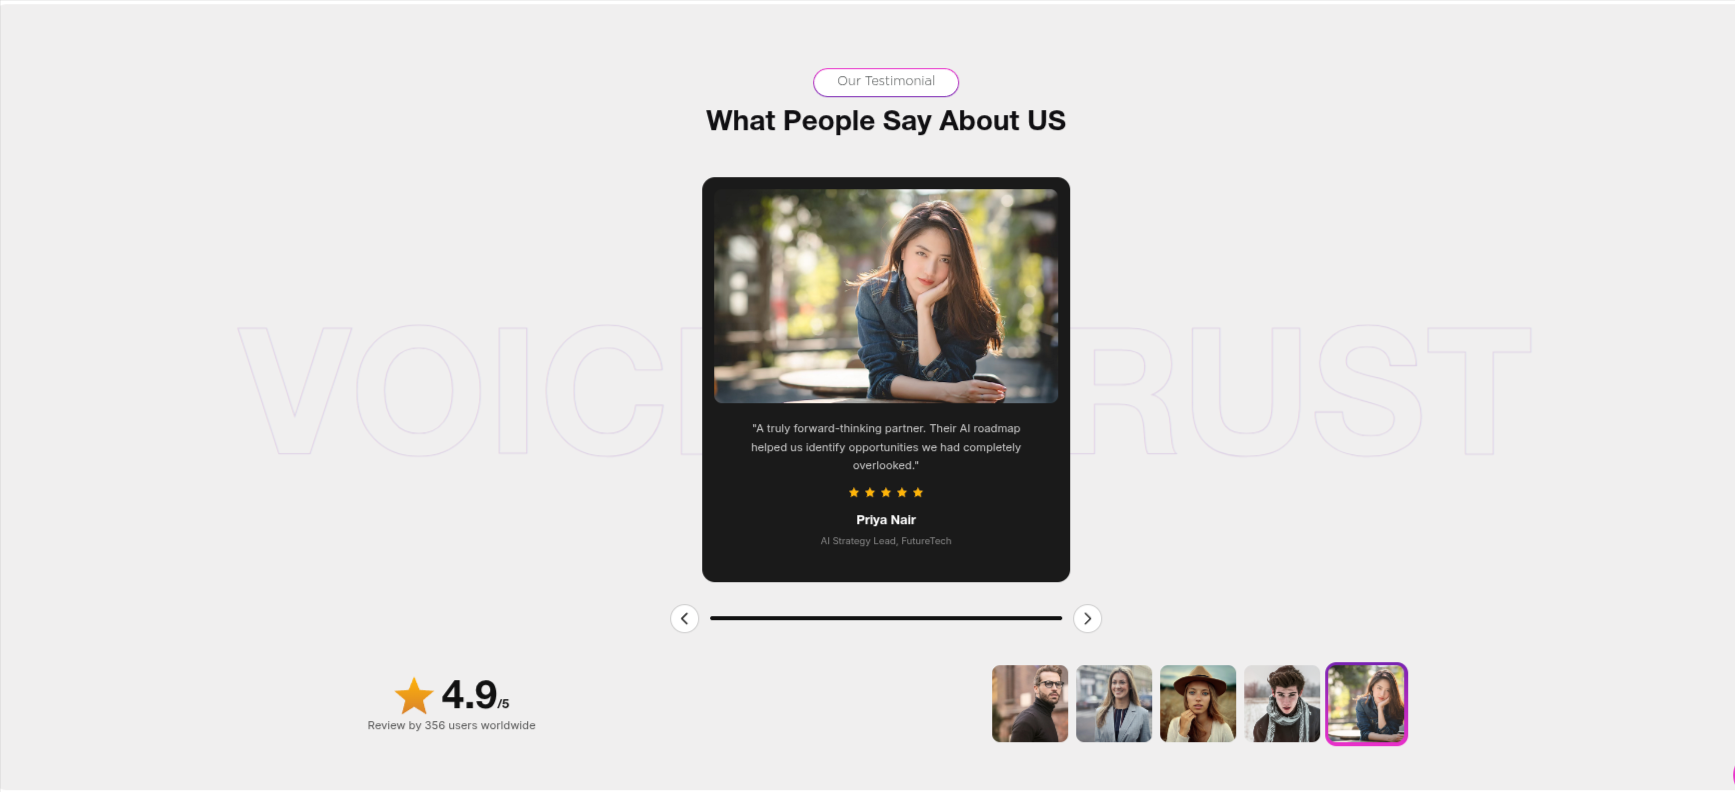
To ensure that start the team Section.
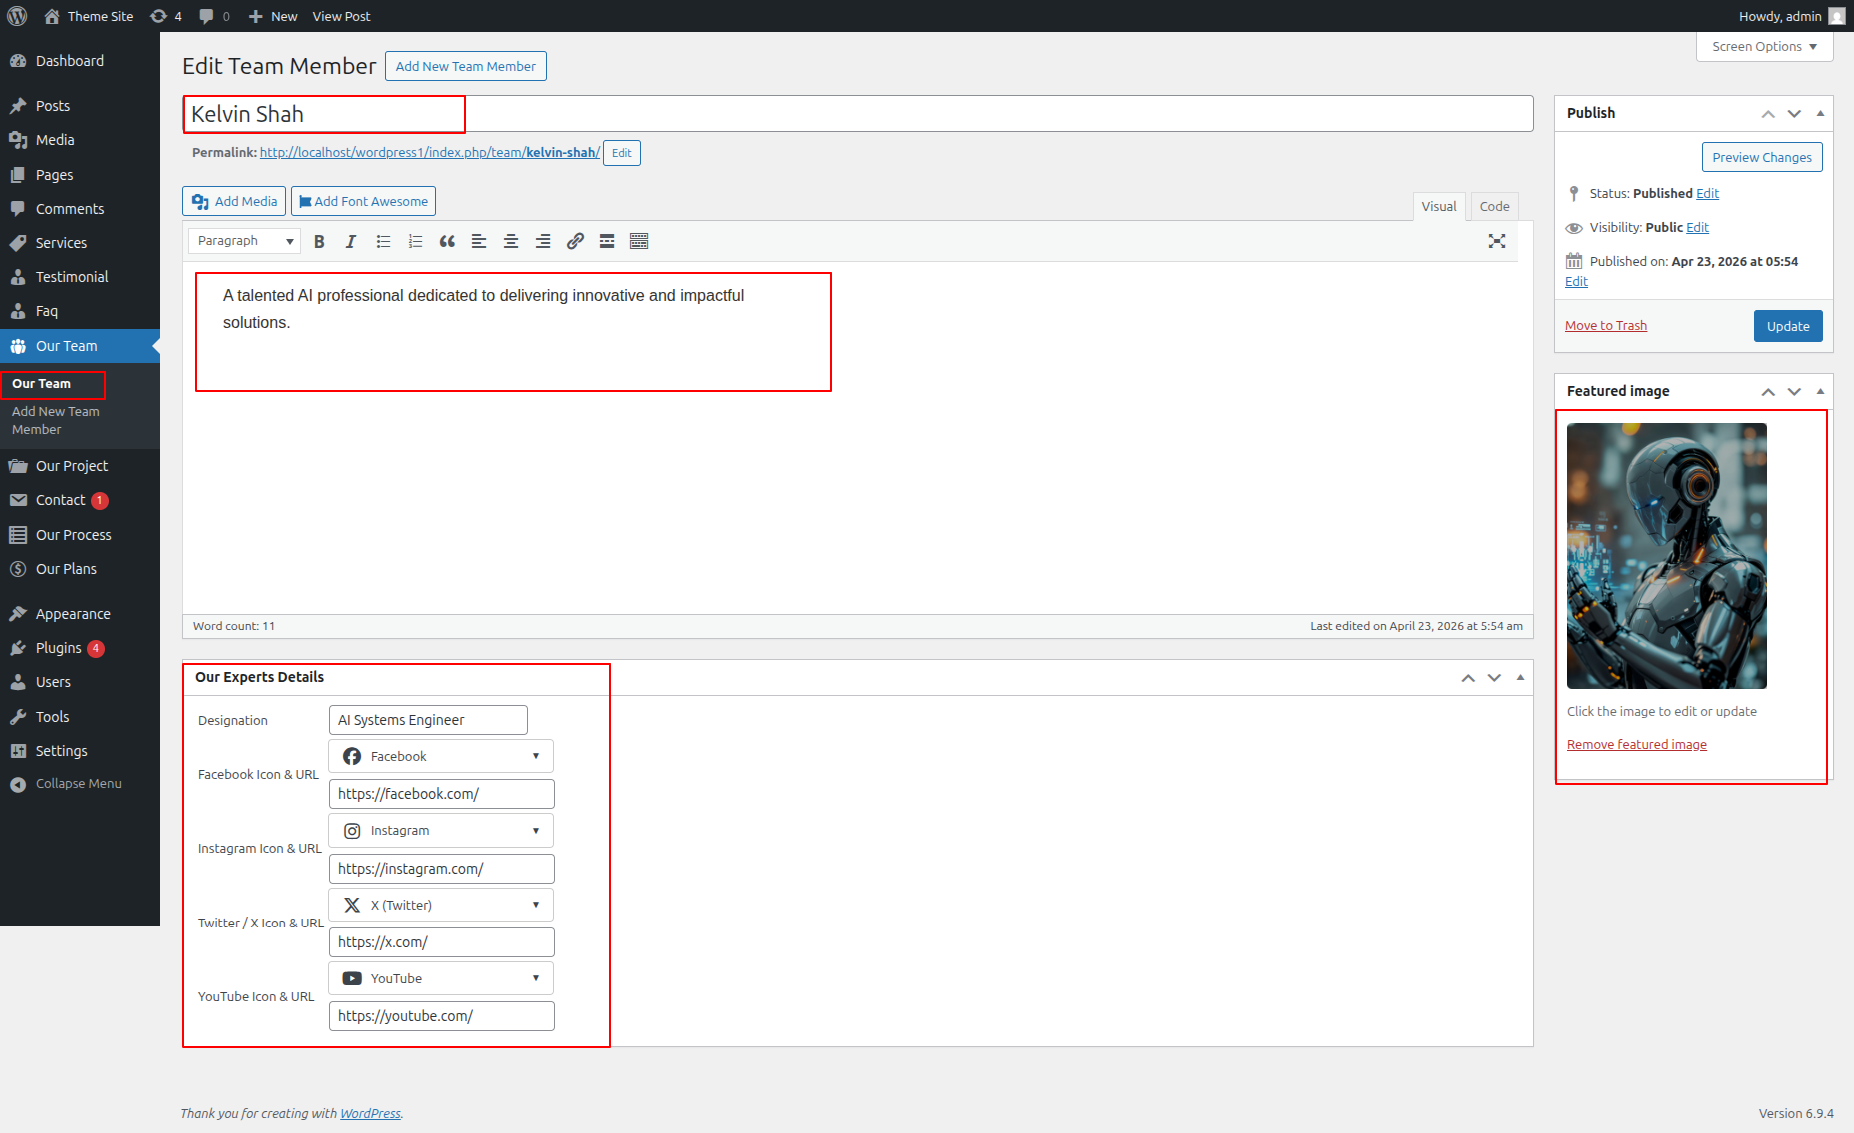
The team must be established on your WordPress website first.
Installation and activation of the Artifical Intelligence Pro Posttype Plugin are required for the team section. The dashboard's team section will show up after activation.
To ensure that Configuring Move to the Dashboard in the next section. >> Our Team >>Tap "Add new."
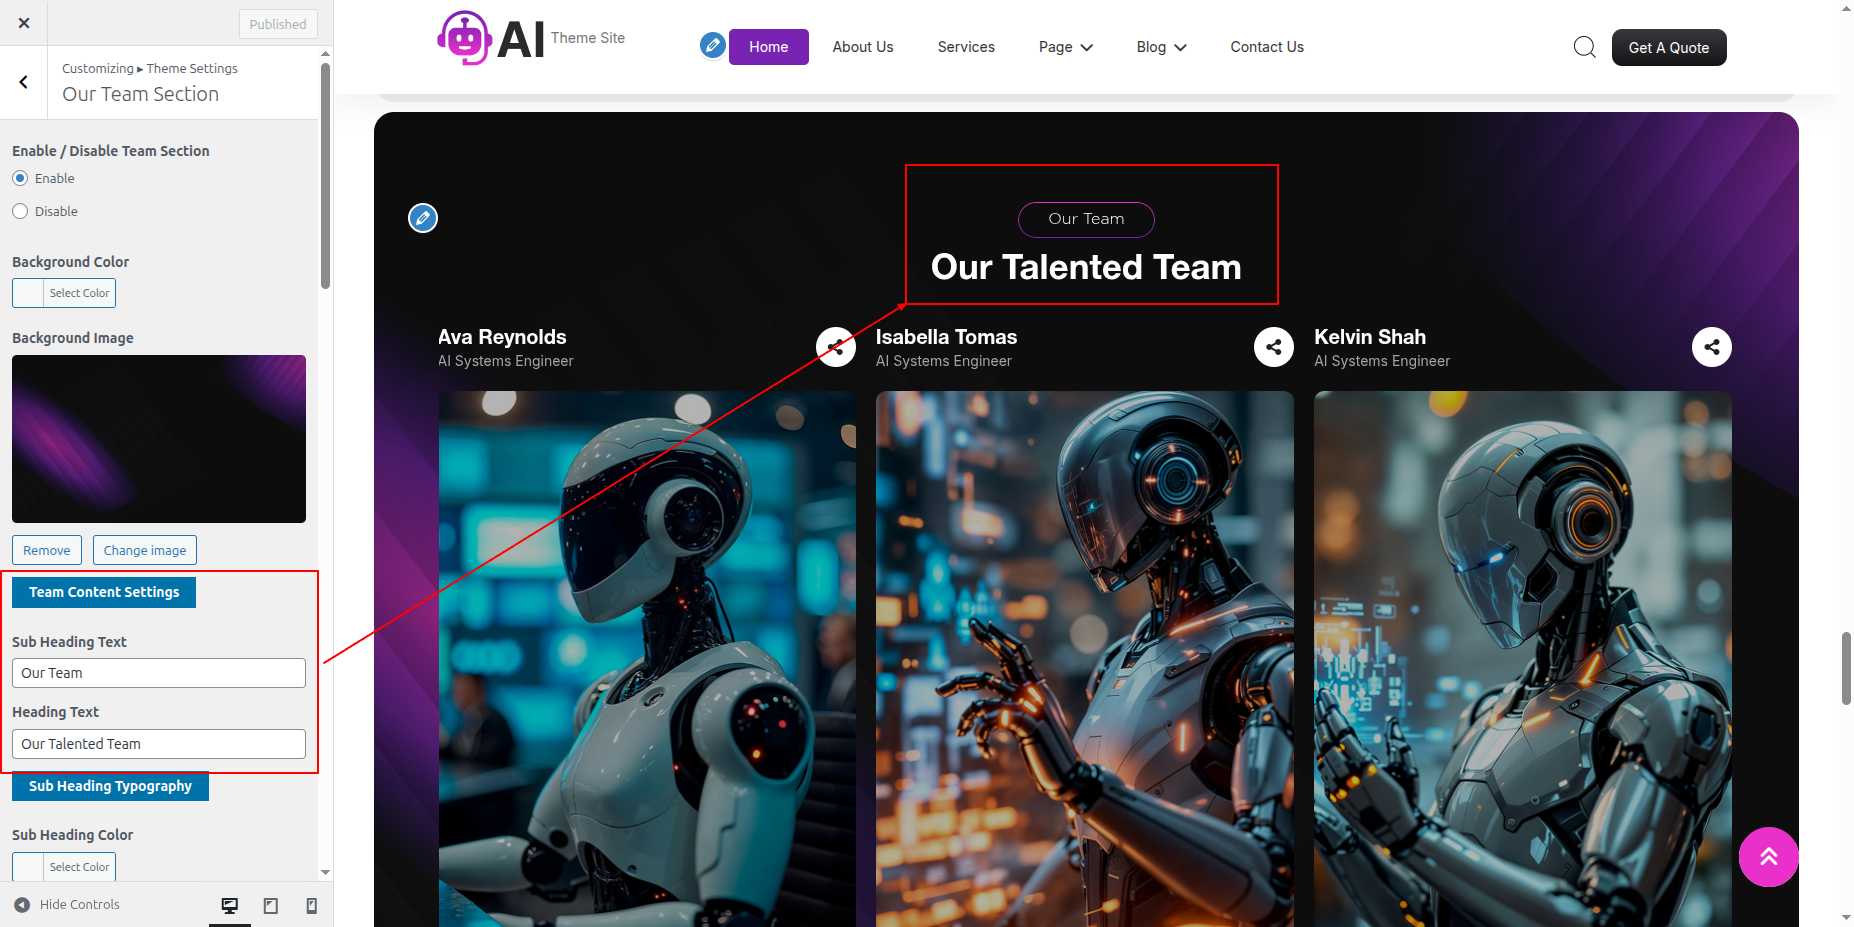
Select The Appearance → Select The Customize → Move to Theme Settings → Our Team Section
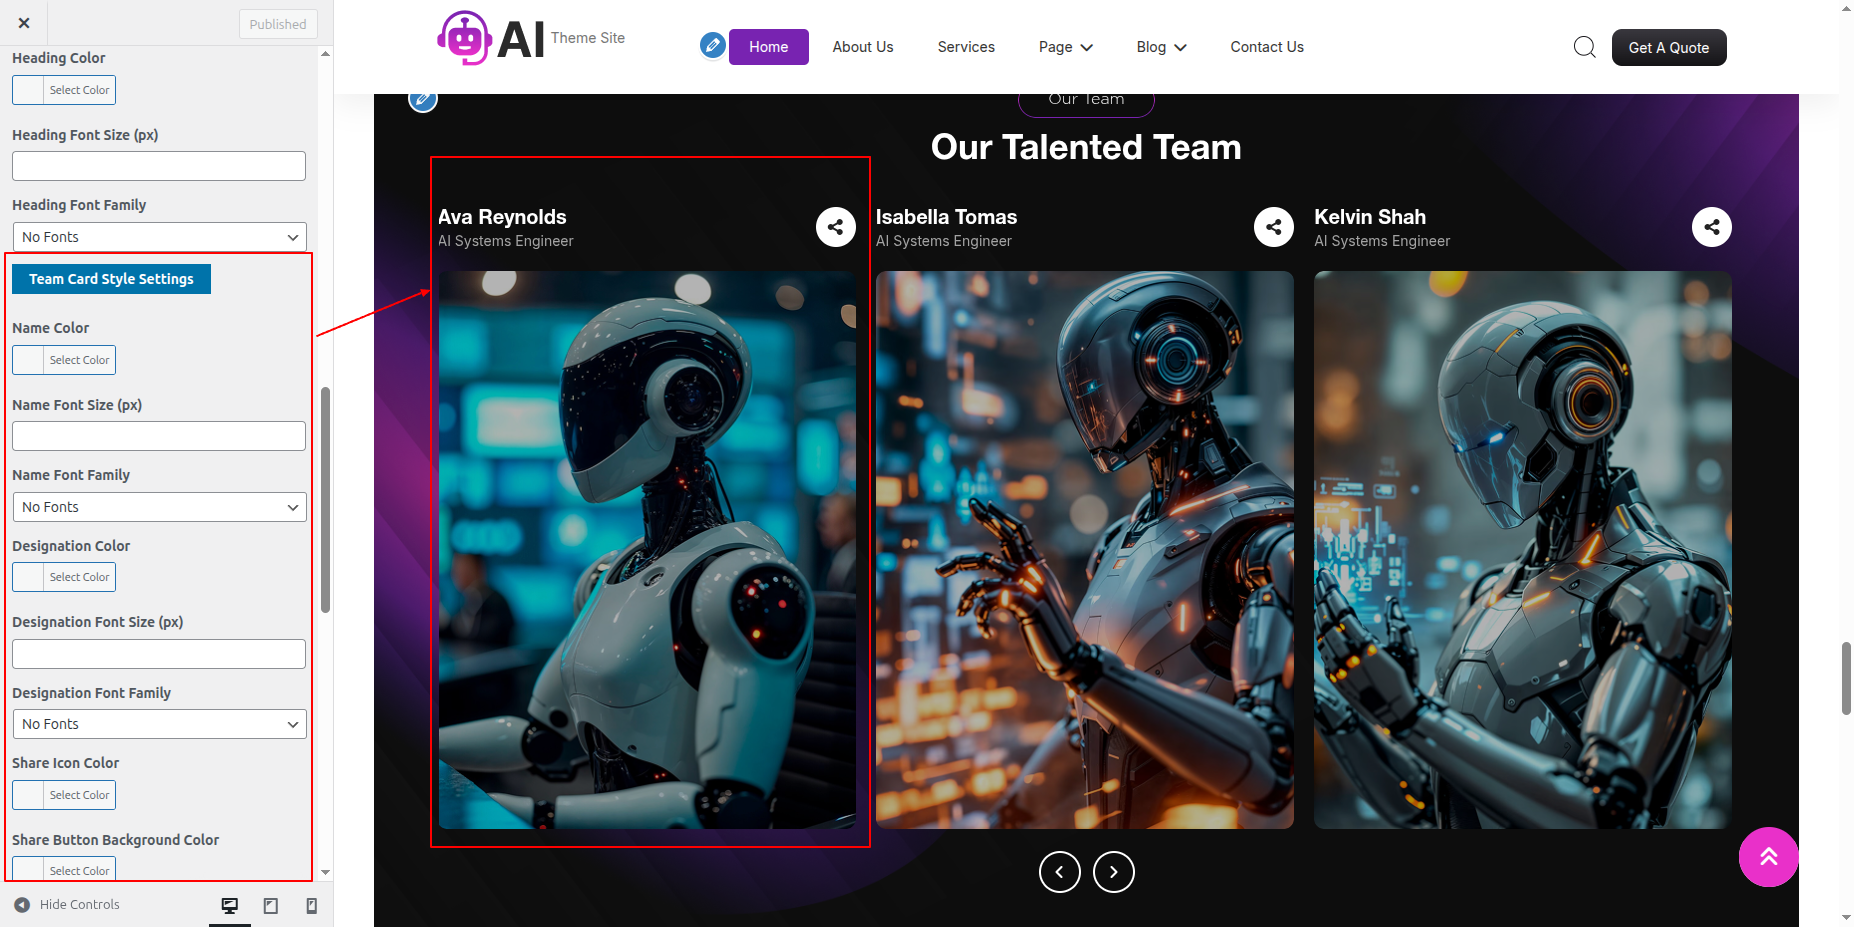
On the front end, it will appear as shown.

To ensure that start the Faq Section.
The Faq must be established on your WordPress website first.
Installation and activation of the Artifical Intelligence Pro Posttype Plugin are required for the Faq section. The dashboard's Faq section will show up after activation.
To ensure that Configuring Move to the Dashboard in the next section. >> Faq >>Tap "Add new."
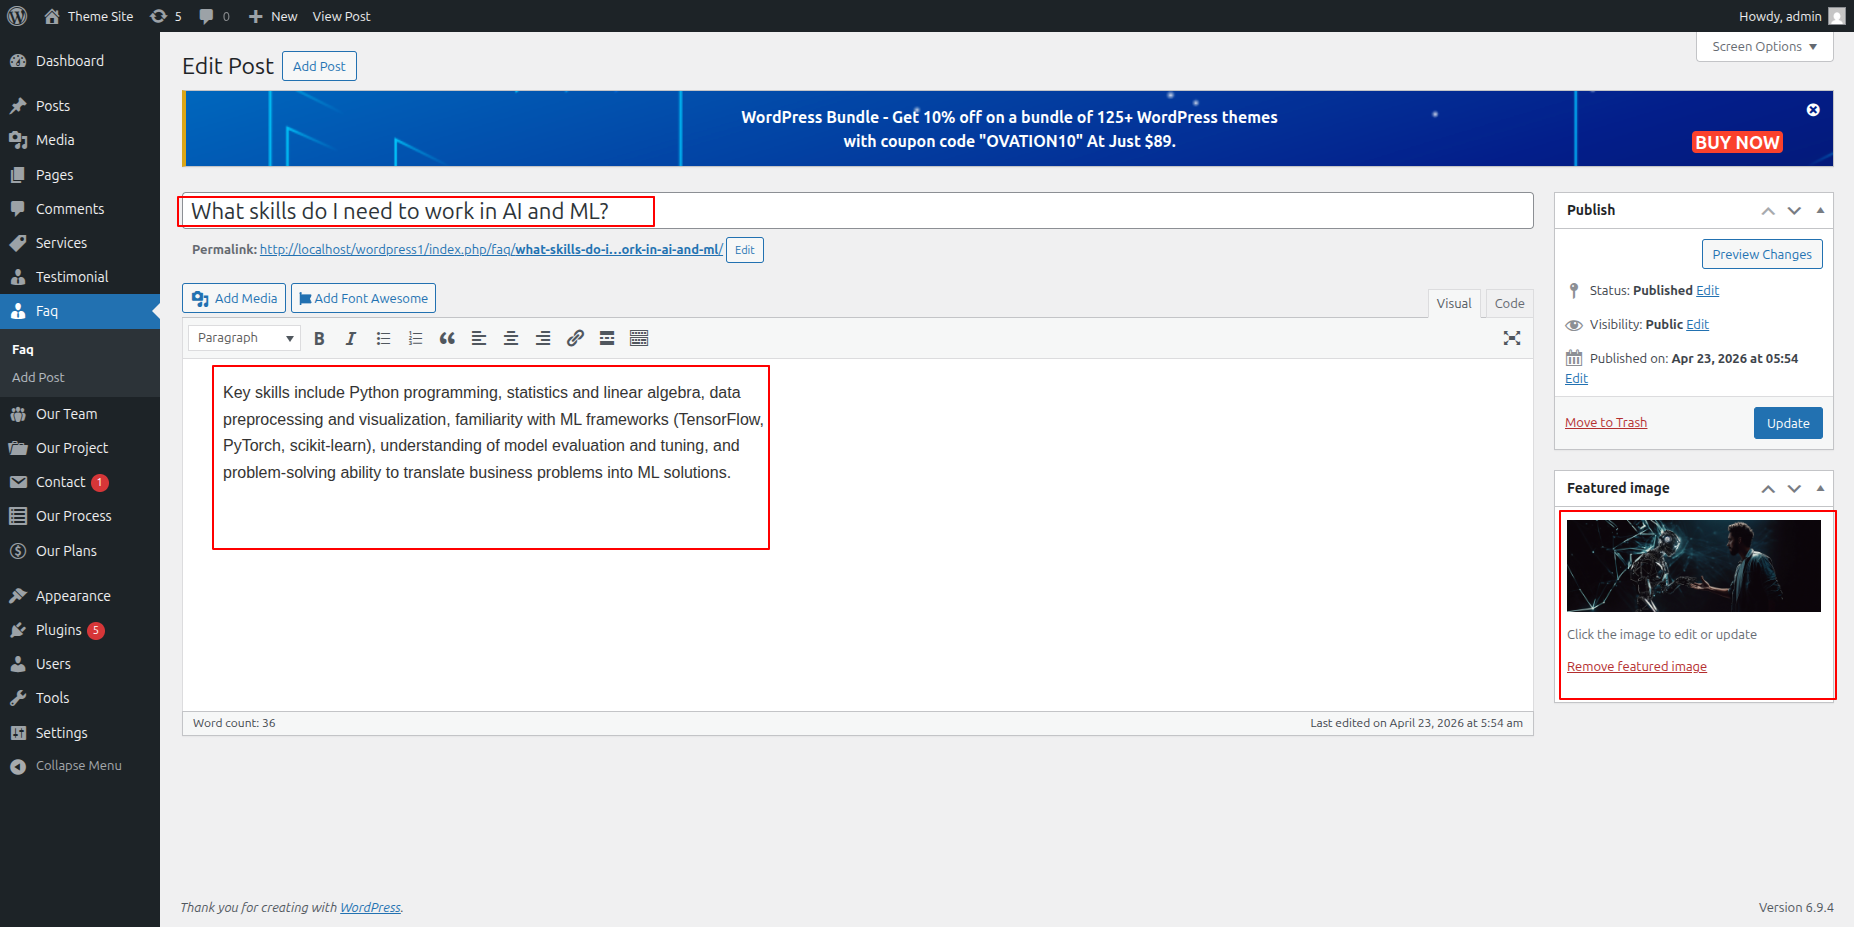
Select The Appearance → Select The Customize → Move to Theme Settings → Faq Section
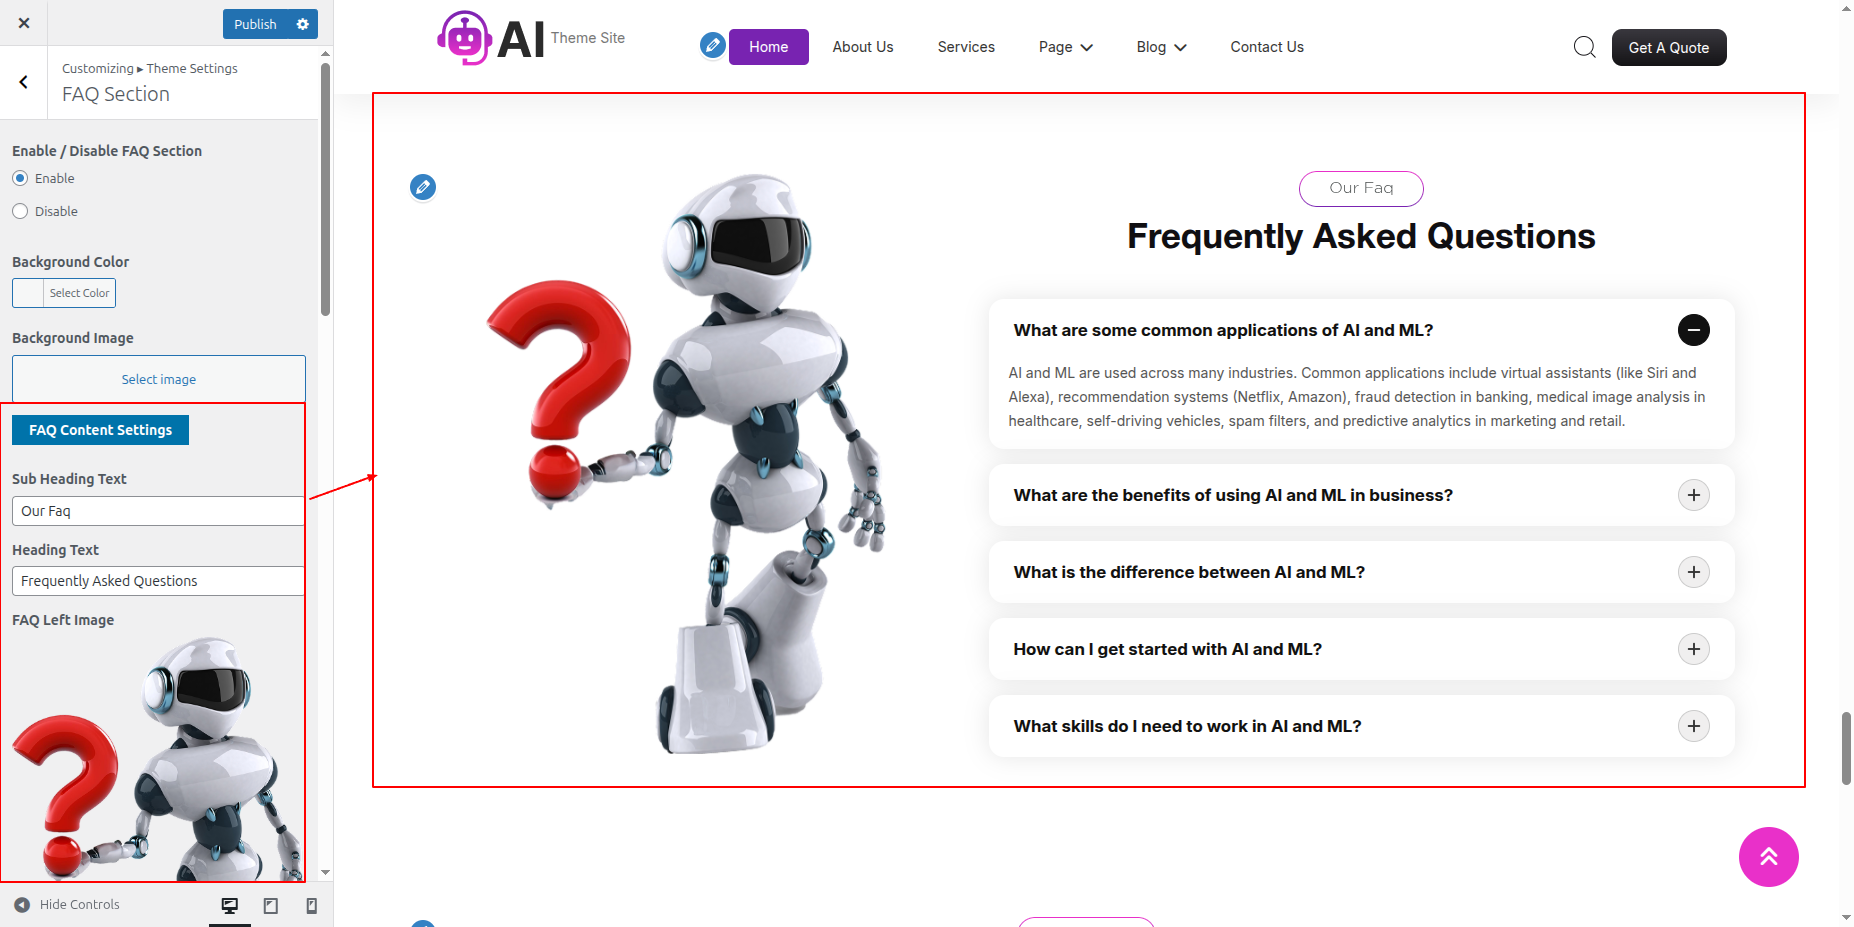
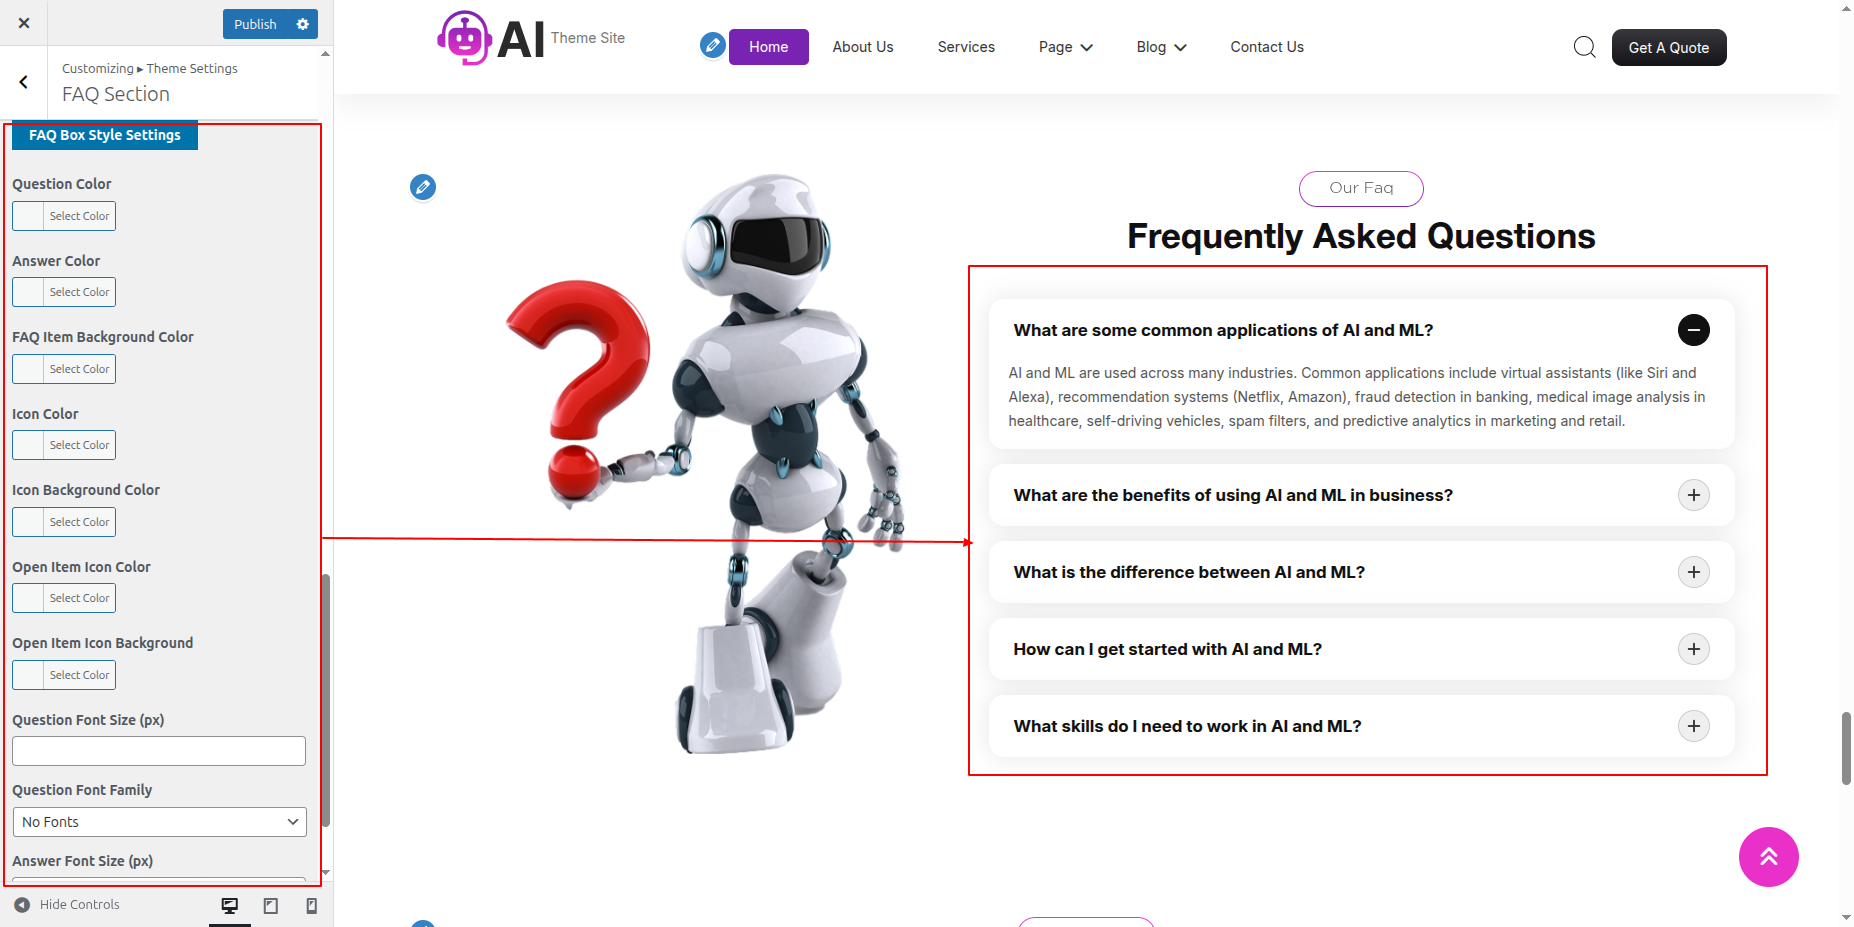
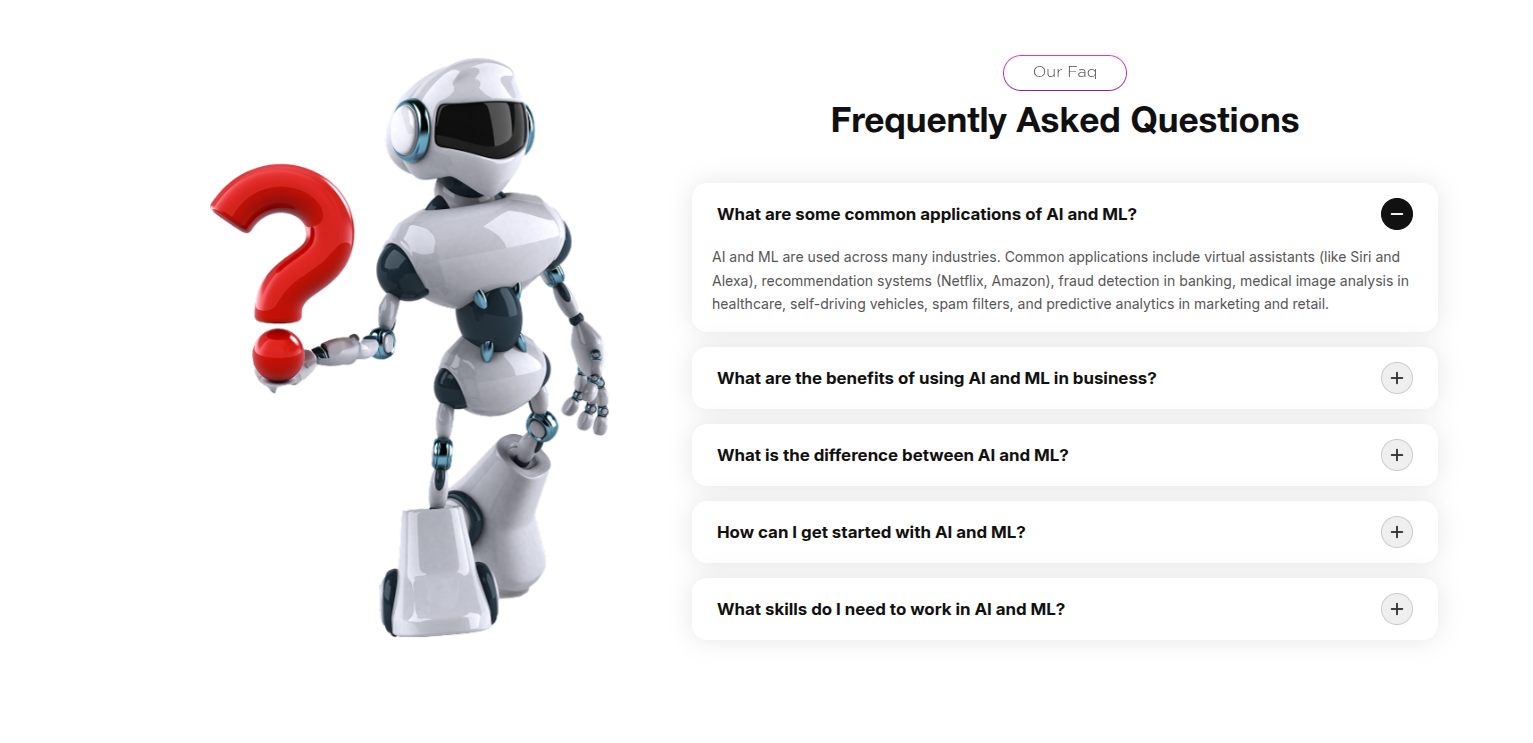
On the front end, it will appear as shown.
To be able to begin with Latest News Section
To begin Configuring the Post across the WordPress website,
Installing and activating the AI Enterprise Pro Posttype Plugin is required for the Post section. The dashboard's Post section will show up after activation.
To ensure that Configuring Move to the Dashboard in the next section. >> Post >>Tap "Add new."
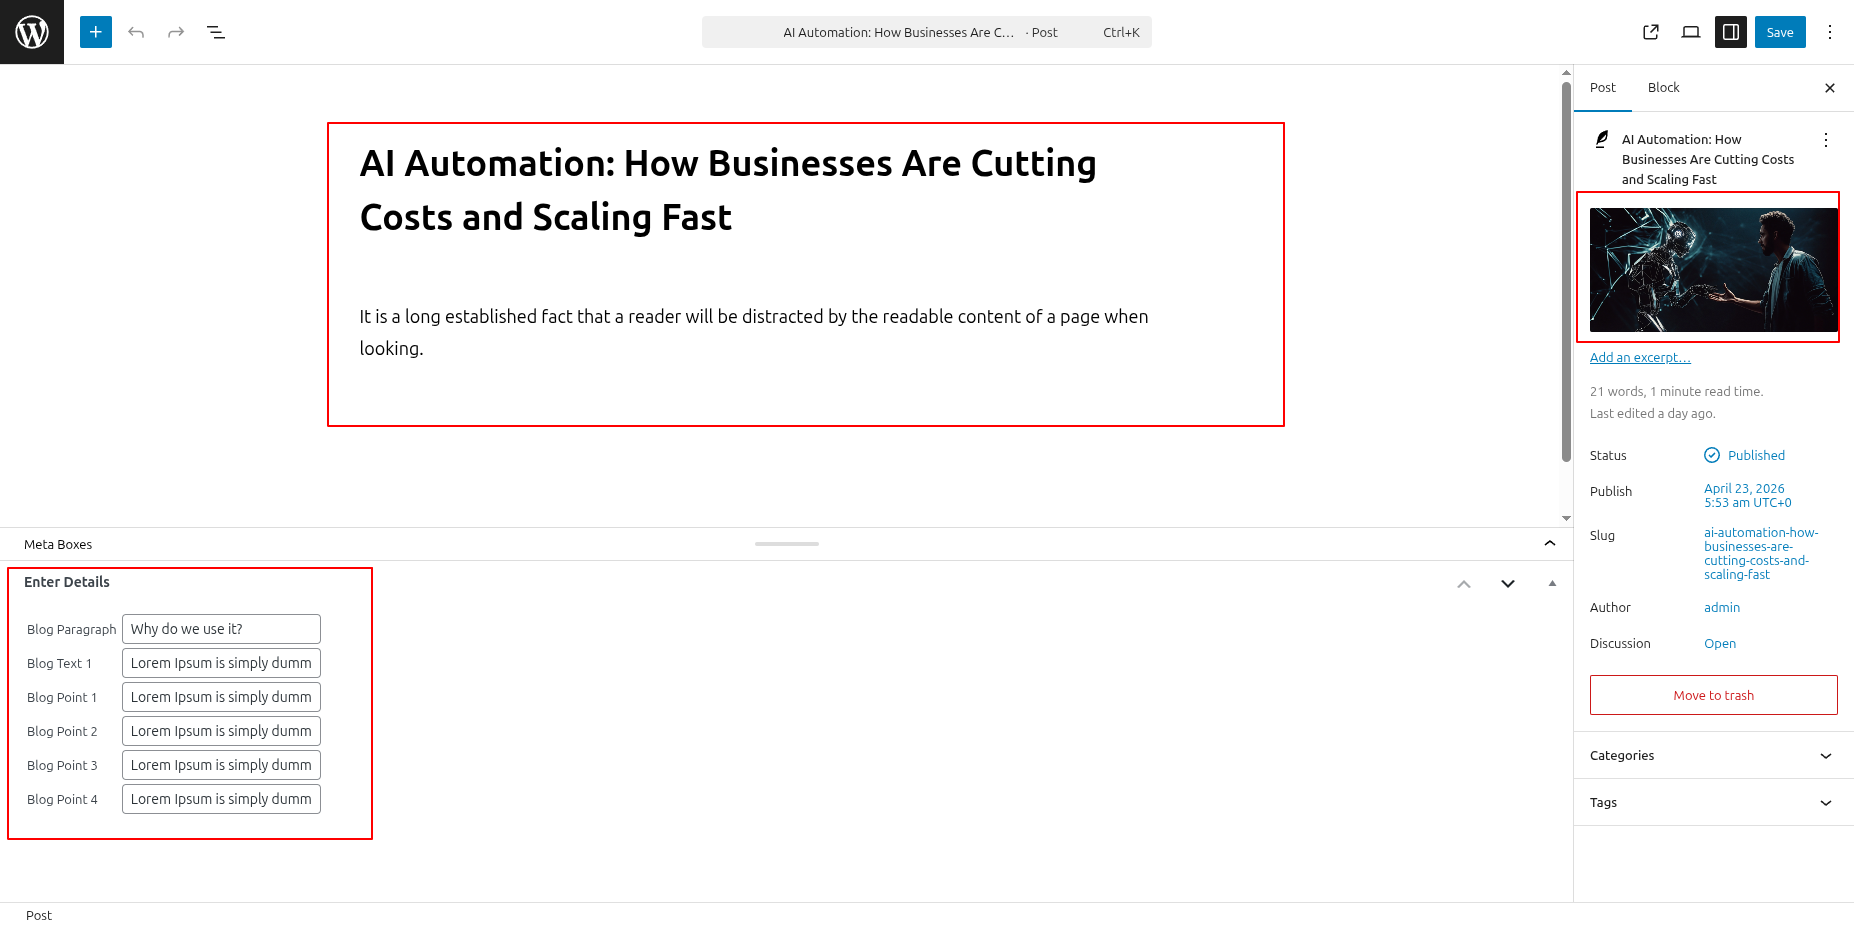
Select The Appearance → Select The Customize → Move to Theme Settings → Latest New
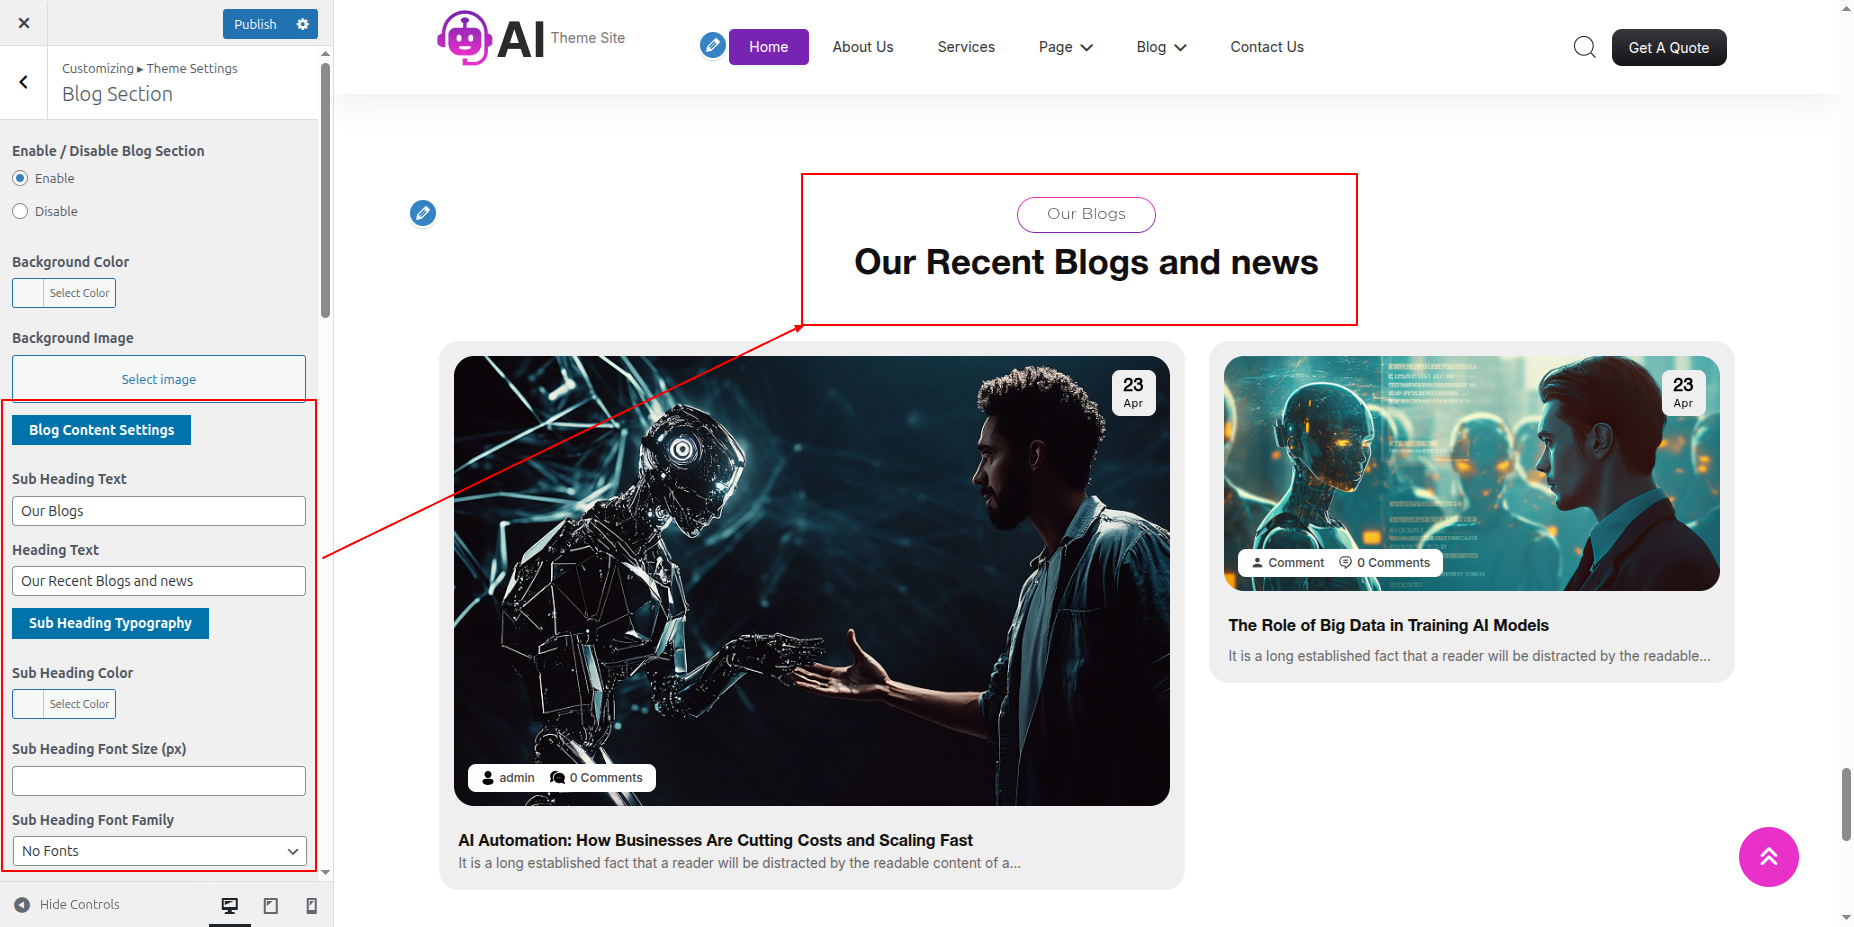
SelectThe Appearance → Select The Customize → Move to Theme Settings → Latest News → Style Settings
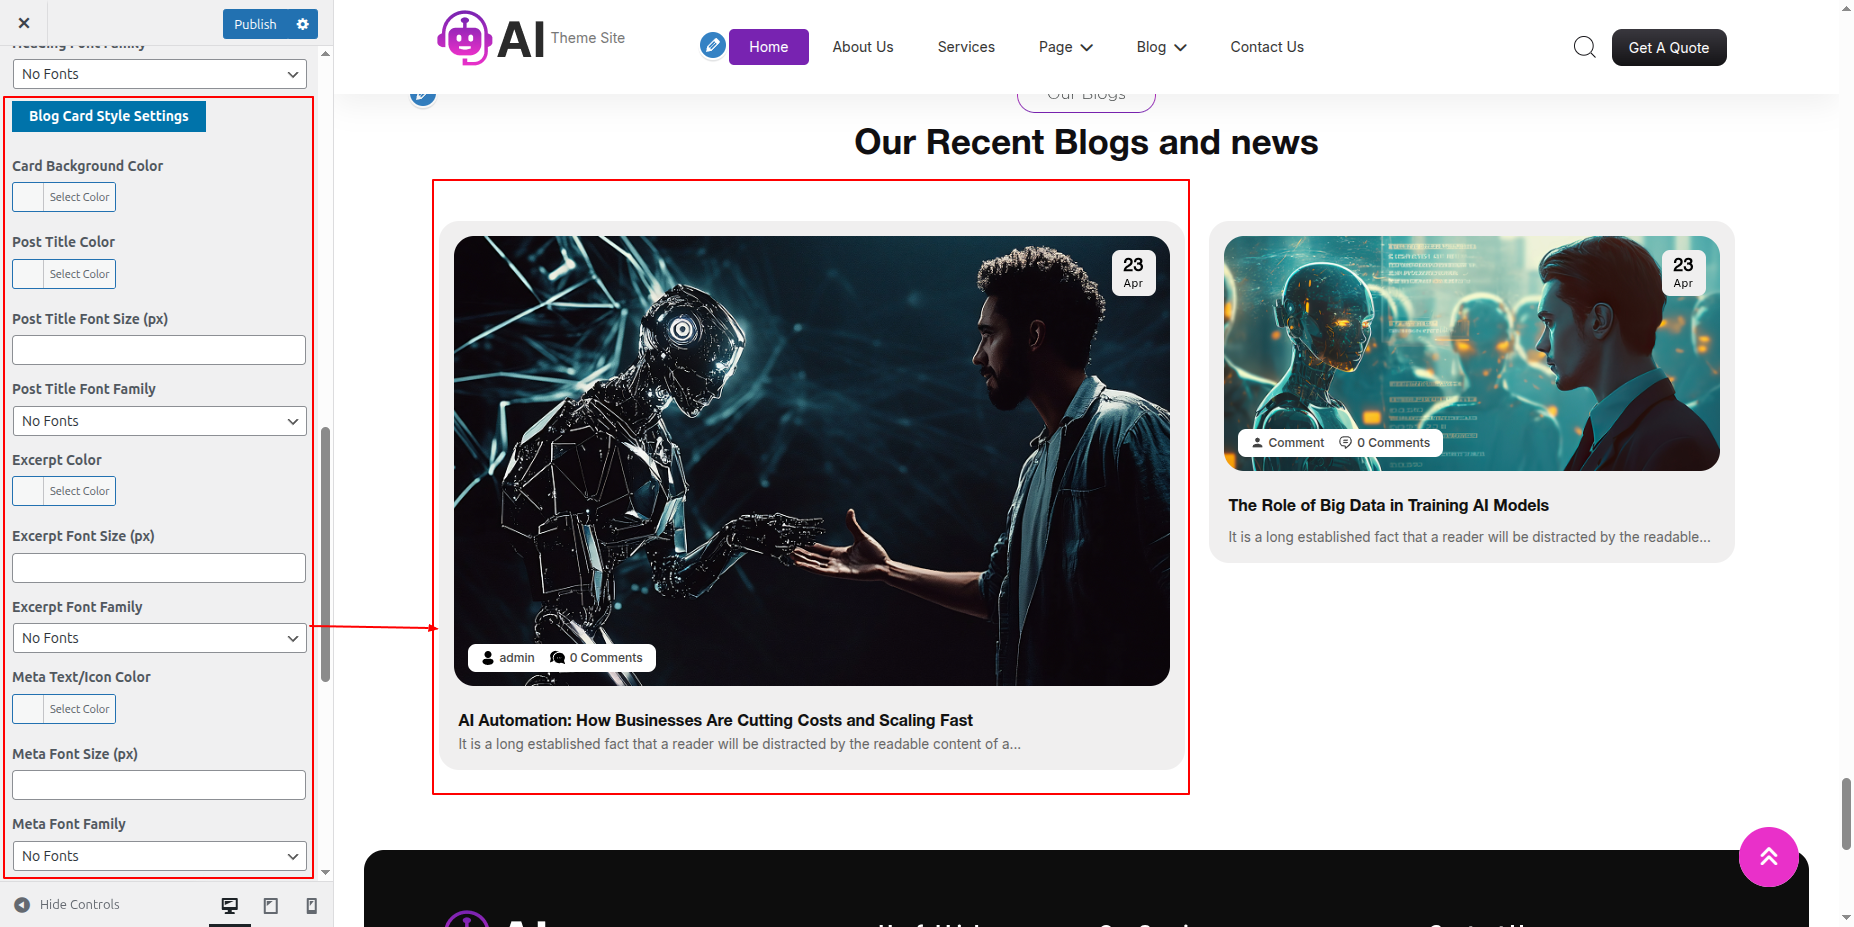
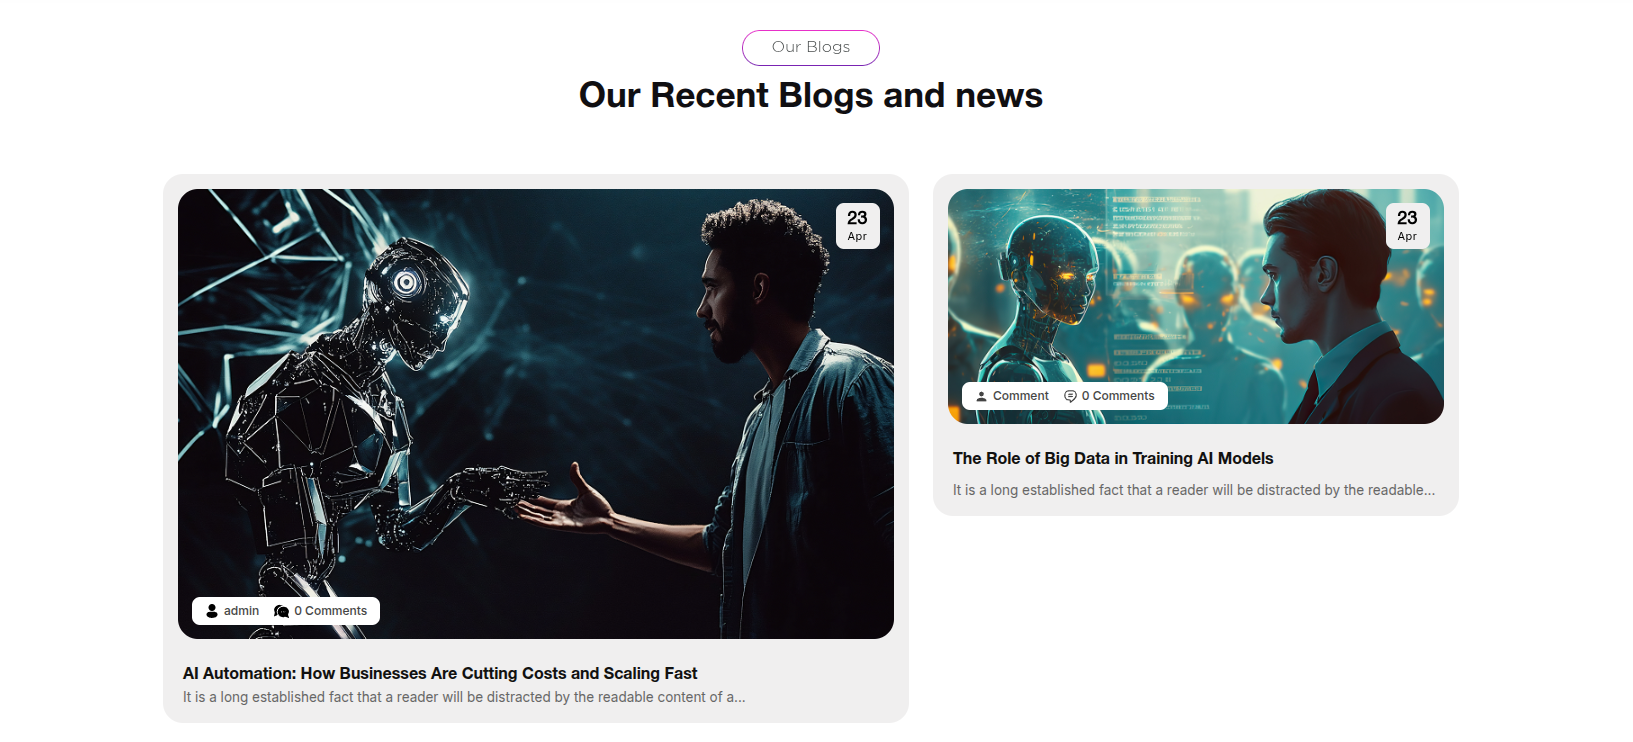
On the front end, it will appear as shown.
To be able to begin with Footer,
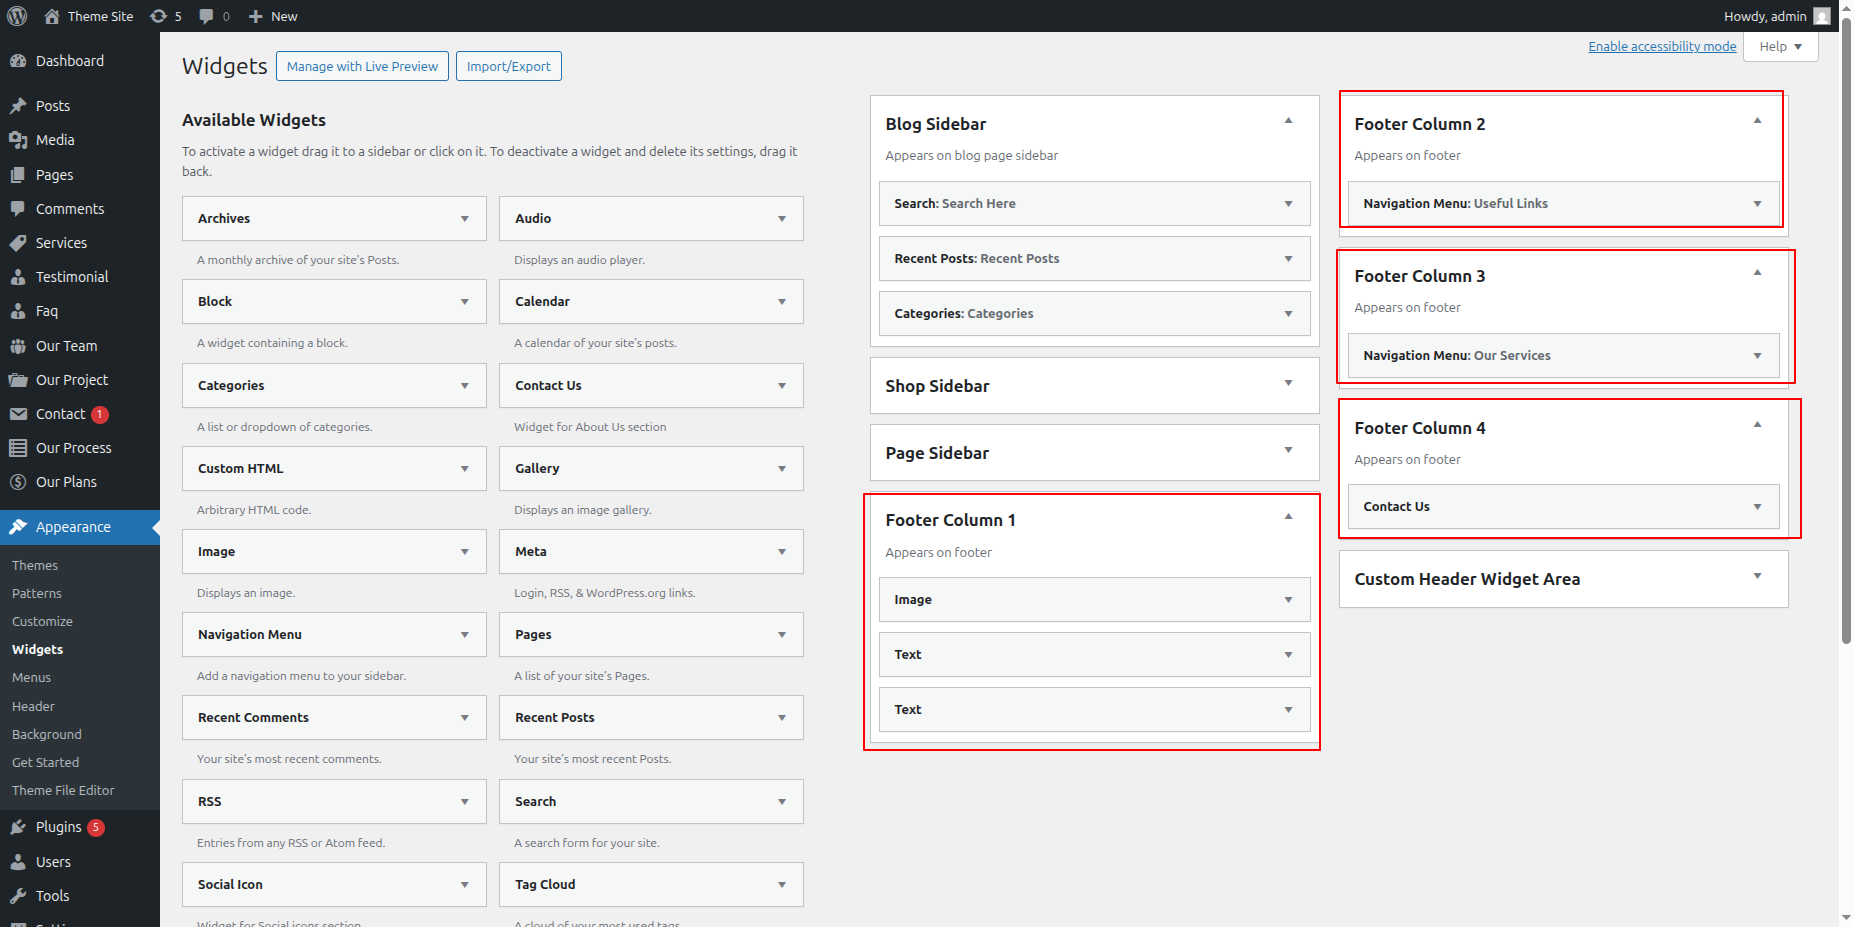
Step 1.SelectDashboard in the next section. → The Appearance → Widgets
For designing this section, navigate to widgets of The Appearance section and select four footer columns for tags, gallery, contact and logo image respectively.
Below image throws light on the section on widgets.
SelectDashboard → The Appearance → Widgets → Tap "Add new."
SelectThe Appearance → Select The Customize → Footer Options → Footer Widgets
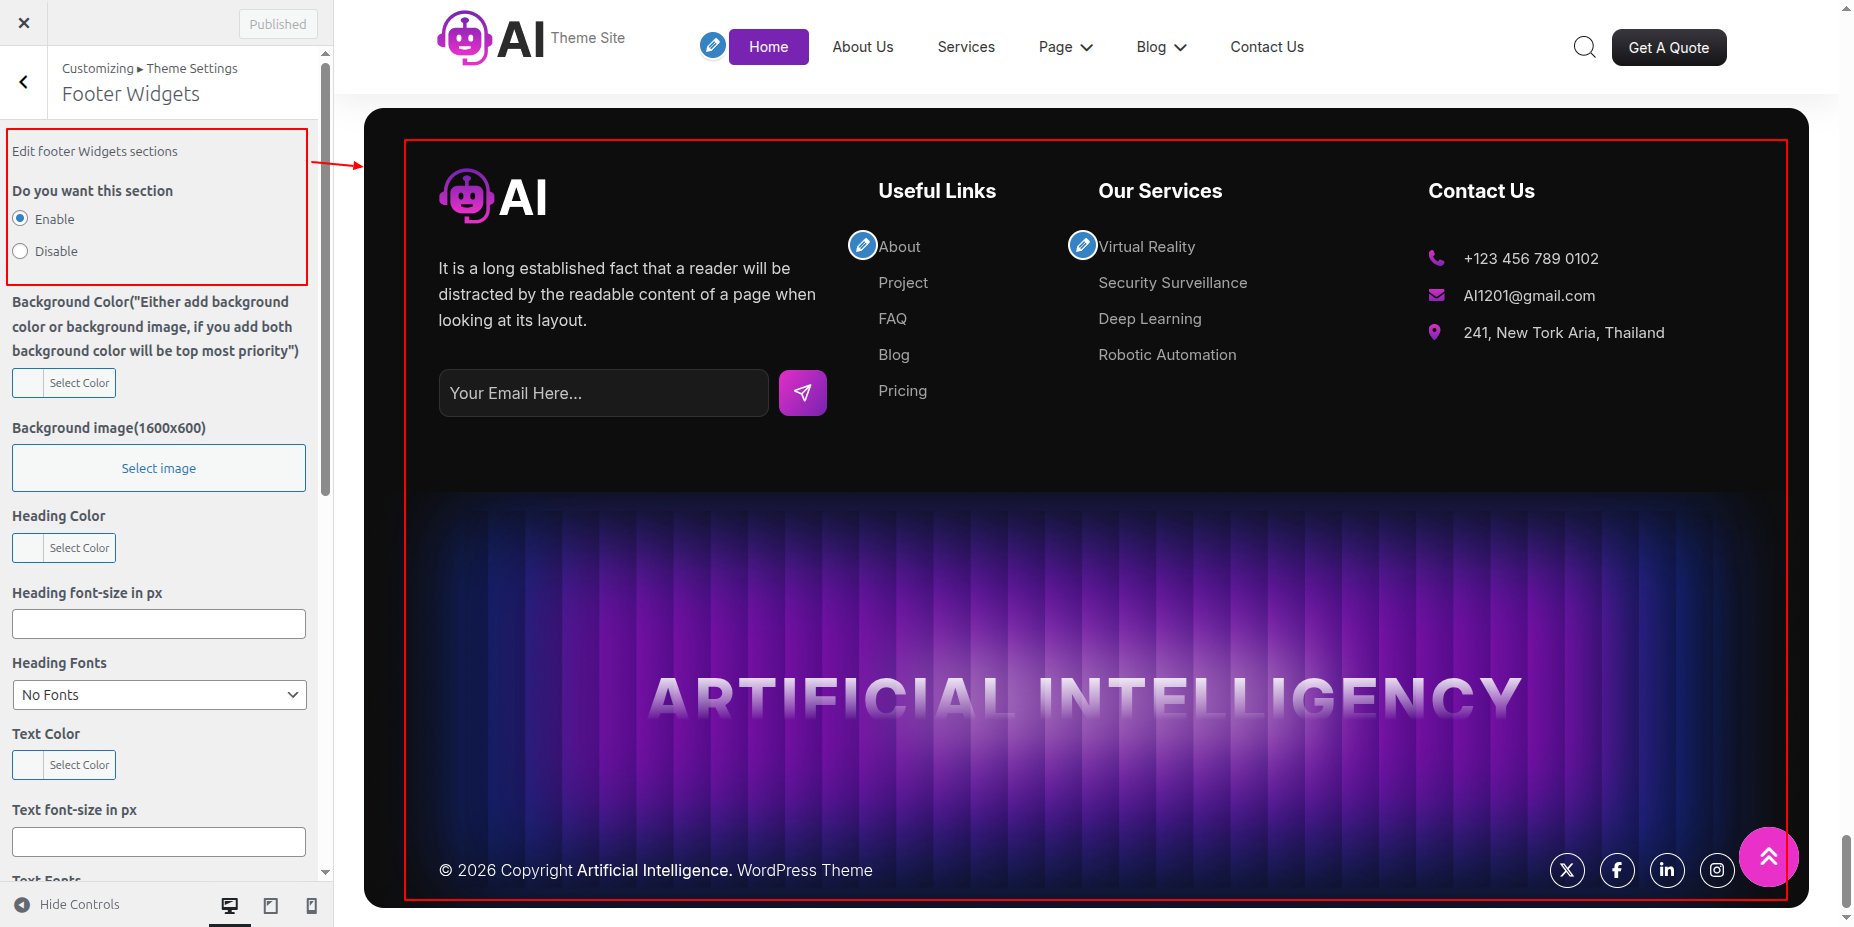
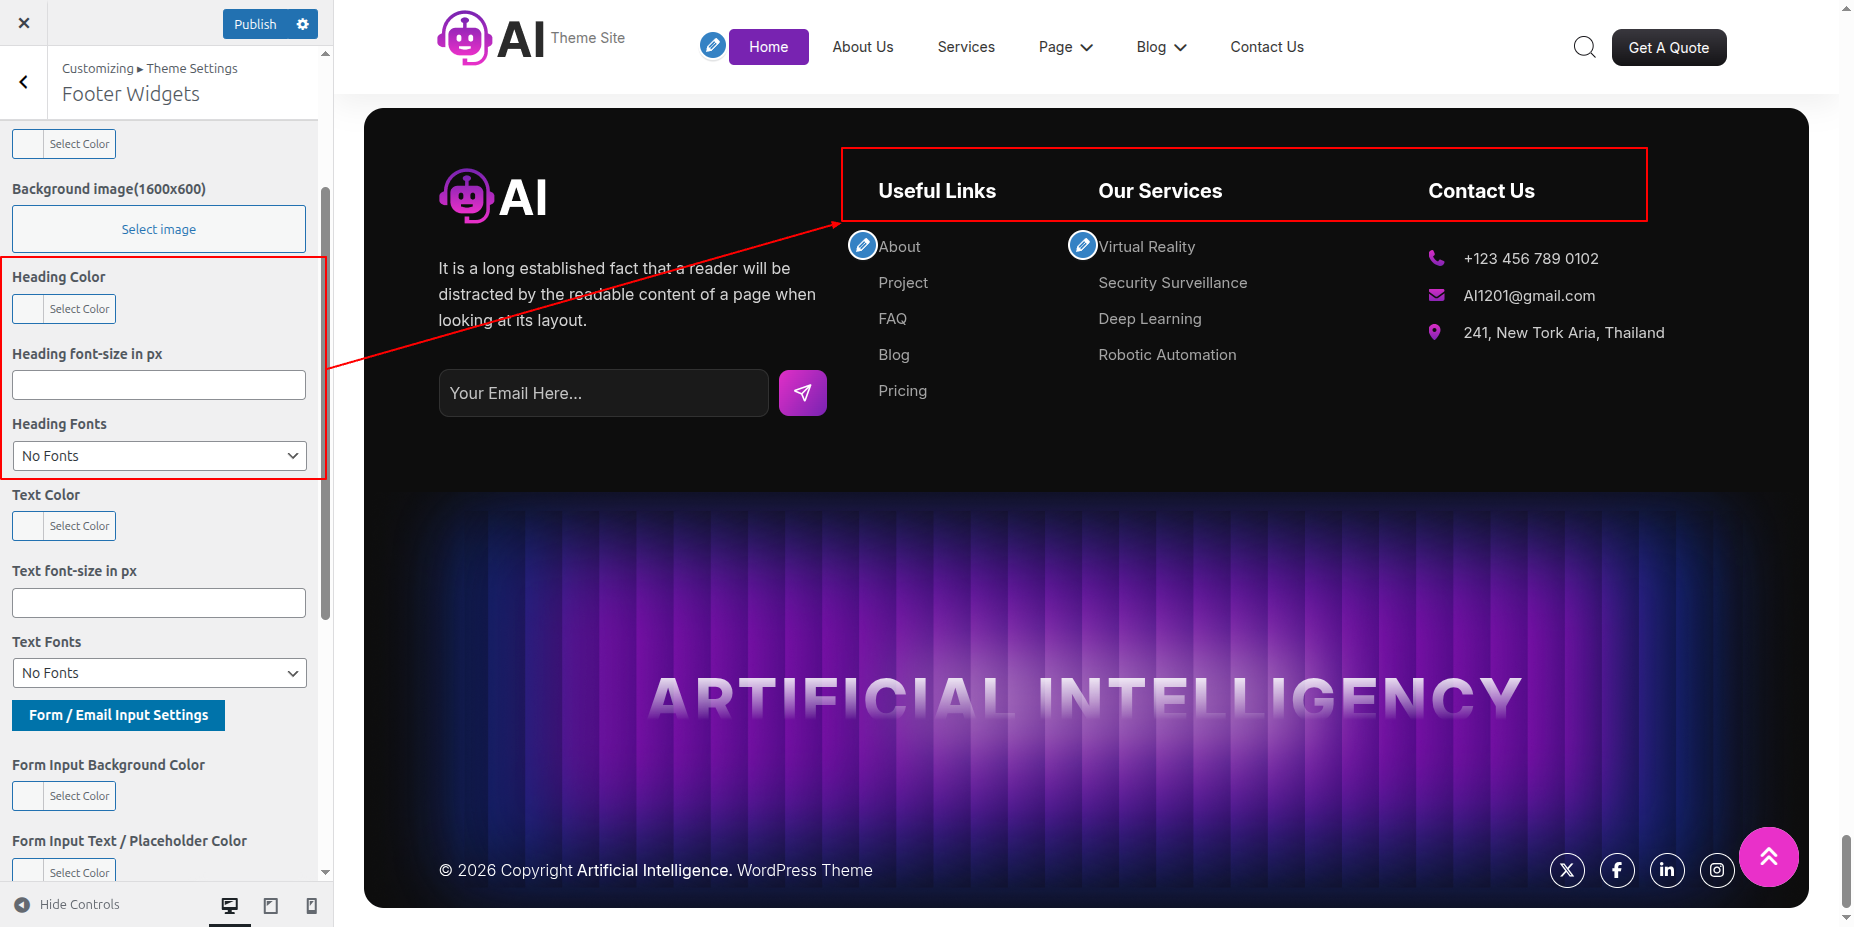
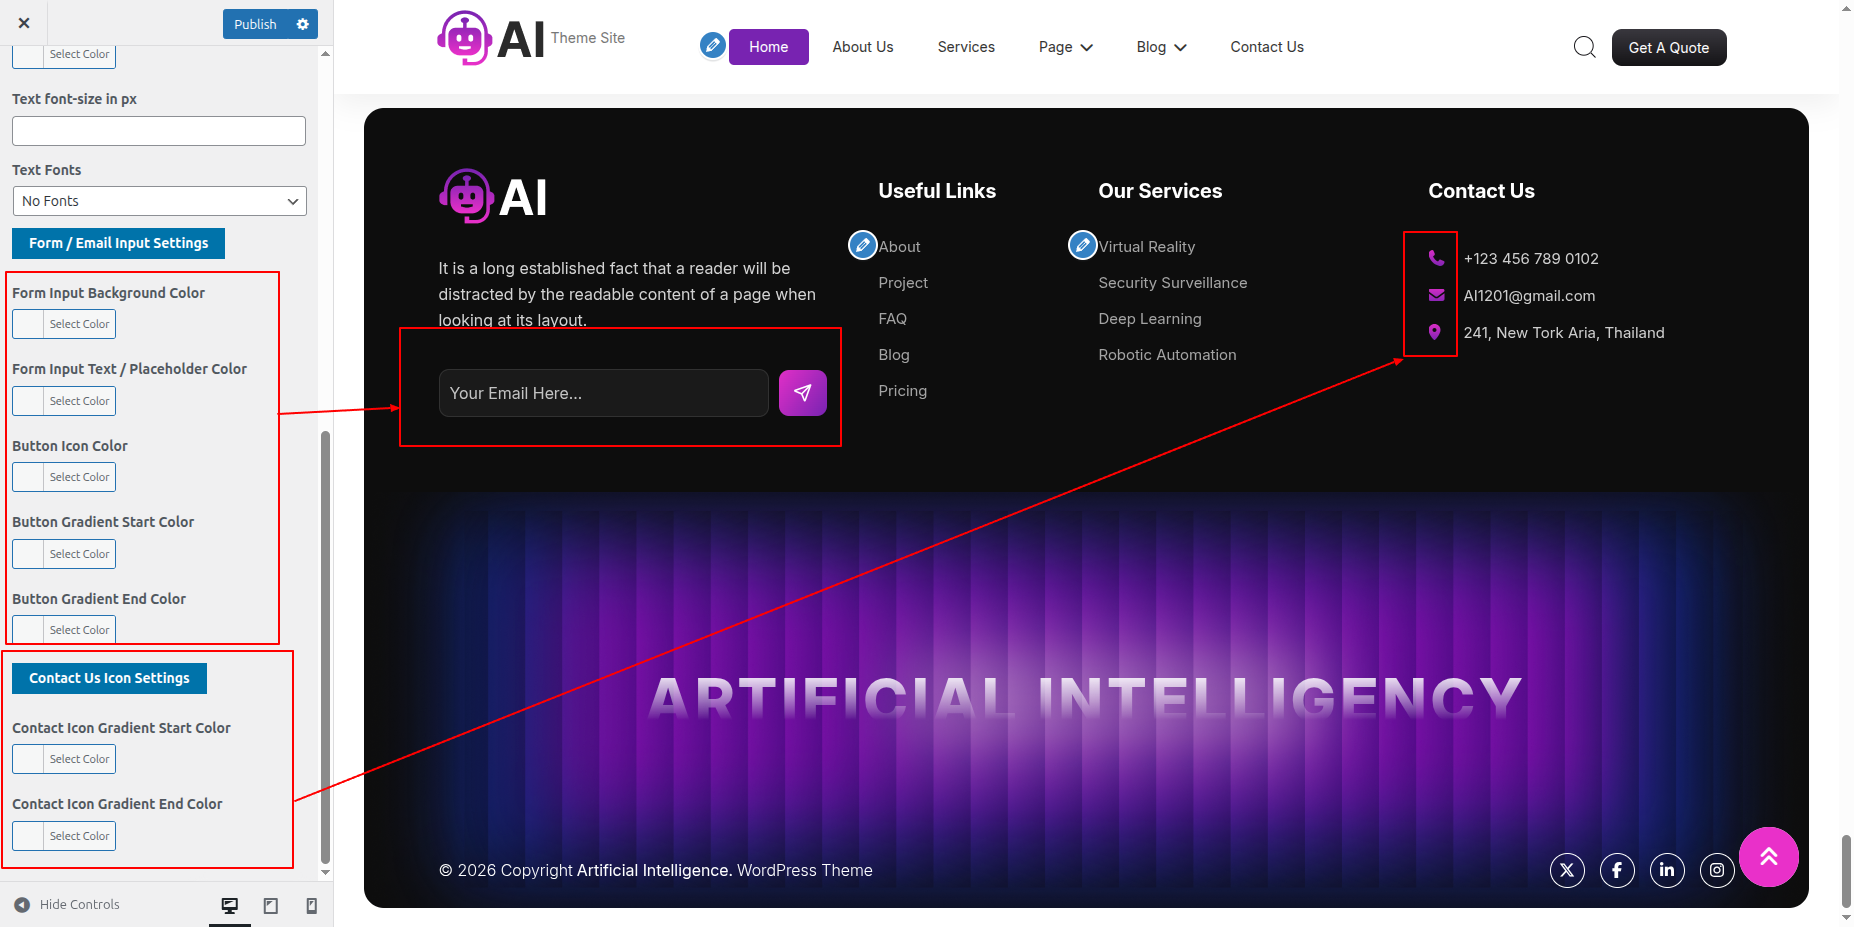
On the front end, it will appear as shown.

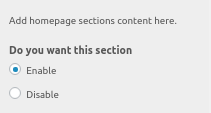
To be able to begin with Section of Footer Text,
SelectThe Appearance → Select The Customize → Footer Options → Footer Text.
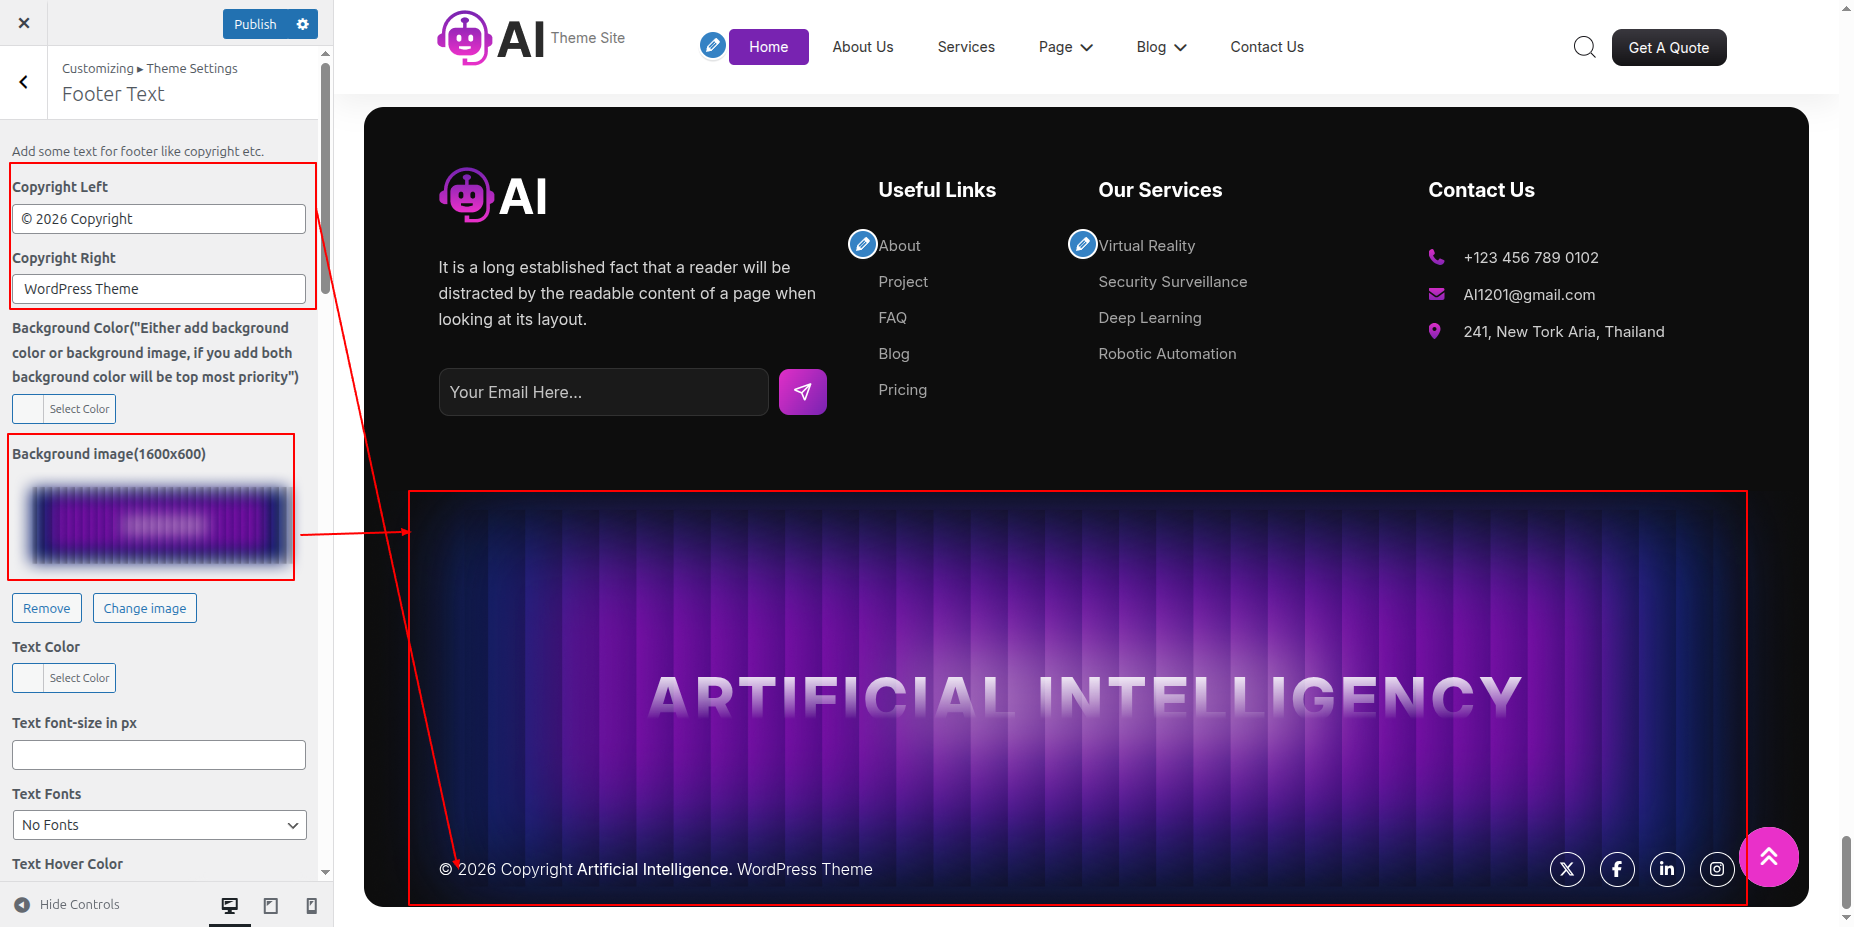
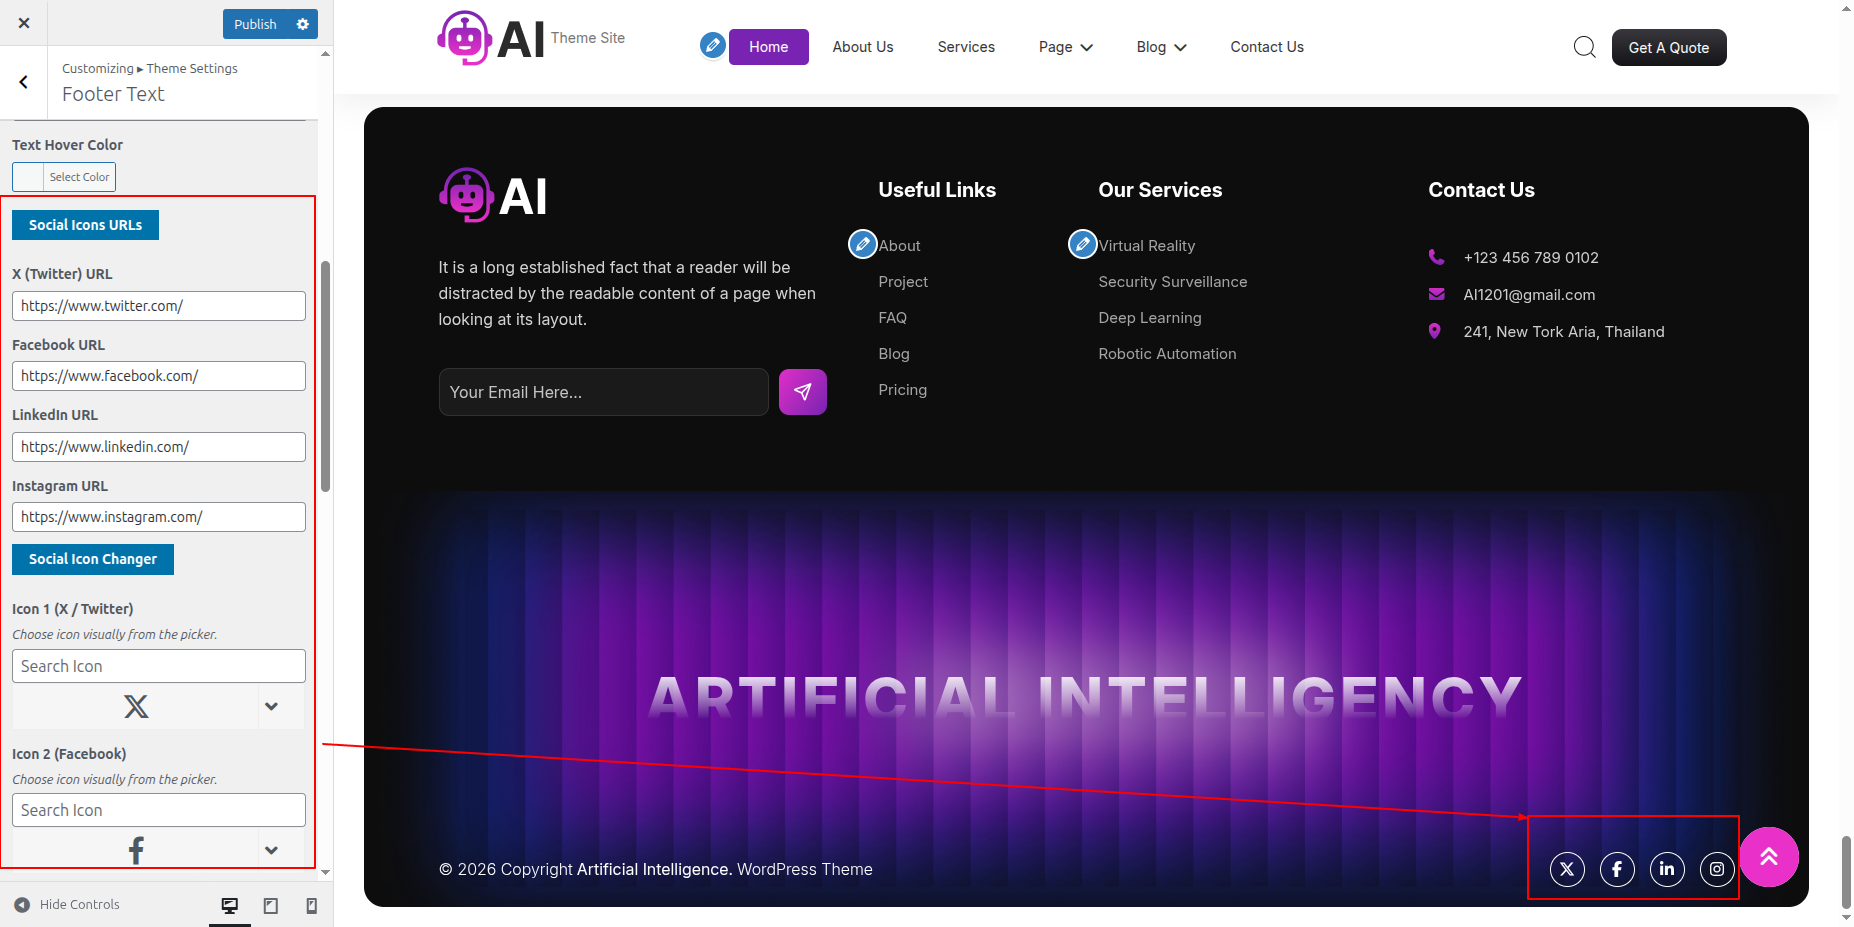
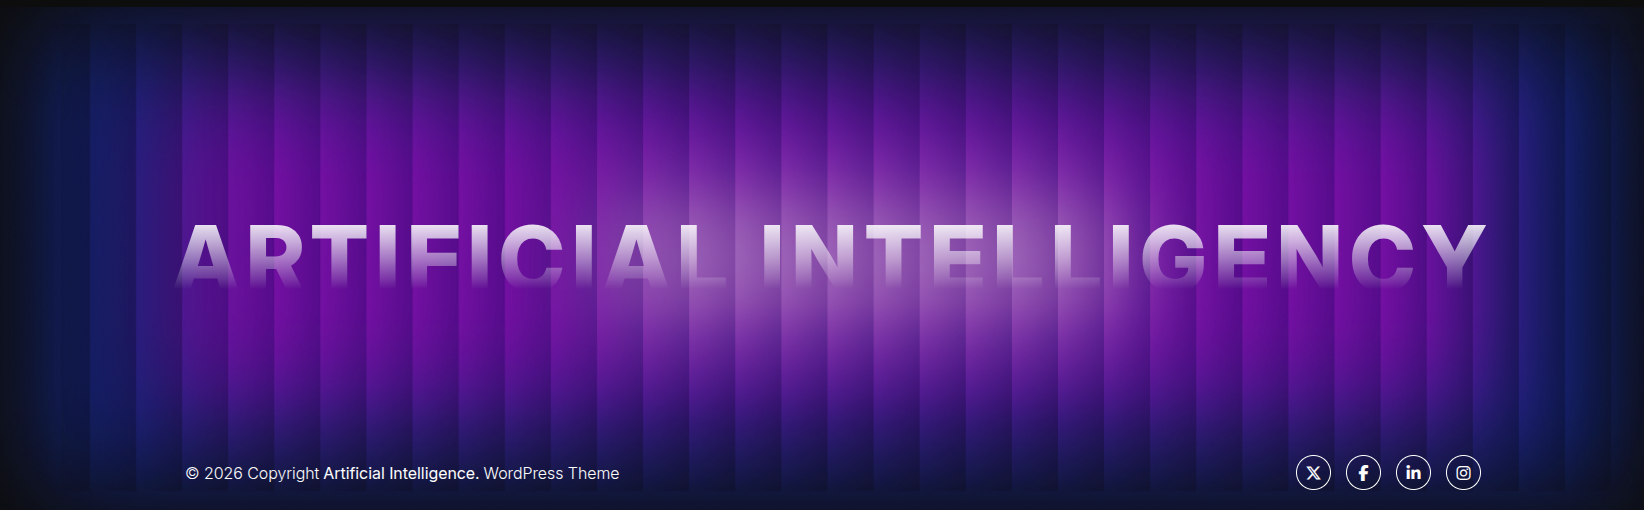
On the front end, it will appear as shown.
We must install the Contact forn 7 plugin across the WordPress website Contact Page. After installing the plugin, contact options will show up.
Navigate to Dashboard in the next section. == Contact == Tap "Add new."
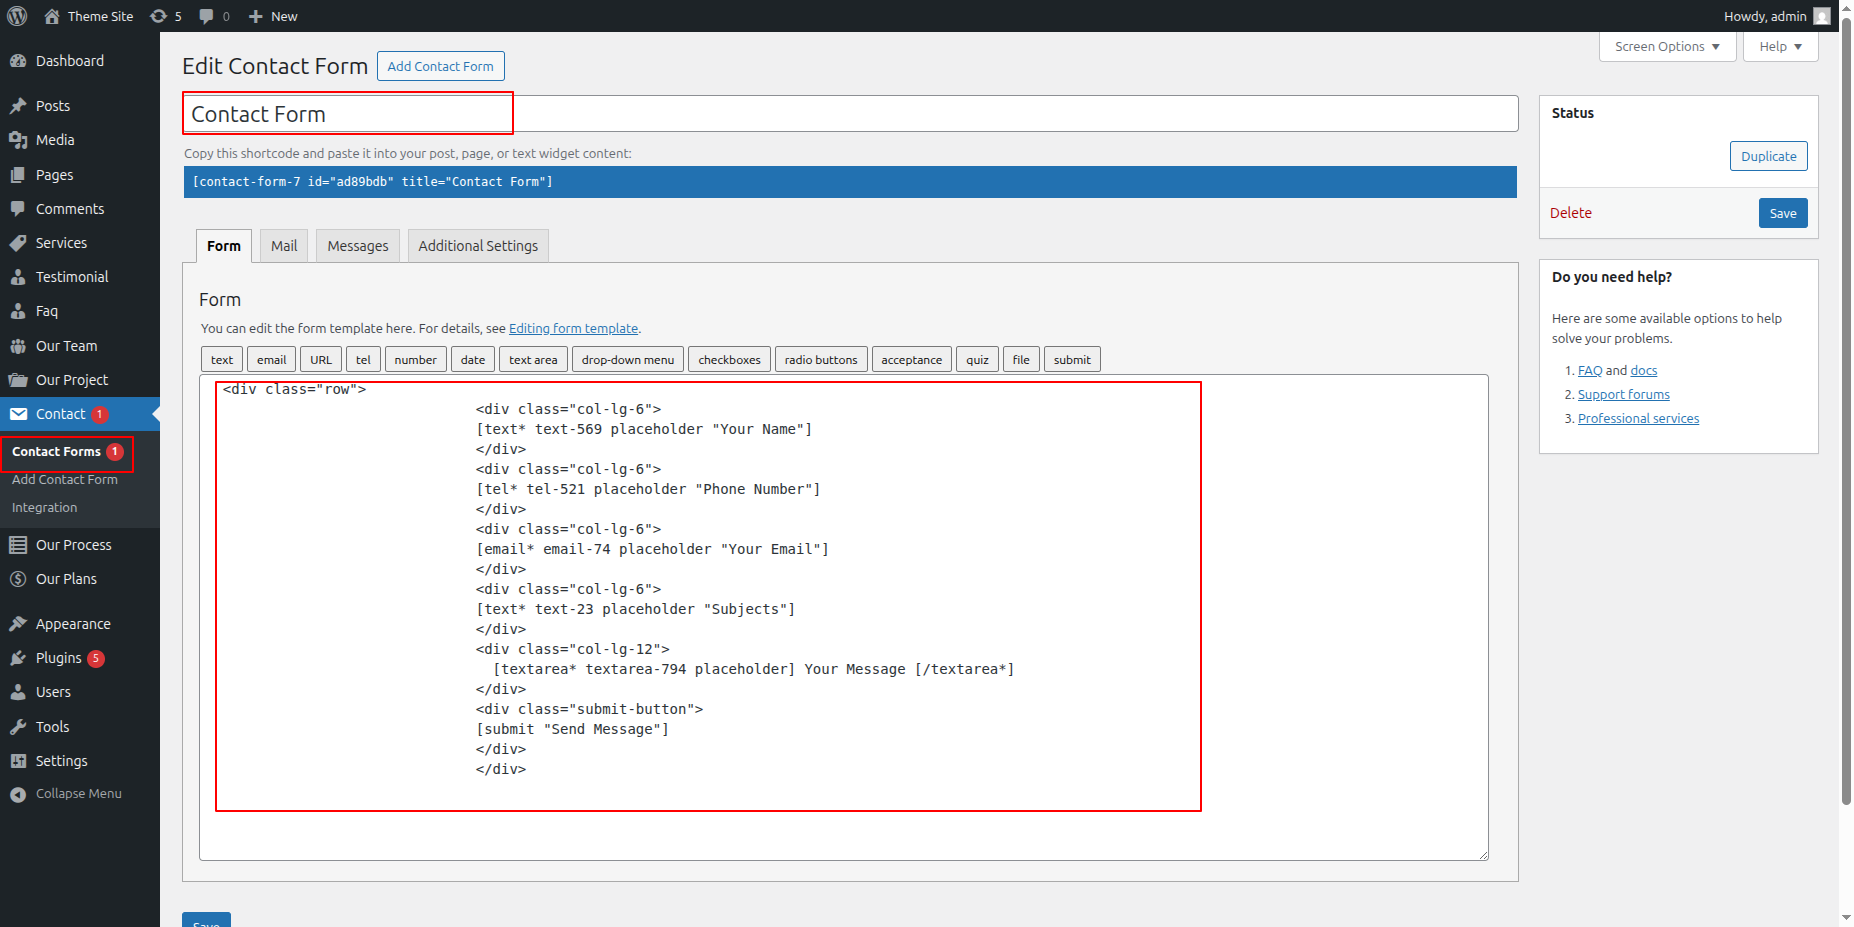
To be able to begin with Contact-Us Page
SelectThe Appearance → Select The Customize → Move to Theme Settings → Contact Page
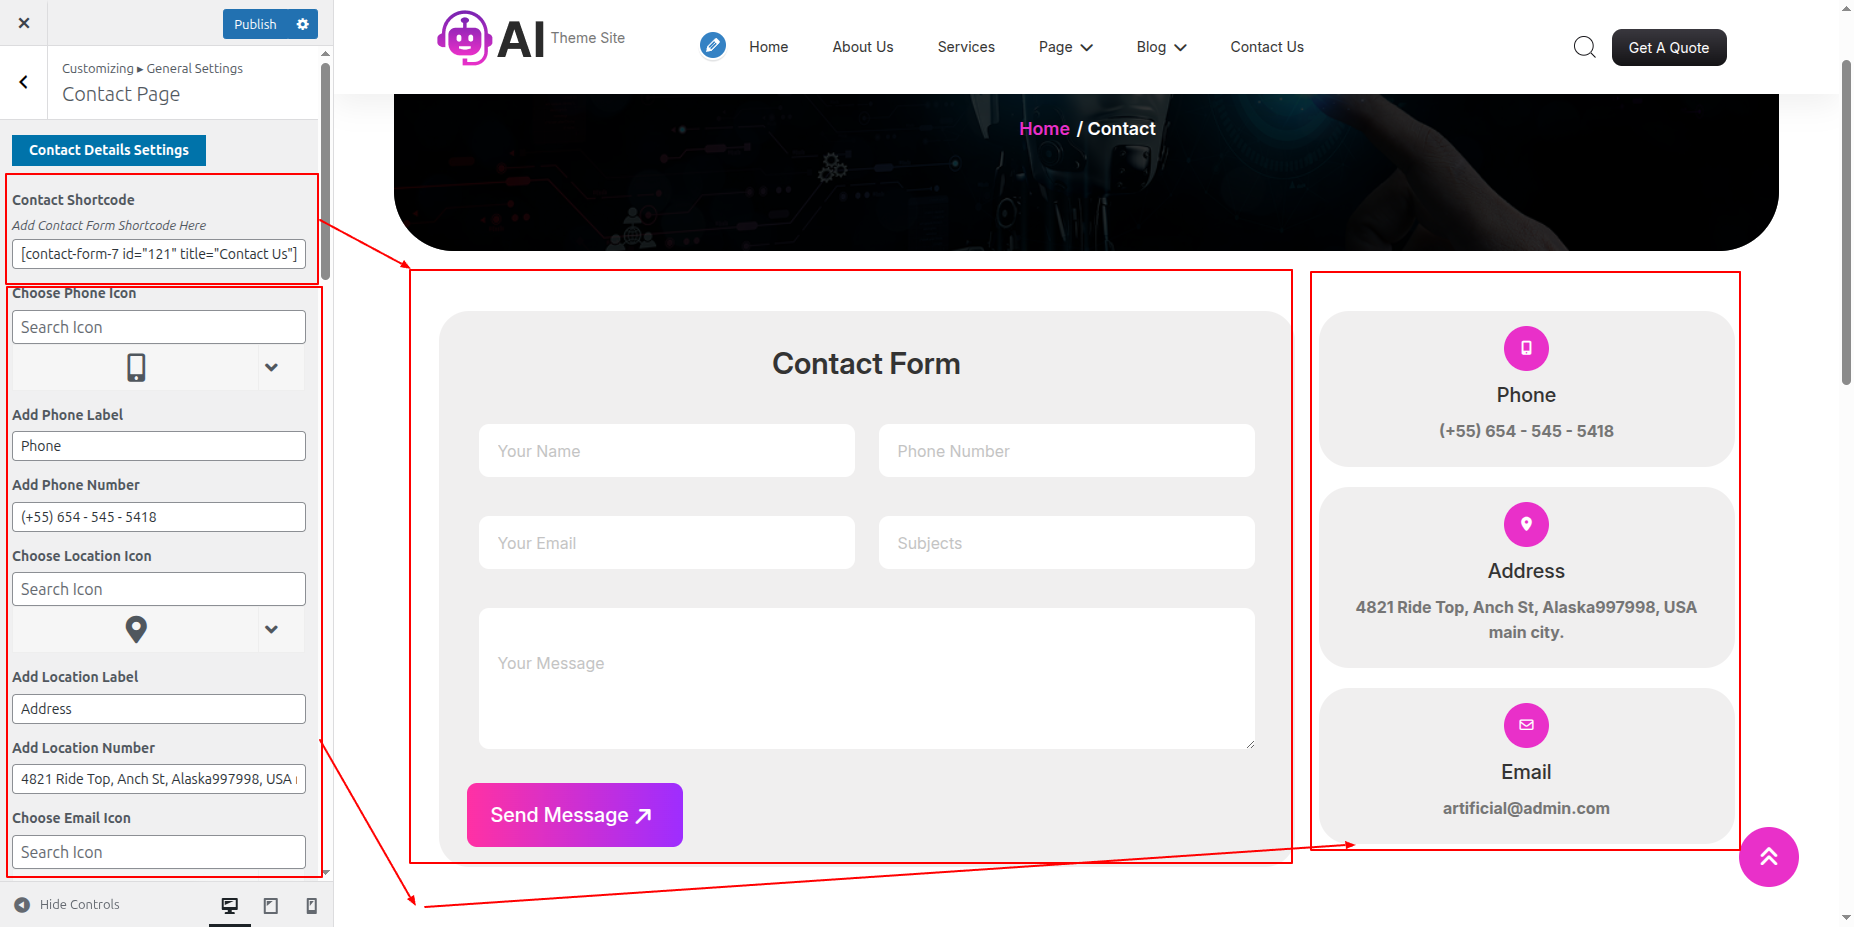
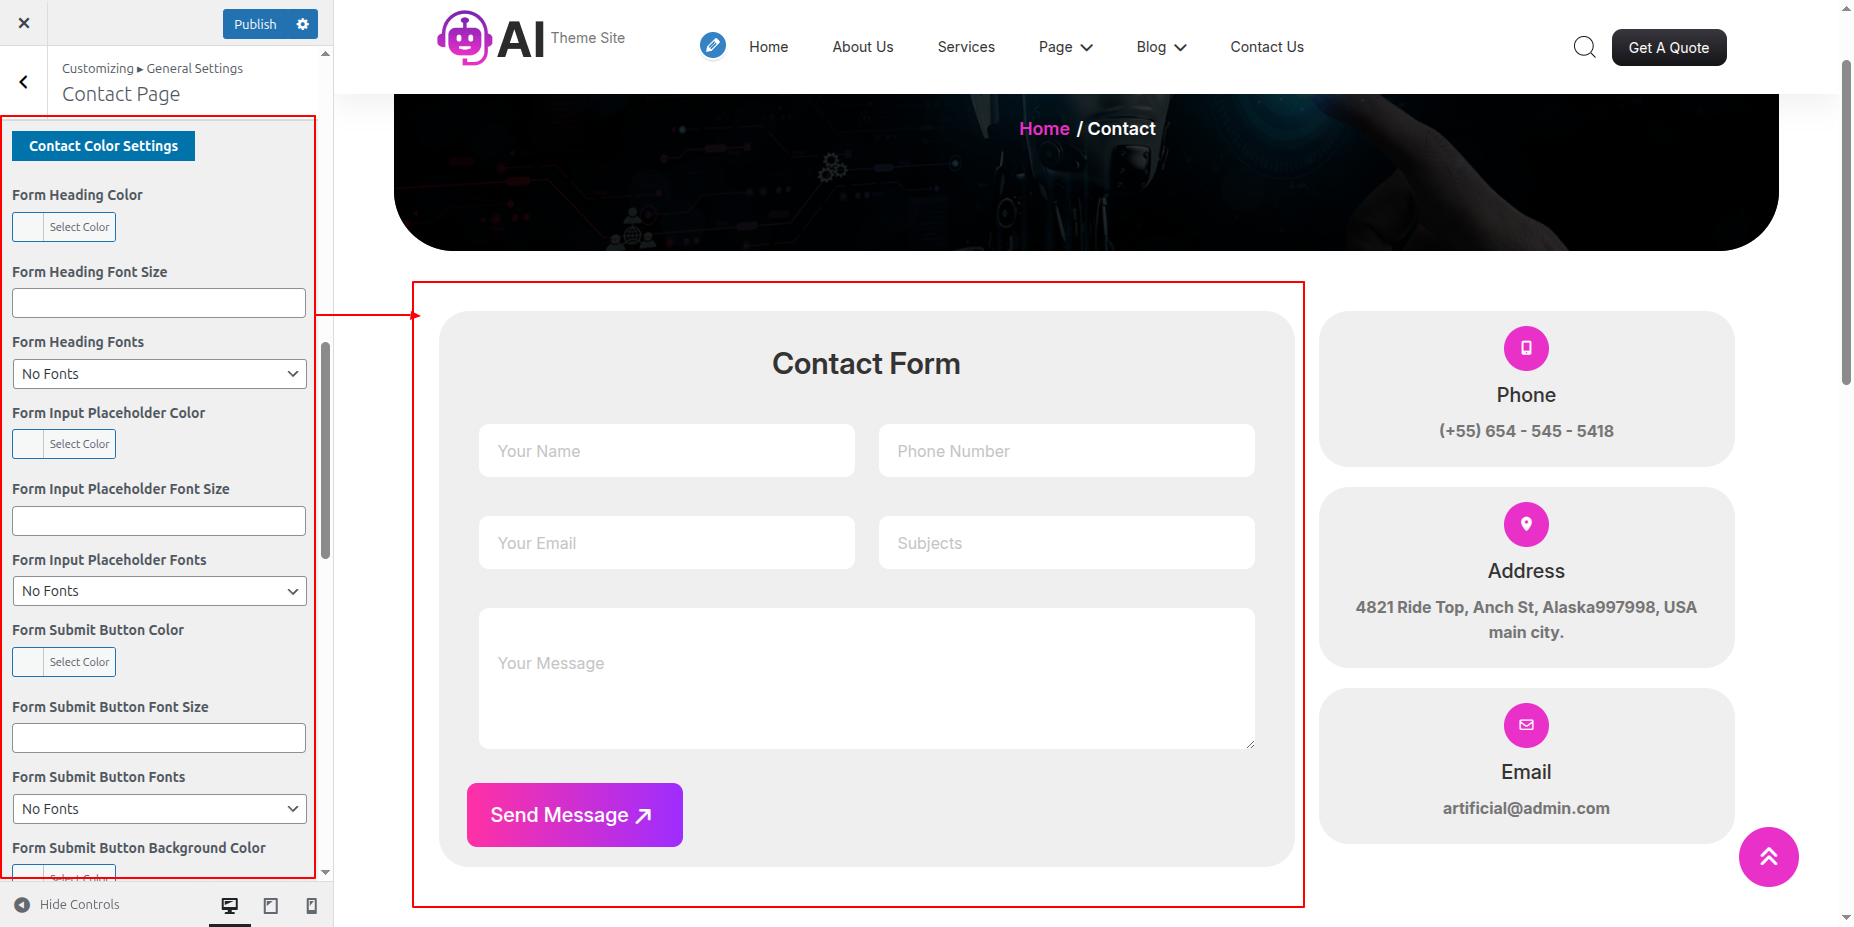
On the front end, it will appear as shown.
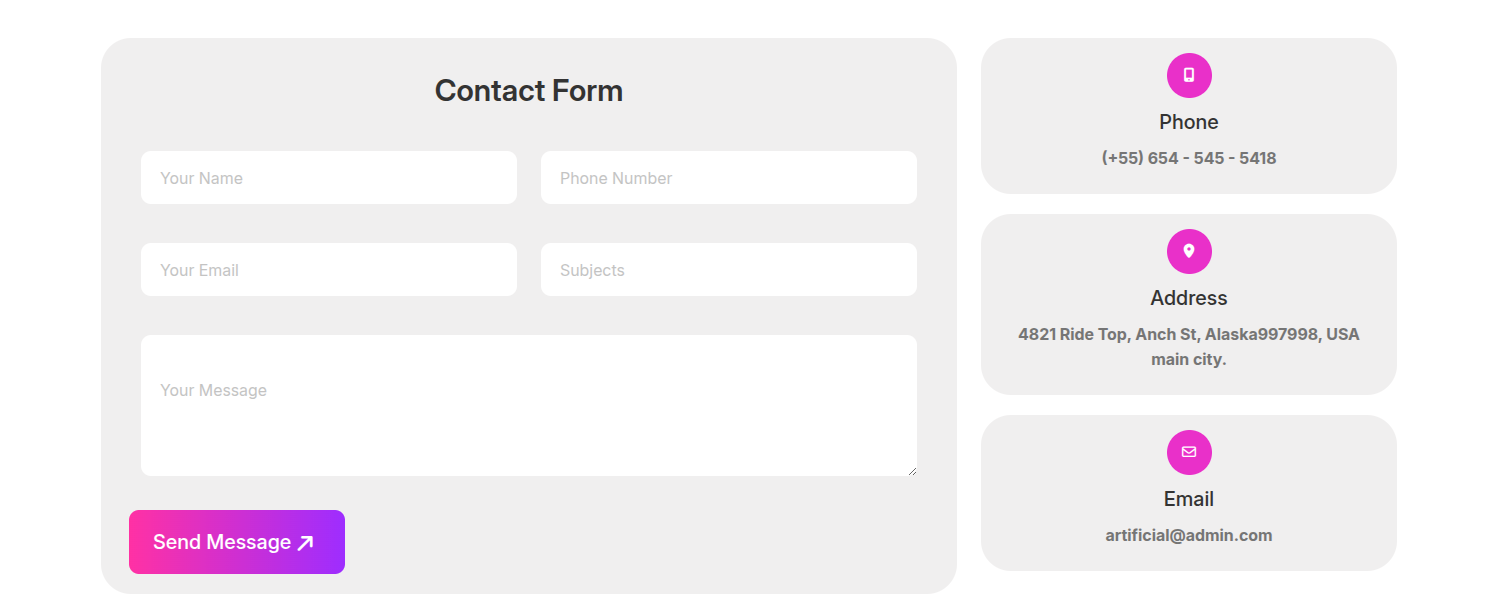
To be able to begin with Single Services Page
SelectThe Appearance → Select The Customize → Move to Theme Settings → Single Services Page
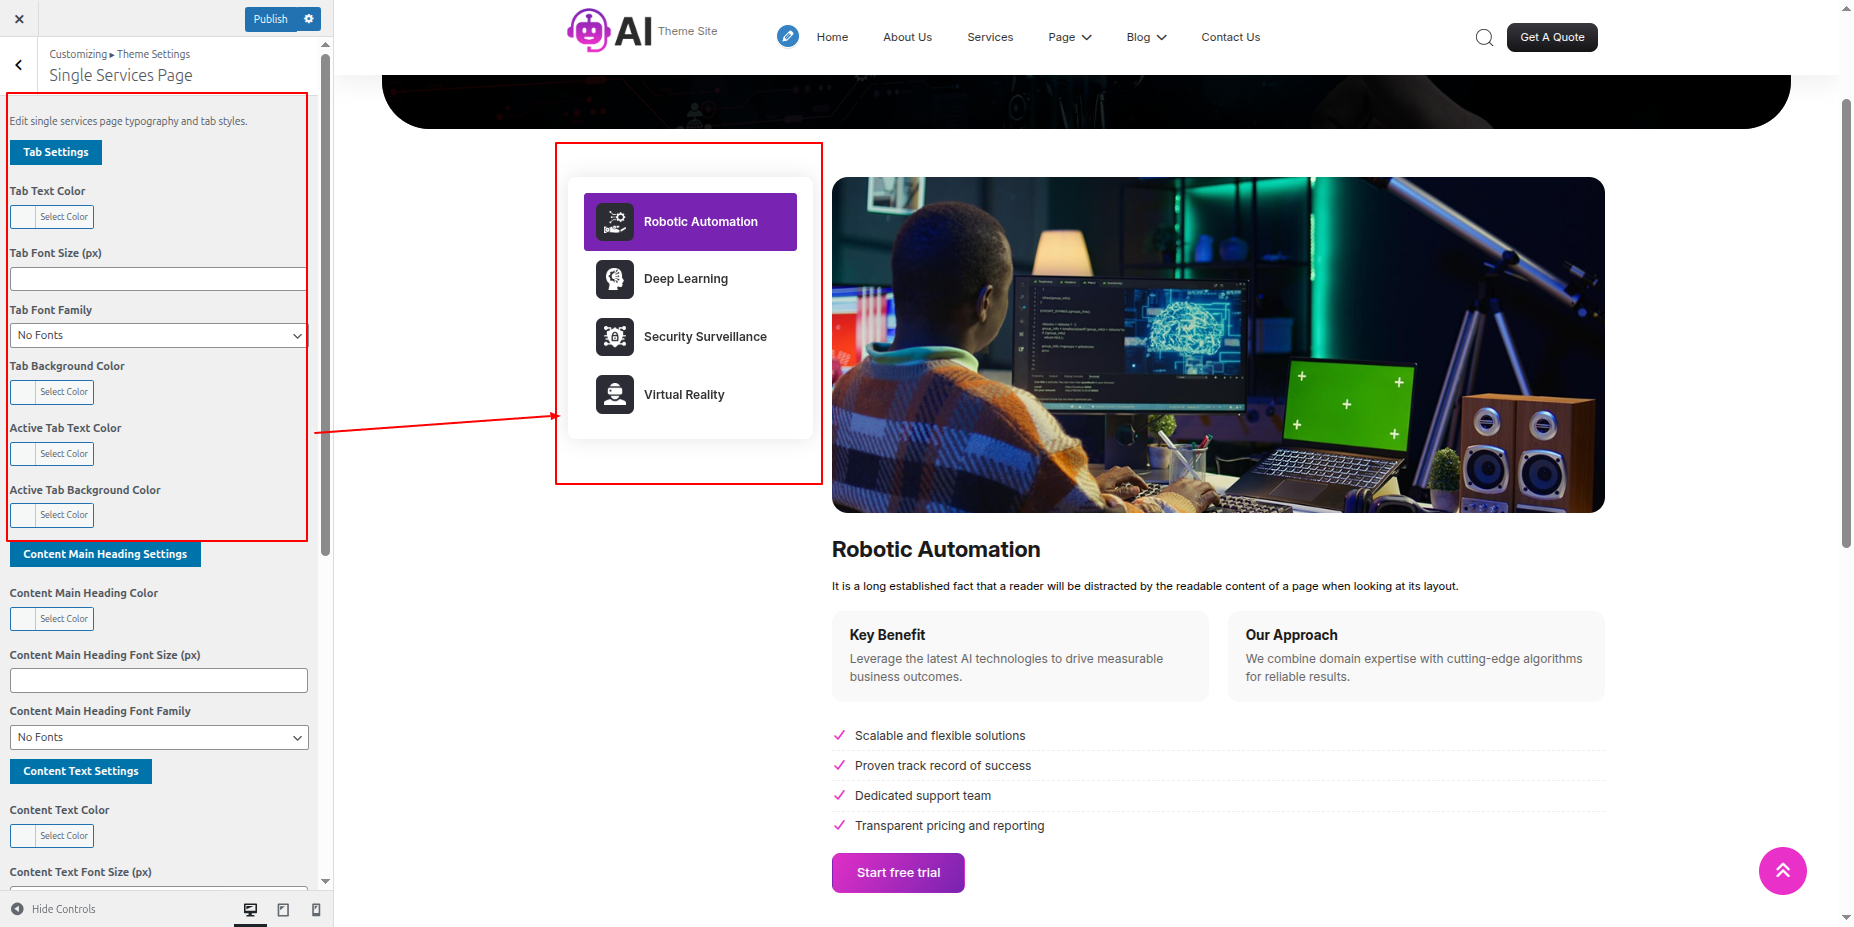
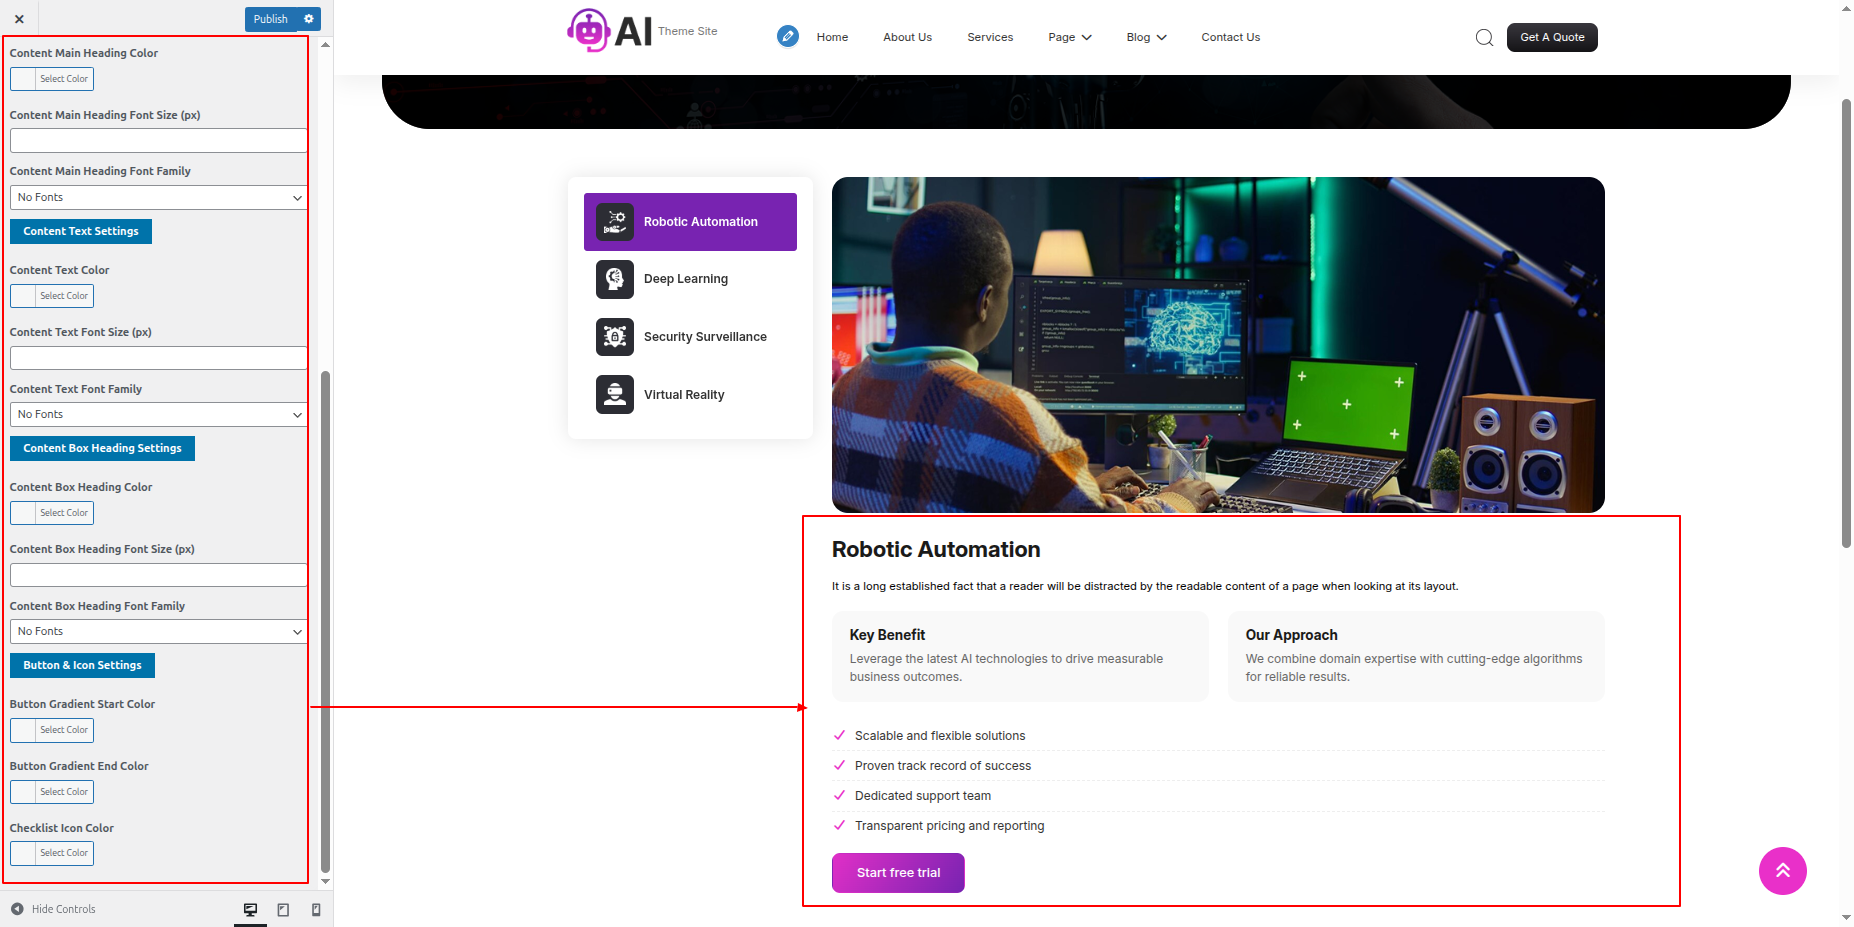
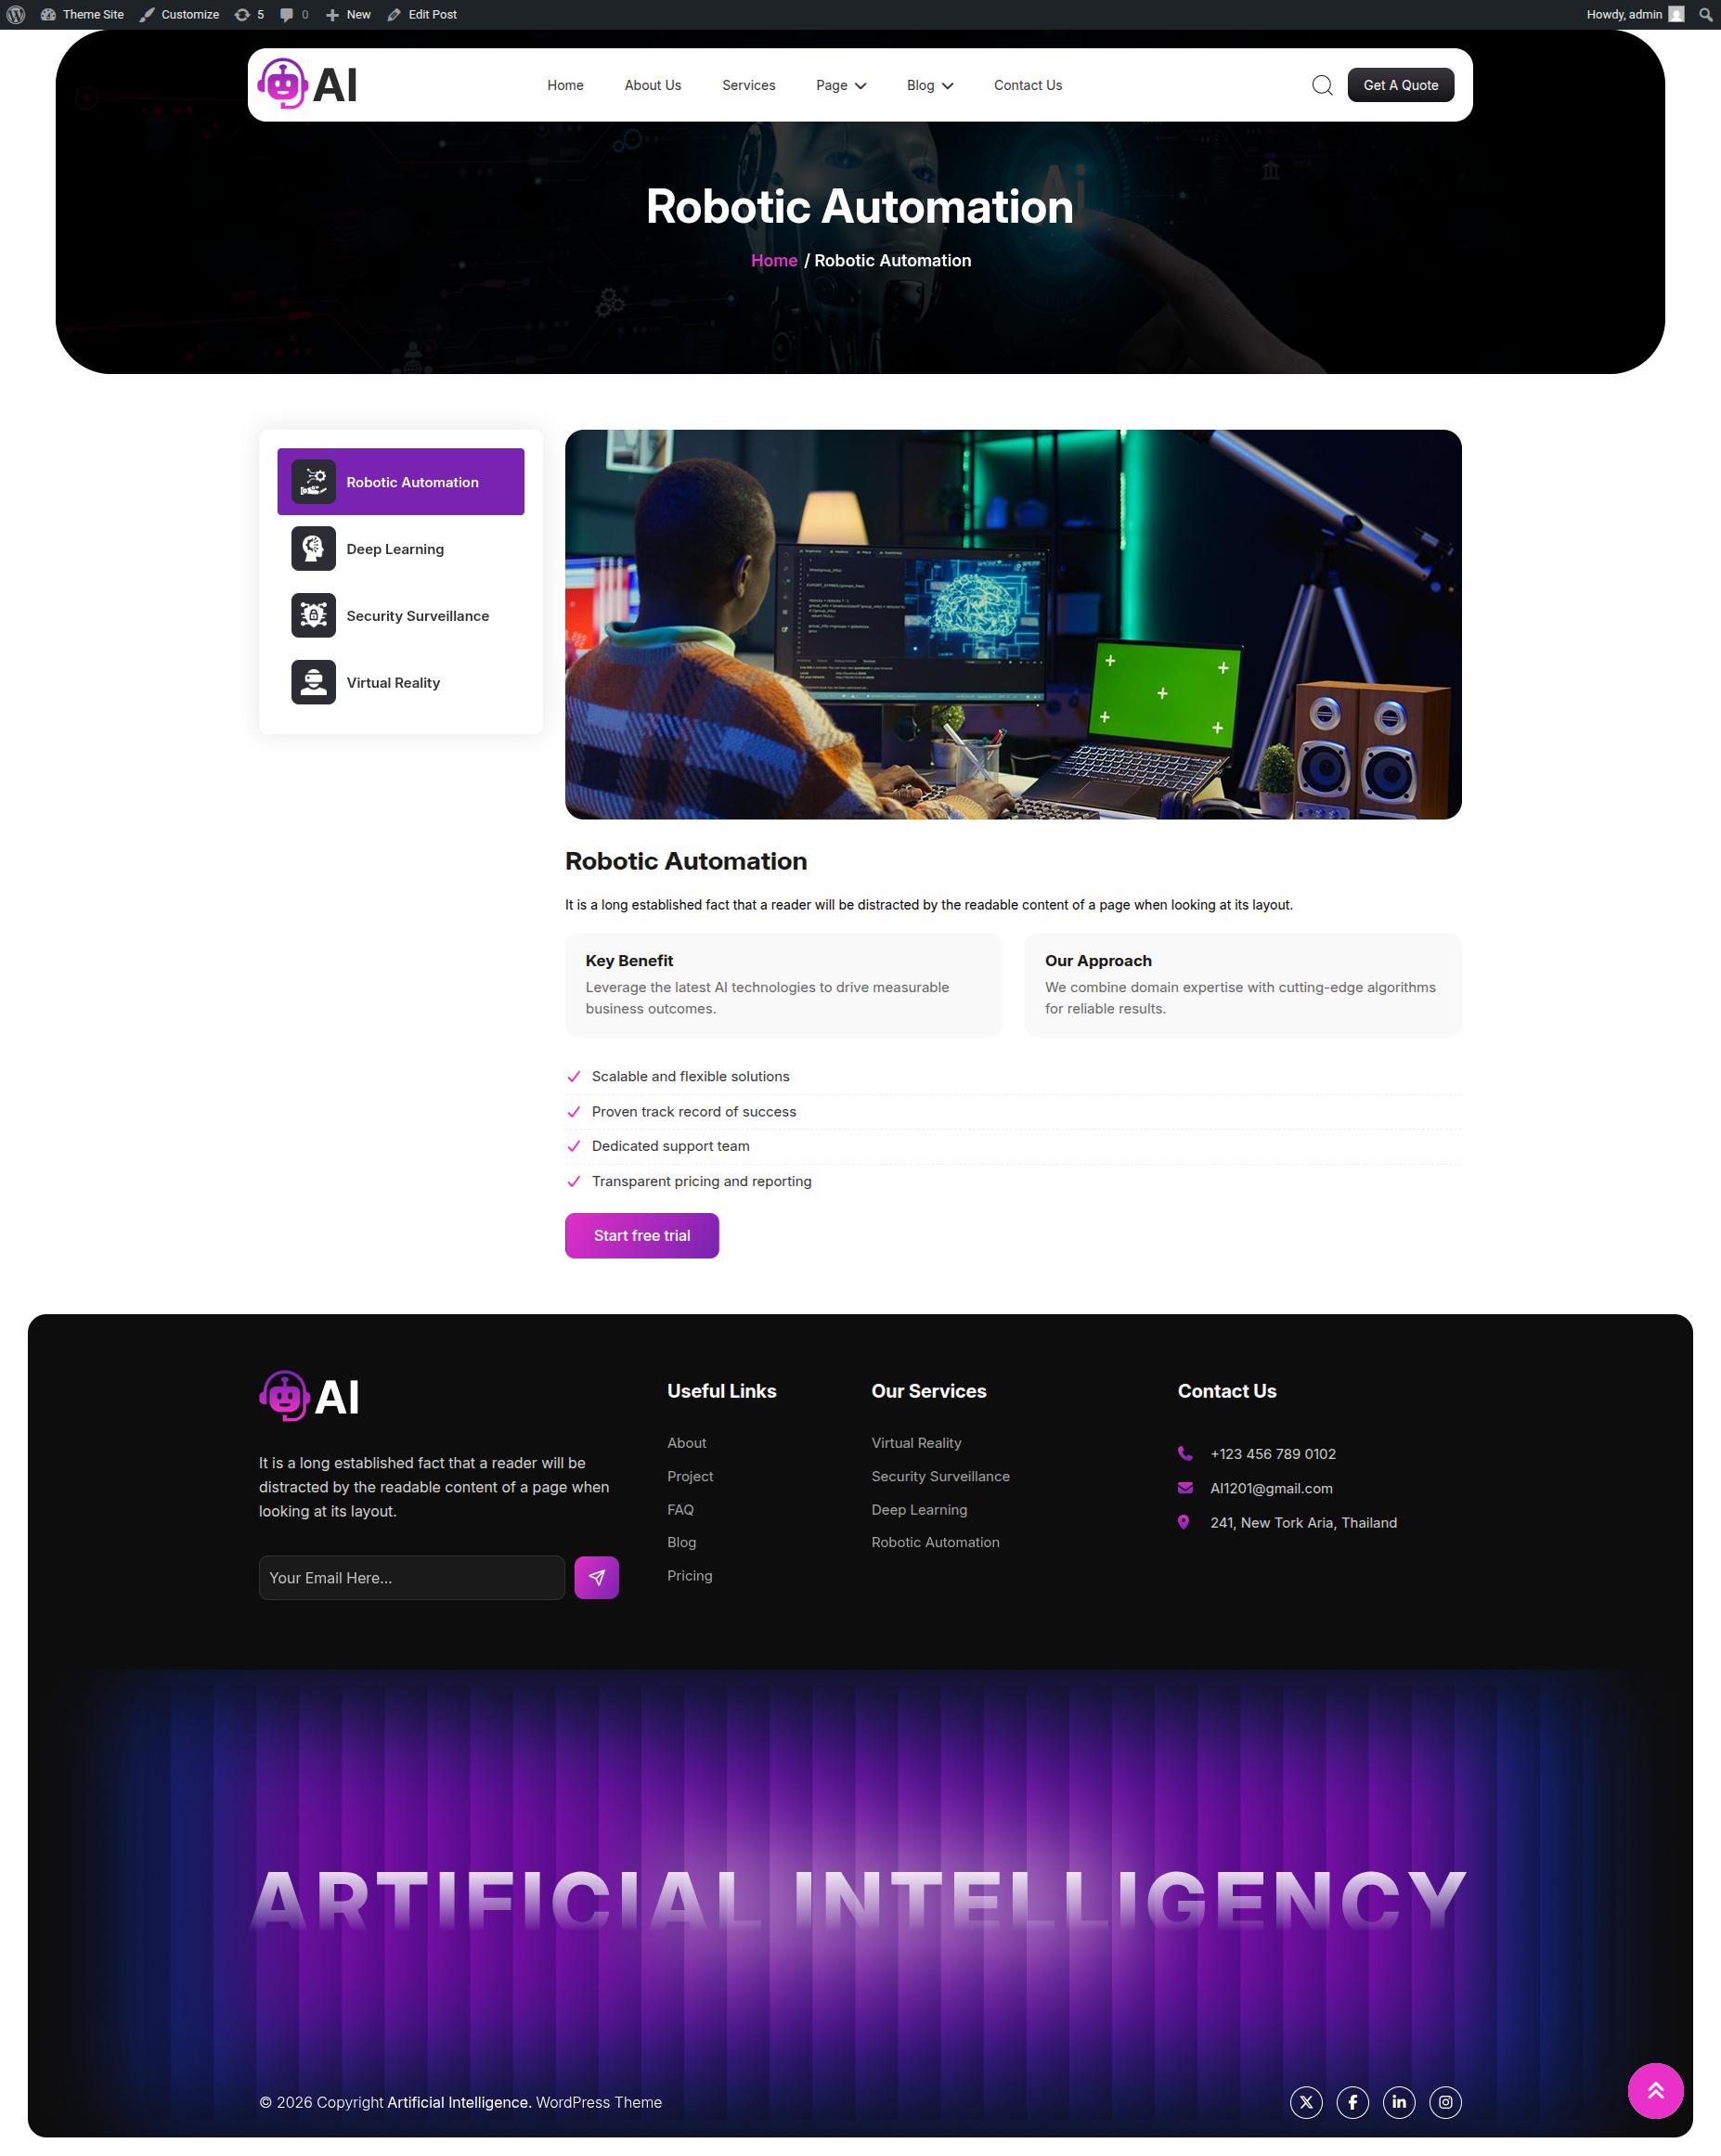
On the front end, it will appear as shown.
To be able to begin with Single Process Page
SelectThe Appearance → Select The Customize → Move to Theme Settings → Single Process Page
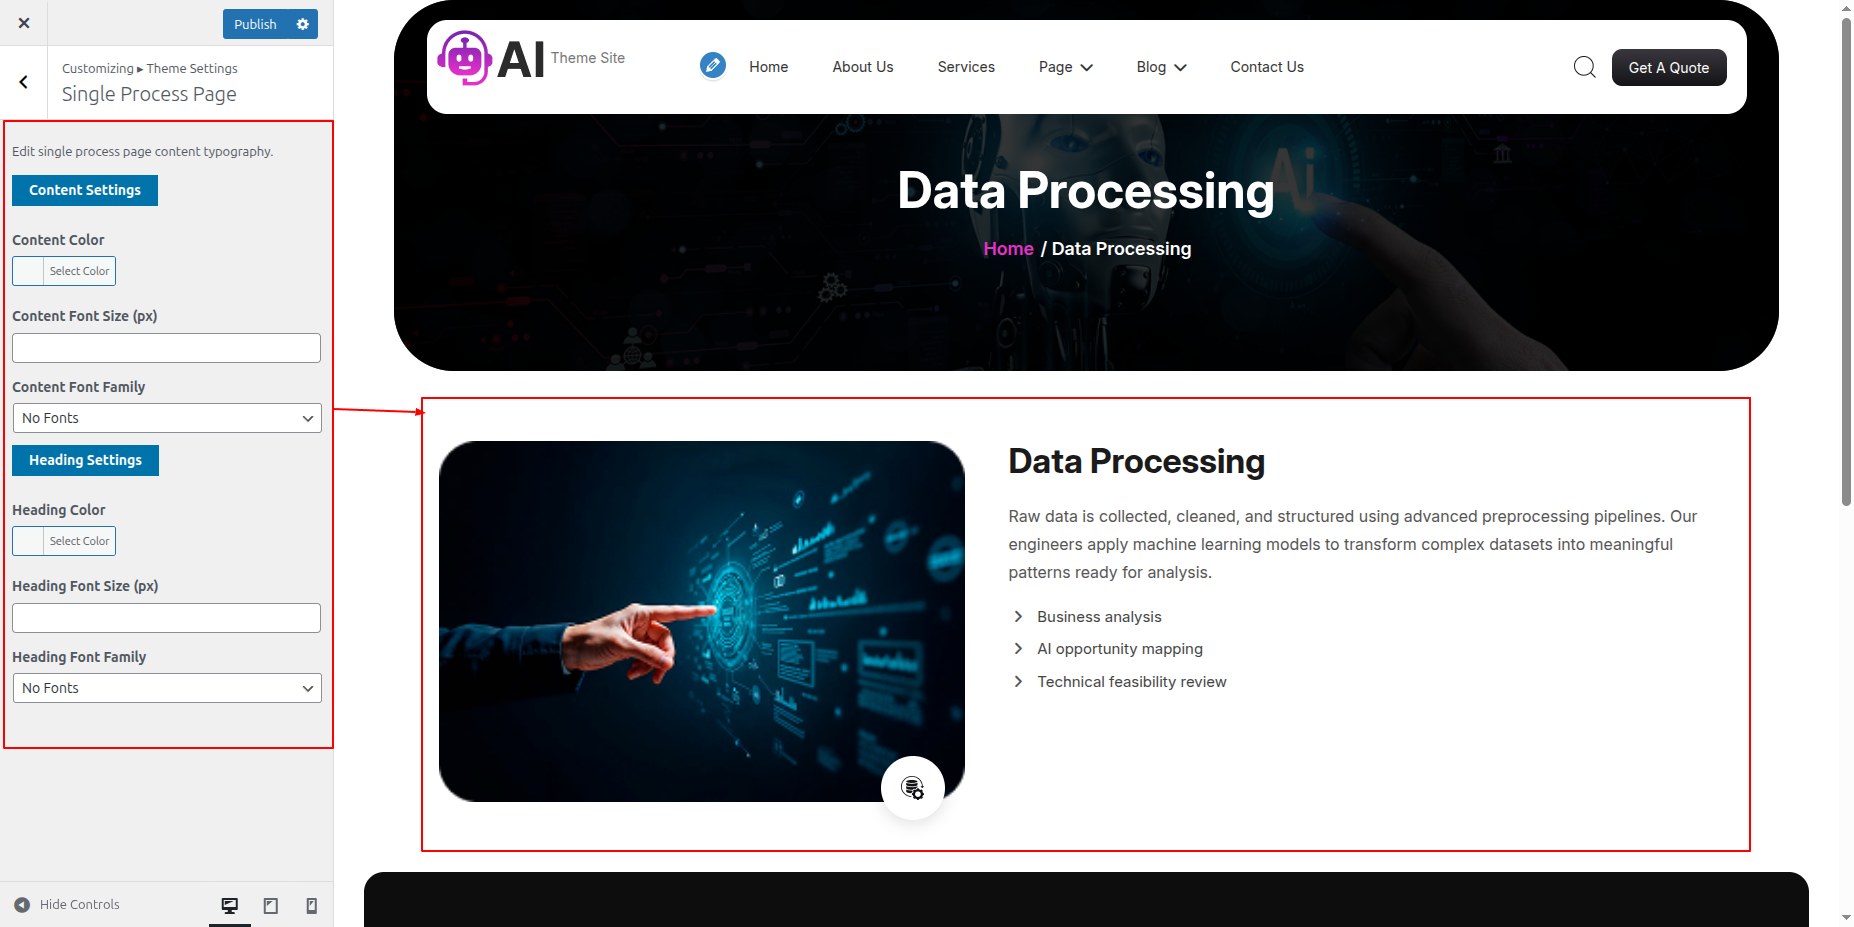
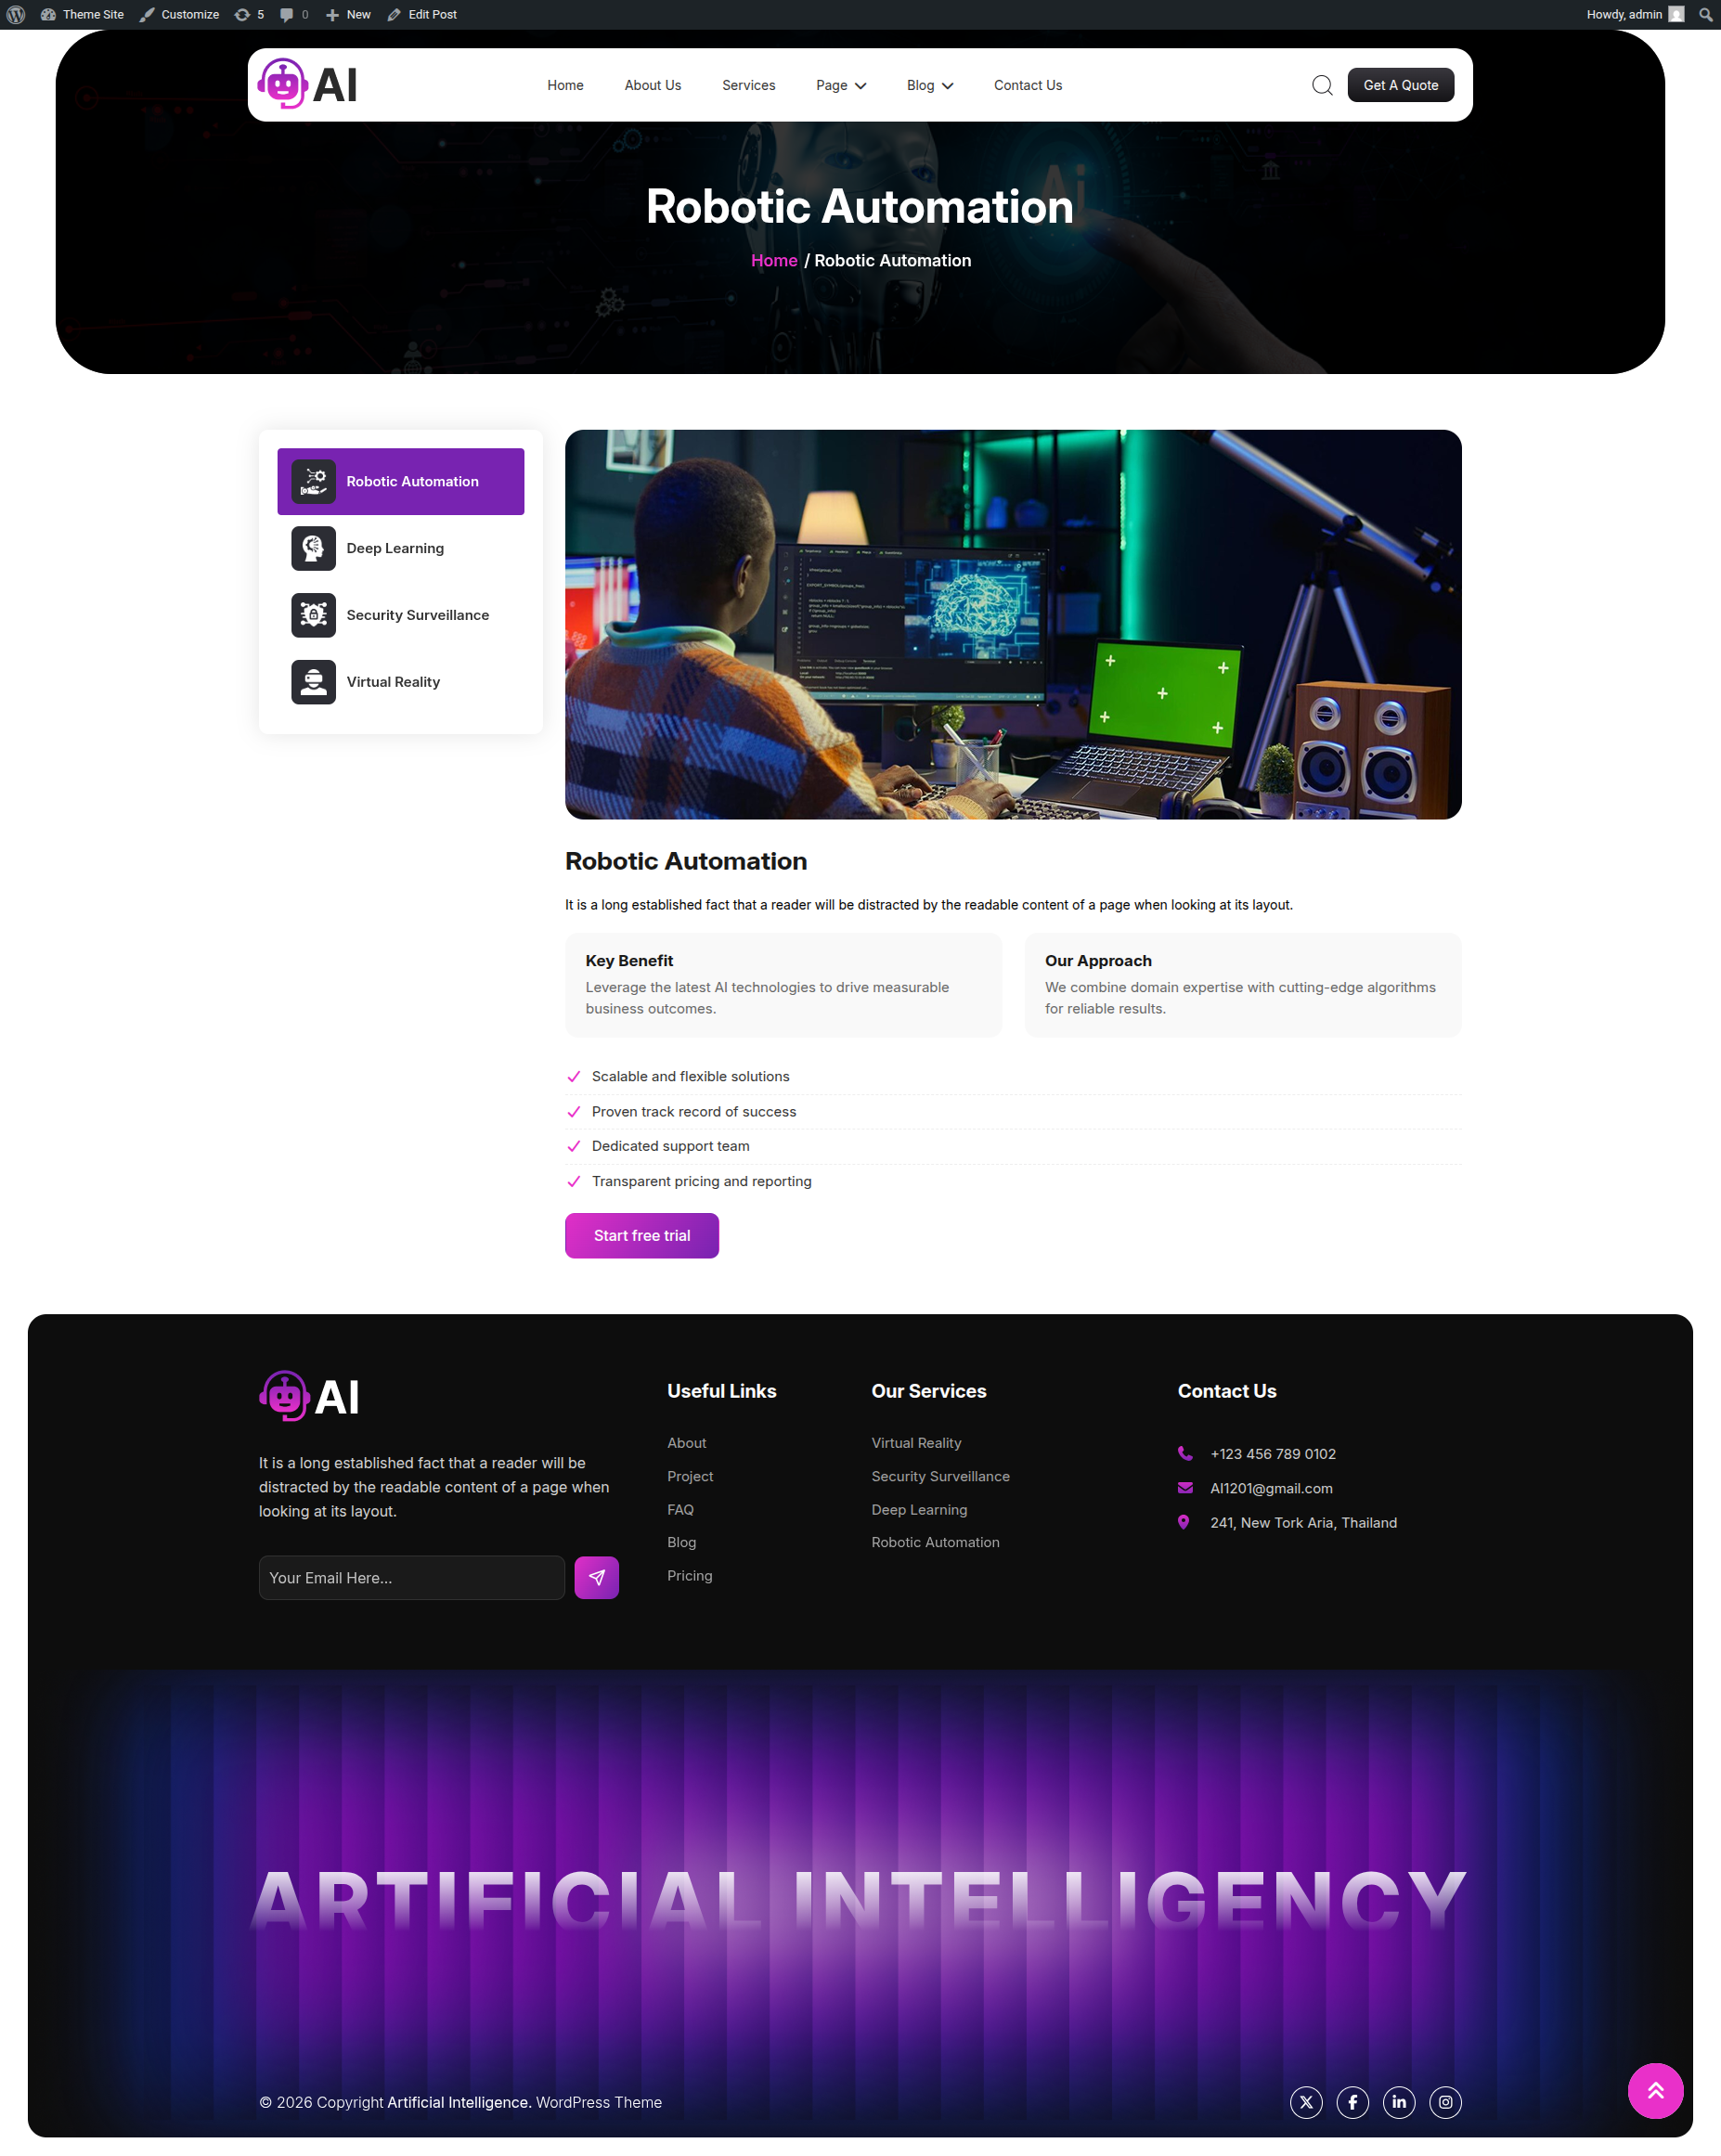
On the front end, it will appear as shown.
To be able to begin with 404 Page
SelectThe Appearance → Select The Customize → Move to Theme Settings → 404 Page
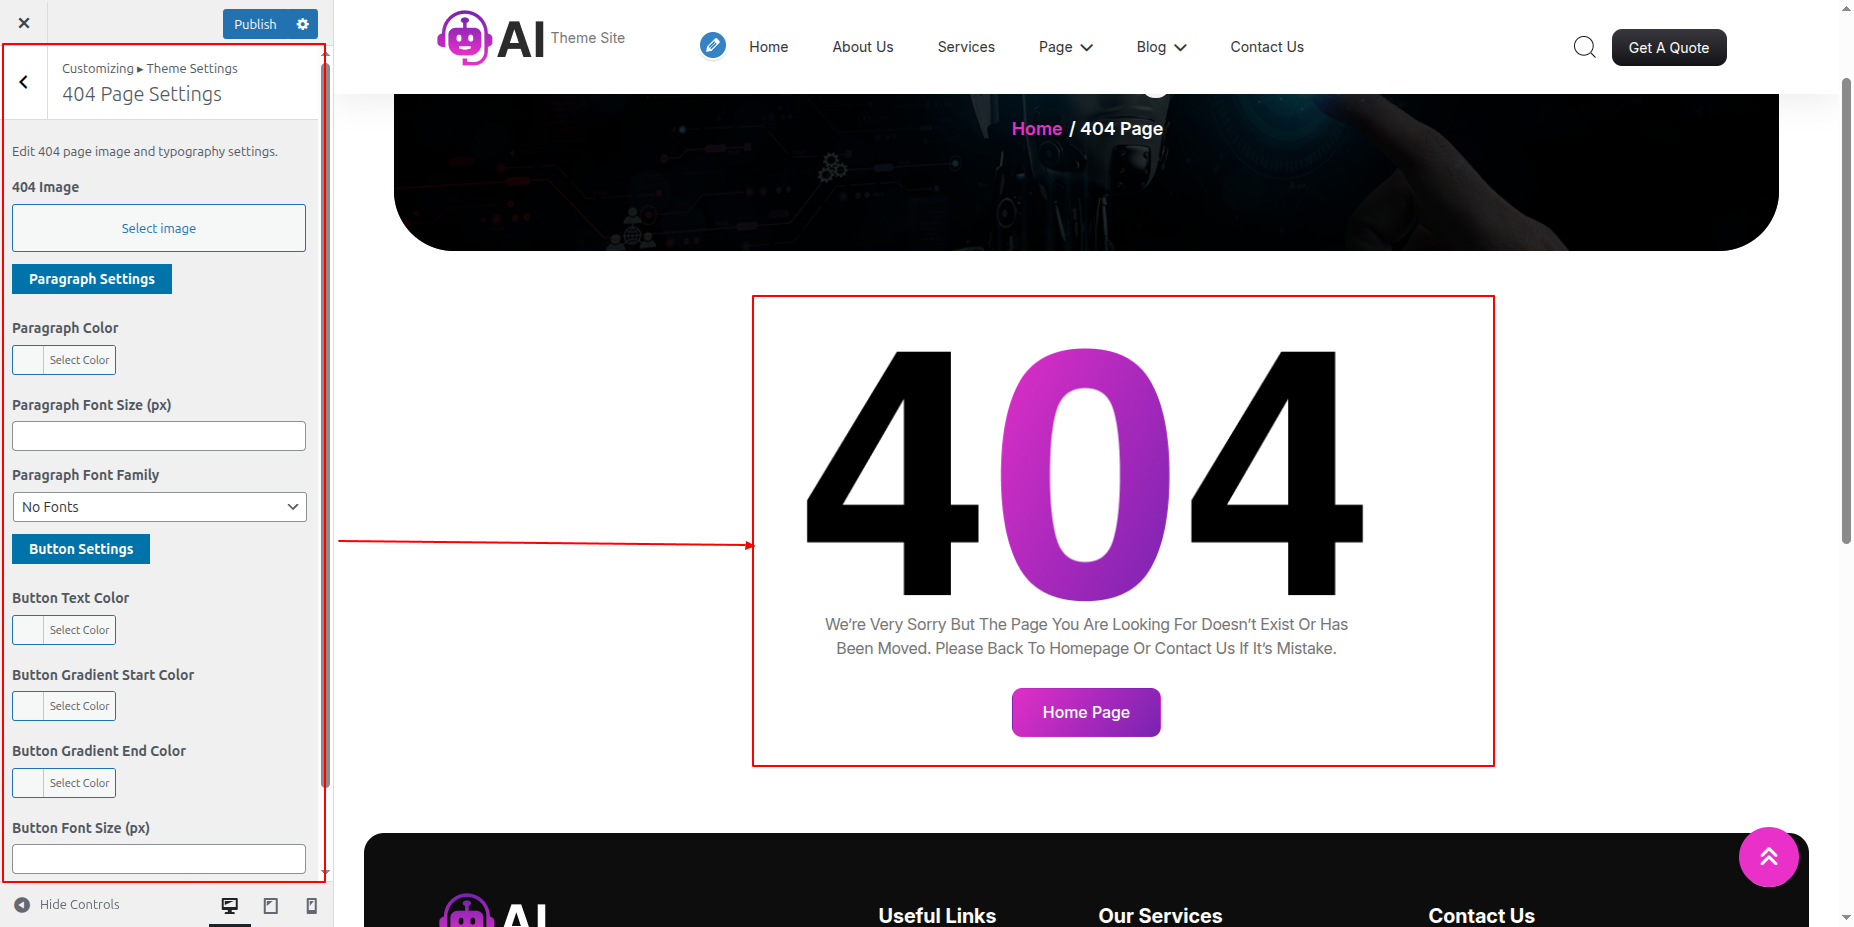
On the front end, it will appear as shown.
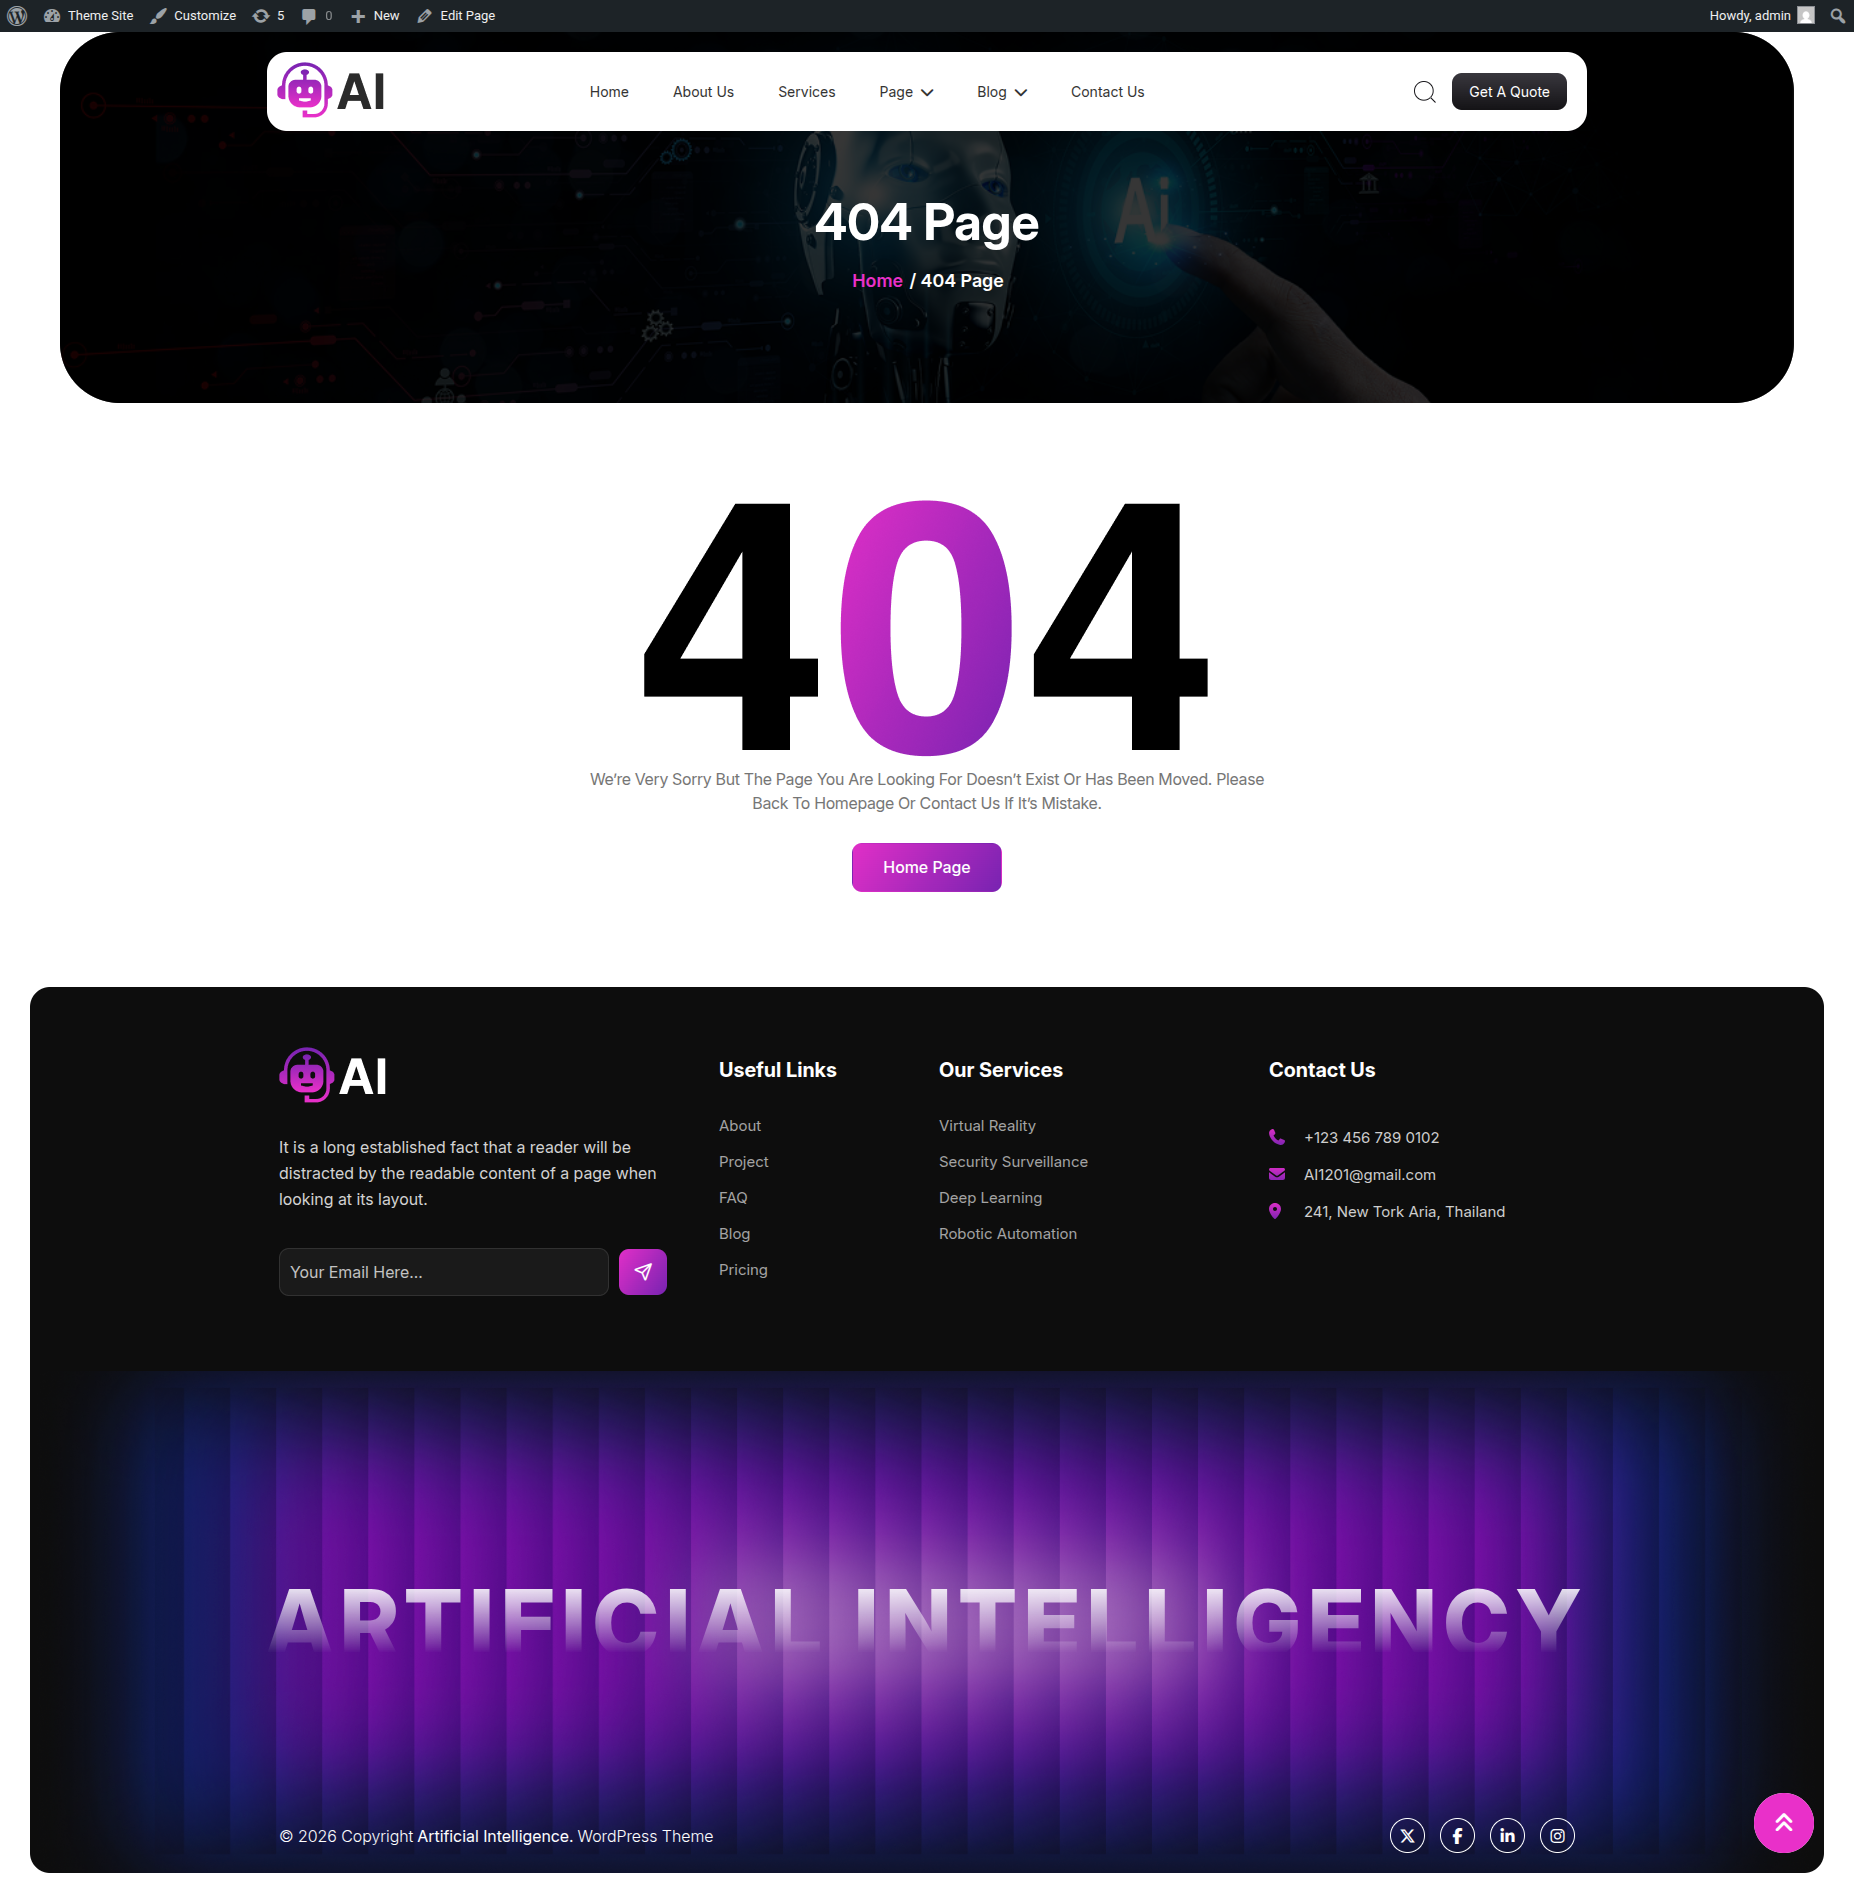
You can checkout the screenshots you will understand it better.
